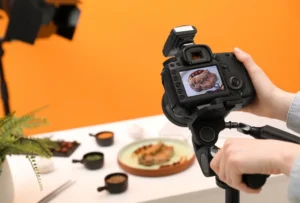
I can’t stress how important lighting is in food photography. With the wrong type of lighting, your food can be hidden in shadows, blown out, or even worse, awash in sickly yellow light. Let’s face it, yellow roasted chicken just isn’t enticing. (Unless it’s a turmeric roasted chicken, but I digress.)
The right light source and the right food photography lighting setup will make your food captivating and alluring.
Contents
- Understanding the Basics of Lighting in Food Photography
- Key Lighting Setups for Food Photography
- Transitioning from Natural to Artificial Lighting
- Techniques for Achieving a Natural Look with Flash
- Enhancing Depth, Dimension, and Texture
- Advanced Lighting Techniques and Challenges
- Post-Processing: Refining Your Lighting Effects
- Take Away
Understanding the Basics of Lighting in Food Photography
There are two basic ways to light your food: with natural light or with artificial light.
Natural light really brings out the beauty of food effortlessly, but it has to be the right type of natural light. A stream of sun in the western sky at noon is going to be too much, too bright, and too harsh. Your beautiful head of broccoli will need a pair of sunglasses.

On the other hand, a cloudy day is going to give you magical lighting. Soft, beautiful, and delicate. It elevates the entire dish into a thing of ethereal beauty.
The only drawback to using natural light is that you need to watch the weather like a farmer during planting season.
By using artificial light, you’re the boss of your own photoshoot. But the trick is how to get the light to work for you. Artificial light is, by its nature, a type of hard light, so it needs to be coaxed into softness. But you can do it! “Talk nicely to it and carry a big soft box,” is my motto.
Understanding Light Characteristics
The basic difference between hard and soft light is found in their names. Hard light can be garish and unyielding. (Think of the broccoli wearing sunglasses as eye protection.) Soft light meanders. It gives you mysterious shadows that trail off out of frame.
And each has its place. If you’re creating a setup of a bright, modern kitchen, hard light can be your friend. It’s energetic and no-nonsense. “Here’s the three-layer raspberry birthday cake with blackberry frosting. Bam!” On the other hand, when photographing chocolate croissants nestled next to a steaming mug of tea, soft light will take you where you want to go. It’s cozy and inviting.
Learning to discern and adjust the type of lighting you want from warm to cool or vice versa is an incredibly useful photography skill.
For instance, shoot a metal colander filled with freshly rinsed strawberries under cool lighting to enhance their crisp textures and accentuate the contrast between the green tops and ruby red bodies. On the other hand, those same strawberries dipped in a mint whipped cream will softly glow in warm lighting.
Key Lighting Setups for Food Photography

Natural Lighting
When you’re utilizing natural light, it’s important to be strategic. Make conscious choices to get the most from your light and time of day. Again, like a farmer. Just like how you shouldn’t water crops in the middle of the day, think about your food and the time of day you’re going to photograph it.
You should start experimenting with light, getting to know your space. How does the light shift across the room from morning to late afternoon? And how does the light play with food?
My studio has a decent-sized eastern window and a large northern window. In the morning, the large window gives me great side light. In the late afternoon, the eastern window, with its slowly dissipating light, gives me several hours of side light. If I want bright overhead light, late morning or very early afternoon in my eastern window is the place to be. It’s all about playing with your space.
To me, the best natural light sources are eastern, southern, and northern. Western light (especially on a sunny day) really blows photos out and gives unwelcome hues. I’m not a fan. But the other sources can offer beautiful, rounded, soft, and diffused light. And don’t even get me started on dappled light! That’s the chef’s kiss of food photography.
To control natural light, you want to keep reflectors and diffusers in your bag of tricks. They’re great tools for your shooting space to help maneuver daylight to your advantage and manage dark shadows. And finally, if you have the room, keep a lightweight second table in your studio to move from window to window. You can’t beat that type of flexibility!
Artificial Lighting
When you start exploring the world of artificial lighting, you’ll need a few tools in your kit. From the lights to light modifiers and tripods, with just a few basics, you’re on your way.
Lighting Warning: The first rule of artificial light is never to use kitchen lights. It will not end well for you if you do. In fact, you should turn off any indoor lights. These will contaminate your images with color casts that will be difficult to correct in post-production. So, what kind of artificial light should you use?
For continuous lighting, you have the option of tungsten, fluorescent, or LED lights.
Tungsten lighting is great in the studio because it emits a warm, yellow glow similar to natural sunlight. The only caveat is that they put off a lot of heat. They’re a phenomenal tool to have, but you’re going to want to use them sparingly – and probably not while photographing an icy cocktail.
Fluorescent lights are fun because they come in a variety of color temperatures. However, you’ll probably have to spend more time editing the images because they can take on a slight green or blue tone after a long day in the studio, which is the last thing I want to deal with.
Which brings me to LEDs. These bad boys give you high-quality, consistent, and controllable lighting. They’re great because they’re steady. Think of them as workhorses, not show horses. They get the job done.
So, I stick with tungsten or LEDs.
You might also want to consider strobe lights or flashes to illuminate your food from different directions, and to give images a specific intensity of light. They also let you shoot at a lower ISO, and they give you more freedom with aperture and shutter speed choices.
Light modifiers are also essential. These include softboxes, reflectors, diffusers, snoots, and gels for customized effects.
Softboxes are lights with a box and a thin diffuser that connect to a tripod and move around the studio. Reflectors bounce light, and depending on the mood you’re evoking, you will want white reflectors (positive fill light) or black reflectors (negative fill light).
There are also “five-in-one” kits that have translucent, white, black, silver, and gold reflectors, which will get you through a myriad of photo situations.
Choosing Between Continuous or Flash Lighting
When I used to think of flash photography, it was as a giant “NO” sign at any concert I ever went to. I mean, you don’t want to startle a bassist off the stage in a flash-blasted stupor, right?
But flash photography does have a place in the studio when you’re photographing that beautiful plate of ingredients. (And concerts too, with restraint. But I digress.)
When you’re working in the studio with artificial lighting, you can use a fill flash to supplement your ambient light to fill in extreme shadows. Shadows for depth are good, but your food half-bathed in darkness is not.
Flash lighting can also be used to great effect as your primary light source.
For videography, continuous light is necessary. And when you want simplicity and really great control in the studio, you can’t go wrong with continuous lighting like LEDs. You set up the light, flip a switch, and voila! You’re ready to get down to work, whether it’s still photography or videography. Consistent light is your friend.
Other Tools and Considerations
To utilize that base of light to the fullest, there are other tools that will help you get there. Grab a couple of snoots (kind of like mini-spotlights), some color gels (to play with the mood and give your imagination a boost). Those two items will really allow you to customize the effects you’re looking to translate for your audience.
Also, varying your lighting angles can get you where you want to go. A vertical shot with tons of layering will be a gateway to a moody shot. And when you move your lights around to create a clean, well-lit white background, it will evoke an airy feeling. Practice, play, practice.
And because you’re working with artificial light, you can play to your heart’s content because you’re not on the sun’s schedule!
Transitioning from Natural to Artificial Lighting
When you start transitioning from the sun to your own ambient light sources, you’re going to suddenly feel freer, and your creativity will soar. It may seem intimidating at first, but you’ll barrel through that initial bout of insecurity and come out on the other side a stronger photographer.
But while you go back and forth between learning to master artificial light and natural light (no one ever said they need to be mutually exclusive), don’t forget that artificial light and natural light can actually work well together.
For instance, when you grab your food photography kit and head out of the studio, are you bringing everything you’d use in the studio, like your diffusers and softboxes? They’re incredibly useful even on sunny days when the light is shifting and you’d like it to remain constant.
One minute you’re in the blinding sun photographing a pitcher of lemonade and a bowl of lemons, when clouds roll in. That’s the perfect time to have a little fill light. On the other hand, under the hard light of midday, set up that diffuser or even a scrim to manipulate the light that falls on the food in your favor.
Techniques for Achieving a Natural Look with Flash
Using a flash doesn’t mean a blown-out subject or scene. Actually, when you manipulate a flash correctly as a fill light supplementing natural light, it will give your food more depth and realism. And who doesn’t want that? And when you’re looking for true-to-life images, don’t forget to look at the back of the camera.
Check your camera settings for AWB (Automatic White Balance), along with other settings like “Incandescent,” “Fluorescent,” “Sunny,” “Cloudy,” and “Tungsten.” That way, you can give your camera a heads-up regarding the conditions you’ll be shooting in.
Soften That Artificial Light
Using your light setup to soften the hard light is important for keeping your food photos natural. Start experimenting with more diffusers and moving them farther or closer to your food to see how it changes your shadows. Adjust accordingly.
Move your light source closer to the food and then farther away. Watch how much this can affect the quality of light and shadow.
Random tip: If you’re ever shooting with a flash in a dark restaurant and you (horror!) forgot your diffuser, just run into the kitchen and beg someone to give you a piece of parchment! It works incredibly well in a pinch. Offer to do some dishes as payment after the shoot is finished. Or, shameful flattery also can be effective.
Enhancing Depth, Dimension, and Texture

Food photography is all about texture. The firm skin of a plum spritzed with water. Chicken nestled in a bed of roasted herbed potatoes. A key lime pie topped with glistening whipped cream.
And your lighting is where you really get to tell that story.
Backlighting, side lighting, and top lighting all help to create structure as much as food styling does. A line of cherry tomatoes tumbling out of a pint box is the perfect place for side lighting. A vegetable tart is a perfect dish for backlighting.
And photographing them together would be a great way to utilize top lighting. Speaking of top lighting, it can be a great way to go for flat lays. Top lighting gives all of that food and those props consistent exposures so that you can see every nook and cranny of the table. Also, something that’s incredibly fun to do (and pays off in dividends) is to take a translucent food and photograph it using backlighting. Watch the texture pop!
I also love to use side lighting for maximum drama when it comes to things like ice cubes and glasses. Using shadows creatively is a great way to highlight the textures and details of ingredients.
So, remember, shadows can and quite often are your best friends.
Advanced Lighting Techniques and Challenges
When you’re looking for something film noir-esque in your photos, you want to go with low-key lighting. In this set-up, your subject nearly melds into the shadows, but the colors pop, pop, pop!
And in the inverse, you want to go with high-key lighting where the subject is bright, shadows are reduced, and there’s very little contrast. For high-key photography, you want to utilize LEDs, strobes, and a good amount of ambient light.
For low-key set-ups, black bounces can really set the tone for your food scene, and underexposing your shot should take you the rest of the way.
Another eye-popping light combination is to combine strobe and natural lighting for a hybrid of styles. Think of it as Rembrandt lighting for your bowl of avocados.
And have you ever had the problem of one part of your ingredient looking fine, but the other looking a little lackluster? Think of a pineapple, with the crown looking gorgeous and textured, and the body looking a little washed out? That’s when you want to combine both hard and soft lighting. Voila! You’ve got a stunning body and crown!
Reflect on Your Reflections

Finally, there’s no way to talk about lighting for food photography without addressing our true enemy, the dreaded reflection! Who among us hasn’t seen our face reflected in a shiny spoon, butter knife, or produce bowl? There are solutions, though.
Watch out for shine coming from some of your scene props. If you’re using artificial light, there is a tendency for it to catch the shine on shooting surfaces. You can try playing with prop placement, or you can use a polarizing filter fitted to your lens to prevent this.
First, dress in the colors you’re looking for in the photo. If it’s a dark set-up, wear black. If it’s bright, wear white. Wearing a pink and purple polo shirt is going to be reflected in something on your shooting table. (Raises hand guiltily on that example.)
And, patinaed silverware and bowls are your friend. Also, look for brushed metal if using new silverware. Also, use diffusers to reduce the chance of glare.
Post-Processing: Refining Your Lighting Effects
I find that it’s useful to shoot in RAW because it’s easier to work with in post-production.
RAW files have more information, and the white balance gives you a lot more wiggle room than a JPEG. And it’s also helpful because you’re not just relying on post-production lighting corrections.
Also, tools in Adobe Lightroom help adjust for light and shadows as well as midtones, highlights, and texture. It’s worth the subscription.