Landscape photos belong to one of the fundamental categories of photography. A photographer’s mission is to convey the scene in front of them while preserving or enhancing the emotion and story behind the picture. It isn’t any different when you edit landscape photos in a program like Adobe Lightroom, as you’re displaying the emotions of a broad scene rather than people or animals.
Sure, you can snap a landscape image and have it printed or posted online without any editing, but cameras tend to deliver bland representations of what we truly see.
Editing your landscape images in Adobe Lightroom gives you the tools needed to bring your photos some life to truly represent the impact of the picture you took.
Why You Should Use Lightroom For Editing Landscape Photos
Lightroom is geared towards photographers that have a lot of pictures to edit, mainly wedding and landscape photography enthusiasts. It was designed to be the ultimate photo organization tool with editing capabilities, and over several years of updates and innovations, it has become a powerhouse editor that many photographers use for all of their photos.
The nice thing about this program is that it is non-destructive. Any of your changes within the program do not affect the photo until you go to export the images. This provides incredible flexibility for experimentation, as you can simply reverse anything done to the photo without any fear of creating a layer or permanently affecting it.

With all of these options available, Lightroom is one of the best tools for post processing that requires a little practice to refine your editing process.
Lightroom VS. Photoshop
Many landscape photography enthusiasts compare Adobe Lightroom to Adobe Photoshop when deciding what photo editing program to use. Photoshop is a pixel manipulation program that can alter a photo right down to a single pixel. This makes it an effective tool for combining images, adding objects, and altering layers within the photo.
Lightroom is akin to the RAW editor that comes alongside Photoshop but with far greater organizational capabilities. Functions like flagging, rating, and “collections” are great for landscape photographers who shoot a lot of images and need a quick way to sort their photos for later editing.
Don’t scoff at the editing options in Lightroom Classic, as you can pretty much do everything you could ever want to do in Photoshop. In the next section, we’ll go over how each of the modules can help bring life out in your photos. If you want to do any further editing in Photoshop, you can easily send the photo over on to the other program for more tweaks.

Here’s How to Edit Your Landscape Photography in Lightroom
Once you’ve imported your photos into Adobe Lightroom, it’s time to switch over to the Develop Module, where you’ll be spending all of your time making changes. For the most part, you’ll want to work down each of the panels, moving sliders to get the desired effect on your photo.
You might be inclined to just start running down the options immediately, but there are a couple of specific items you want to tackle before changing any global adjustments.

1. Start With the Lens Correction Tool Panel
The lens correction panel is seldom used by new photographers as they are unaware of the power behind what it can do. If you shoot with a wide-angle lens (as most landscape photographers do), then you may notice a slight curve at the edges of your shot.
Lightroom has a cool option that automatically fixes that problem for you, often with pre-programmed settings based on the metadata in the shot. This feature is called Enable Profile Corrections and will be used in every landscape photo you take. If the automatic setting doesn’t work, there’s a dropdown menu where you can select the lens you used.
2. Color Calibration
Often touted as one of the most powerful tools found within Lightroom, the color calibration panel is underutilized by the majority of photographers. Every camera manufacturer has their take on color saturation, and it reflects in the values that the camera portrays.
For example, every pixel has a different combination of red, green, and blue, but how is the shade of the final color determined? Is every mixture of these three colors the same across every camera? well, no it’s not.
Canon’s color shade can be different from a Nikon. Some manufacturers will change the shadow based on what they think is best, and that’s where the color calibration tool comes in handy. You’re able to change the mix of red, green, and blue to something different.
You do have to play around with it at first since each slider impacts the other, but you can get some great tones going in the image with this tool.

3. Crop and Transform Your Landscape Photo
Landscape photos are all about broad, sweeping views that inspire awe and spark the imagination; However, sometimes things get in the shot that is undesirable, and action needs to be taken.
Cropping is an excellent way to fix the framing on your scene, and you should spend a few minutes seeing if a crop can make your image pop.
Once you go into the crop tool, you’ll be greeted with some guiding lines on your photo. The most common 3×3 grid landscape photographers use the Rule of Thirds, where points of interest will lie at any of the 4 intersections. Our eyes are naturally drawn to those intersections, which makes it advantageous to keep your subject in those areas.

Aspect Ratio
The aspect ratio is important to maintain the relationship between the width and height of your photo. If you change your photo to a 1:1, then the width will be the same as the height, for example, it would be 20cm by 20cm.
If you changed the aspect ratio to 4:5 (most popular for 8 x 10″ prints), the image would be 20 by 25cm instead. It doesn’t change the physical size of the photo, it sets the guide so that you can print any photo that has these proportions.
Changing the aspect ratio is easy, simply open up the crop tool and select the dropdown beside the aspect ratio and choose which one you want. The photo will automatically be cropped to those proportions, and you can then continue.

4. Basic Adjustments Panel
It’s funny how Adobe has nailed the basic flow of editing to the point where you can almost go from the top to the bottom of the basic adjustments panel, and it’ll generally stay part of your overall workflow, even as you become more familiar with the program. Expect to find settings here that will affect the entirety of the image.
Black and White
Is your scene popping with color, or is it a dramatic scene with heavy clouds? These are things to consider when choosing whether or not to convert your images to B&W to Monochrome. Keep in mind that tools such as HSL will work differently as colors are ultimately tied to the tones in your image.

White Balance
You’ll often find that your landscape images will need to have their white balance corrected. This is due to cameras not being able to automatically change the color temperature as our eyes can. Sometimes shooting images in bright light can cause a blue hue to appear over your photos, or maybe a sunset photo looks a little dull and could use a boost of warmth. These are all easily fixable using the white balance color and tint sliders.
Using the Temp slider, you can adjust the amount of blue or yellow casting in your image. Great for adding little accents to the overall atmosphere of your photos. The Hue slider underneath lets you change the color of the temperature itself.
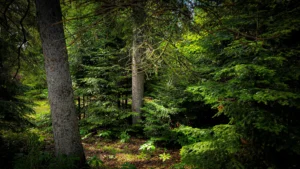
A coniferous forest scene, for example, could benefit from a cooler green cast that complements the dark green of the boughs.
Exposure Slider
This slider adds or removes the current exposure and should only really be used if your image is underexposed or overexposed to try and save some of the detail. There is one situation where it can be effective involving the Dehaze tool.
As you start to increase the Dehaze slider, you’ll notice that your landscape image may start to darken. Raising the exposure a little will compensate for this while still keeping the original effect.

Contrast Slider
You’ll find that in many landscape photos, you’ll decrease the amount of contrast in your photo. If you slide your contrast slider to the left, you’ll notice that the darker parts will start to get lighter.
You’ll want to lessen the overall contrast here because you’ll be adding in selective contrast later on with the tone curve, dehaze, and shadows slider.
Highlights/Shadows
These two sliders are some of the most important when editing landscape photos because it helps bring balance to the land and sky exposures. Highlights control the brighter parts of your photo, which include the sky in most landscape images.
The shadows work with the darker parts of the image, mainly the shadows. Don’t confuse this with the black/white sliders, which handle the overall black and white pixels in the image.

Darks/Whites
Sometimes you’re shooting on a bright day, and you’ll notice that the brightest or darkest part of your images is clipping. Using these sliders can help bring back the detail in these parts of the images. Holding the ALT (Option on a Mac), you can see what areas are clipping as they are highlighted in red.
As you adjust the black or white slider, these areas will start to reduce until there is no more red.

Texture/Clarity
Looking to add a little sharpness to your photos? Or perhaps a little enhancement to a misty morning. These tools can both add detail to your images, but they do it in very different ways.
Clarity – By increasing or decreasing the contrast in the light and dark areas which fall into the mid tones category, namely highlights and shadows. As you increase the clarity, what happens is that the little details will start to pop, giving the illusion of sharpening your landscape image.
Decreasing the slider will soften the image, giving them an almost dreamy look.
Texture – One of the newer features in the Adobe Lightroom arsenal and is also known as the “smoothness slider”, or it was in the earlier development stages. Think of the texture tool as between sharpening and clarity. It is much less impactful than the clarity tool and doesn’t affect the brightness or saturation of the image.
Dehaze
Do you have an annoying haze in your photo that dulls the contrast in the overall image? This can sometimes happen in a misty image where you want to pull a little more detail out of the items that are being hidden.
Another great example is if your sky is dull and lifeless, then increasing the dehaze slider will pull some of the darker details out of the clouds. On the other hand, you can decrease the dehaze slider and add a little more haze to your image, which is great for moody overcast scenes.

Vibrance/Saturation
If you’re looking for a way to boost the color globally within your image, then you’ll want to check these sliders out. Some photographers will change and manipulate the saturation and vibrance right at the start, while others will wait until the very end to adjust the overall color concentration.
Saturation increases (or decreases) the color in your landscape photo. It is easy to get carried away with this slider, so it’s best to work in slight adjustments and compare before continuing.
Vibrance has some intelligence powering it and only boosts the less saturated tones. The nice thing about this tool is that it will never boost any color past the already saturated ones, as the saturation slider would do.

5. Tone Curve
Most people think that using this awesome tool is mainly for adjusting exposure and contrast, but it can do so much more. The tone curve is designed to adjust the tonal range of your photo, adding targeted contrast and pop to make a great landscape photo.
Pay attention to your histogram for any potential clipping, and be sure to adjust the curve as needed since every change will ultimately affect the last.
Region/Point Curve
Use the region curve if you’re new to editing landscape photographs in Lightroom, as it uses the slider system that can be found throughout the program. Each of the different sliders corresponds to a different tone range within the photograph (think highlights, shadows, blacks, whites, and midtones).
Adjusting the sliders gives you greater control over these areas than you would find in the basic panel.

Point curves give you full control of the tone curve by creating points and manipulating the tones to create your style. The most famous strategy for using the tone curve when editing a landscape shot is to use the “S” curve. It adds contrast by making the lights lighter and the darks darker.

6. HSL Panel
Landscape photos are a great opportunity to showcase the colors of nature, but sometimes they need a little bit of tweaking as RAW files tend to be dull when first imported into Lightroom.
Here you’ll notice three categories with sliders for every color in the image. Adjusting these allows you to play around with your creativity and add your personal touch to the image.
Hue
A good starting point would be to identify the dominant colors within your image. The hue slider will change the shade of the color. If you have an image with a lot of green coniferous trees, then moving the green slider to the right will deepen the color as it adds some blue to the mix.
Autumn leaves can be turned from light yellow to deep orange by moving the yellow hue slider to the left, showing how easy it is to display your creativity.
Saturation
Use this slider to target the intensity of specific colors. Using the saturation slider in the basics panel will adjust every color in the image, while the HSL tool saturation slider only affects a specific color. If you’re looking for a moody atmosphere for your image, then lowering the saturation on certain colors can give them a washed-out look.

Luminance
The luminance slider adjusts the brightness of the color, which can be great for making specific tones stand out amongst the others. If you’re shooting woodland scenes, the luminance slider for the green color can be increased (pushed to the right) to enhance the brightness of the trees. Play around with the different colors in your image, as luminance is a great way to add subtle improvements.

Go For The Targeted Approach
There’s a handy button in the top left of the HSL tab that can be handy for scenes that have multiple colors throughout. You’d commonly have this come up with fields of wildflowers or a scene with a gradient (think sunsets).
Clicking this button and then hovering over the area you want to adjust will highlight the colors it will affect, indicated by the different sliders. It’s fantastic for areas that have multiple colors in one, as it will adjust multiple tones at once.

A Note on Black and White/Monotone
If you converted your image to black and white, then the HSL tool will work a little differently. Each color tone in your image will adjust the darkness of a specific area.
For example, if you have red flowers in your photo and you changed it to monotone, changing the red value for any of the three sections will lighten or darken it instead. This means that every color impacts the contrast in your black and white image, making it a powerful tool to add drama to that type of photo.
7. Color Grading
Have you ever wondered how Instagram creates its catalog of filters that you can overlay on your photos before posting? Well, color grading is a great way to achieve the same results in your photo.
Think of color grading (split toning is another name for it) as adding a color cast to your image. Now imagine taking it a step further and being able to add a color cast to your highlights to shadows, specifically. Let your creativity shine here and play around with the different colors for different effects.
If you’re stuck, it’s always a great idea to use a color that complements specific tones. In the case of a sunset photo, adding some pink to the highlights using color grading too is a great way to enhance the ambient color within the shot.

8. Details Panel
If your entire image is underexposed and you brightened it up a bit, you may have noticed some colorful noise showing up. That noise is the result of data loss from the camera not being able to capture enough detail, either due to the environment or camera settings.
Landscape photos should be pin sharp, or the image will take on a slightly fuzzy look. Not only is this distracting to the eye, but it obscures a lot of the fine detail in the photo.
Sharpening Sliders
Sharpening is great for landscape photos because it can make the subject pop, as water and sky generally don’t need any sharpening. Use this tool to add modest amounts of sharpening since too much can cause problems such as haloing artifacts around your subject, as you would see with over-edited High Dynamic Range shots. Commonly, photographers will ensure that the sharpness, radius, and detail sliders are in line with each other, but play around and see what works for your image.
Using the masking slider while pressing alt (Option on a Mac) will create a mask that sharpens only the parts of the image highlighted in white, mainly the edges of whatever’s in your photo.

Noise Reduction
The noise reduction tools in Lightroom are pretty impressive for eliminating a lot of that background noise from under/over exposing or overediting. Landscape photographers will generally find noise in the darkest spots in the image, such as deep shadows.
The best photos will not need any noise reduction at all, but if you have to use it, then make sure to use it sparingly. This applies to both the color noise reduction and luminance noise reduction sliders. Zoom in on a specific part of your photo to see if there is a noise that needs cleaning up.
Try out the color noise slider first, sliding it to the right until you notice an improvement up close. The luminance slider can also help reduce noise but increasing it too much can start to muddy the details, and you’ll end up with some watercolor effects as it smooths out the edges too much.

9. Spot Removal
Most photographers clean their lenses as part of a ritual before going out to shoot landscape photos, but even so, sometimes you’ll get the occasional spot on your lens. You’ll generally find these aberrations in high visibility areas such as bright skies.
Locate the healing tool and use the slider to determine the size of the area you want to apply it to, this can be done by scrolling the middle mouse wheel. Then simply click the area, and Lightroom will determine the best sampling area automatically. If all goes well, your spot should be fixed. If not, then you can move the sampling to a different part of the photo and see if that helps.
10. Local Adjustments AKA. Masks
Local adjustments are the last stop in your editing workflow, and it is usually where you add some of the final touches. Landscape photos showcase a photographer’s ability to shape and play with natural lighting. Using the various local adjustments help highlight detail in the lights, adding a new dimension to your photograph.
Adjustment Brush Tool
The brush tool allows you to paint an area of the photo that you would like to adjust. For example, if you were to paint the tree trunks in a woodland shot and then raise the exposure, then the trees would only be affected. There is a handy red overlay that can show you where you’re making the changes.

Radial Filter Tool
Every landscape photographer should take advantage of the power found in the radial filter tool. This mask creates a circle of effect, which when inverted, provides a focused point of editing. Utilizing the dodge and burn preset effect makes this a great tool for adding a smattering of light or deepening some lingering shadows with a subtle vignette.

Linear Gradient Tool
If you’re a fan of shooting storm clouds, then the graduated filter tool will work wonders for you. All you have to do is drag down the tool until your sky is covered, then take down the highlights until the clouds have a little more pop to them. Finish up by moving the dehaze slider to the right to further deepen the moodiness of the clouds.

Selectively Adjust the Sky or Subject
Being able to use AI to select the sky or your subject is a newly added feature to Lightroom. It does a pretty good job of picking out the edges between the horizon and the sky. For landscape photographers who can’t get a tight mask for the sky with the graduated filter tool, this is a great alternative if you’re not using Photoshop for a sky replacement. On the other hand, selecting your subject automatically is handy for wildlife photographers with clearly defined subjects.

Final Thoughts
Use these guidelines to help give you a good feel for how Adobe Lightroom can help you bring the most out of landscape photography editing. The most important things to remember are to make sure your image is properly exposed and as sharp as you can get it.
One of the best ways to get into editing landscape photos in Lightroom is to work off a preset, meaning choose one that suits your photo and then make final tweaks to customize it to your photo. Check out our selection of landscape presets and get started on editing photos in Lightroom.


Great workflow and tips. Gotta try that out. Thanks for the good work.
No problem! Thanks for reading and I appreciate the kind comments. If you have any tips that weren’t mentioned feel free to share!
Cheers,
Perrin