Being from Kansas, we’re one of the furthest states away from the ocean, so my first real experience with the ocean came in January of 2012 as an adult. While I had been to the ocean before as a kid in Corpus Christi, I was six. While it left an impression on me, visiting the ocean for the first time as an adult was a different experience. This time, I was early in my photography journey, driving from Wichita to San Francisco with two friends as one of them prepared to move west.
We started off in Wichita, stopping at the Grand Canyon (another first for me on this trip) on the first night. After another night in Las Vegas, we finally reached the coast near San Simeon on the southern edge of Big Sur a few hours after sunset. That first night at the Pacific Ocean, I never actually saw it. Instead, my first experience was hearing it. The waves rolled in somewhere beyond the blackness that carried a sense of power that was impossible to ignore. Even without sight, there was already a sense of awe, respect, and a small dose of healthy fear of the vastness of the ocean.
The next morning delivered an unforgettable sunrise. The sun rose far to the south, and the coastline cut back southeast at the beach near San Simeon, so the southern part of the coastline was ablaze as the sky turned various shades of pinks, purples, reds, and oranges over the course of twenty minutes or so. I spent a ton of time just photographing waves and then just watching them. At that time, my lack of experience photographing the coastline was made up for by the brilliance of the color in the sky that was reflected in the waves below. Driving up Big Sur and seeing iconic locations like McWay Falls was a rush of beautiful scenes after beautiful scenes. From the smells and sights to the delicious seafood, I was hooked!
In this article, we’ll explore what makes coastal photography so compelling and how we can approach it with intention. From understanding how light and tides work to mastering shutter speed choices or how to post-process your images, I have written these tips to help you choose how you want to present your photos of the coast.
Contents
- Understanding the Dynamics of Coastal Photography
- Essential Equipment for Coastal Shoots
- Techniques for Stunning Coastal Images
- Post-Processing Coastal Photos (From Good to Great)
- Expanding Your Perspective Beyond A Pretty Landscape
- Challenges at the Coast (And How to Beat Them)
- Finding Inspiration (And Keeping It Fresh)
- Conclusion
- Take Away
Understanding the Dynamics of Coastal Photography
Coastal scenes are never static, as light changes quickly, and with water always in motion, it is crucial to understand how these dynamics come into play when it comes to photography. The weather can add another layer to this, along with what the tide levels are at.

Light at the Coast (Golden Hour vs Blue Hour)
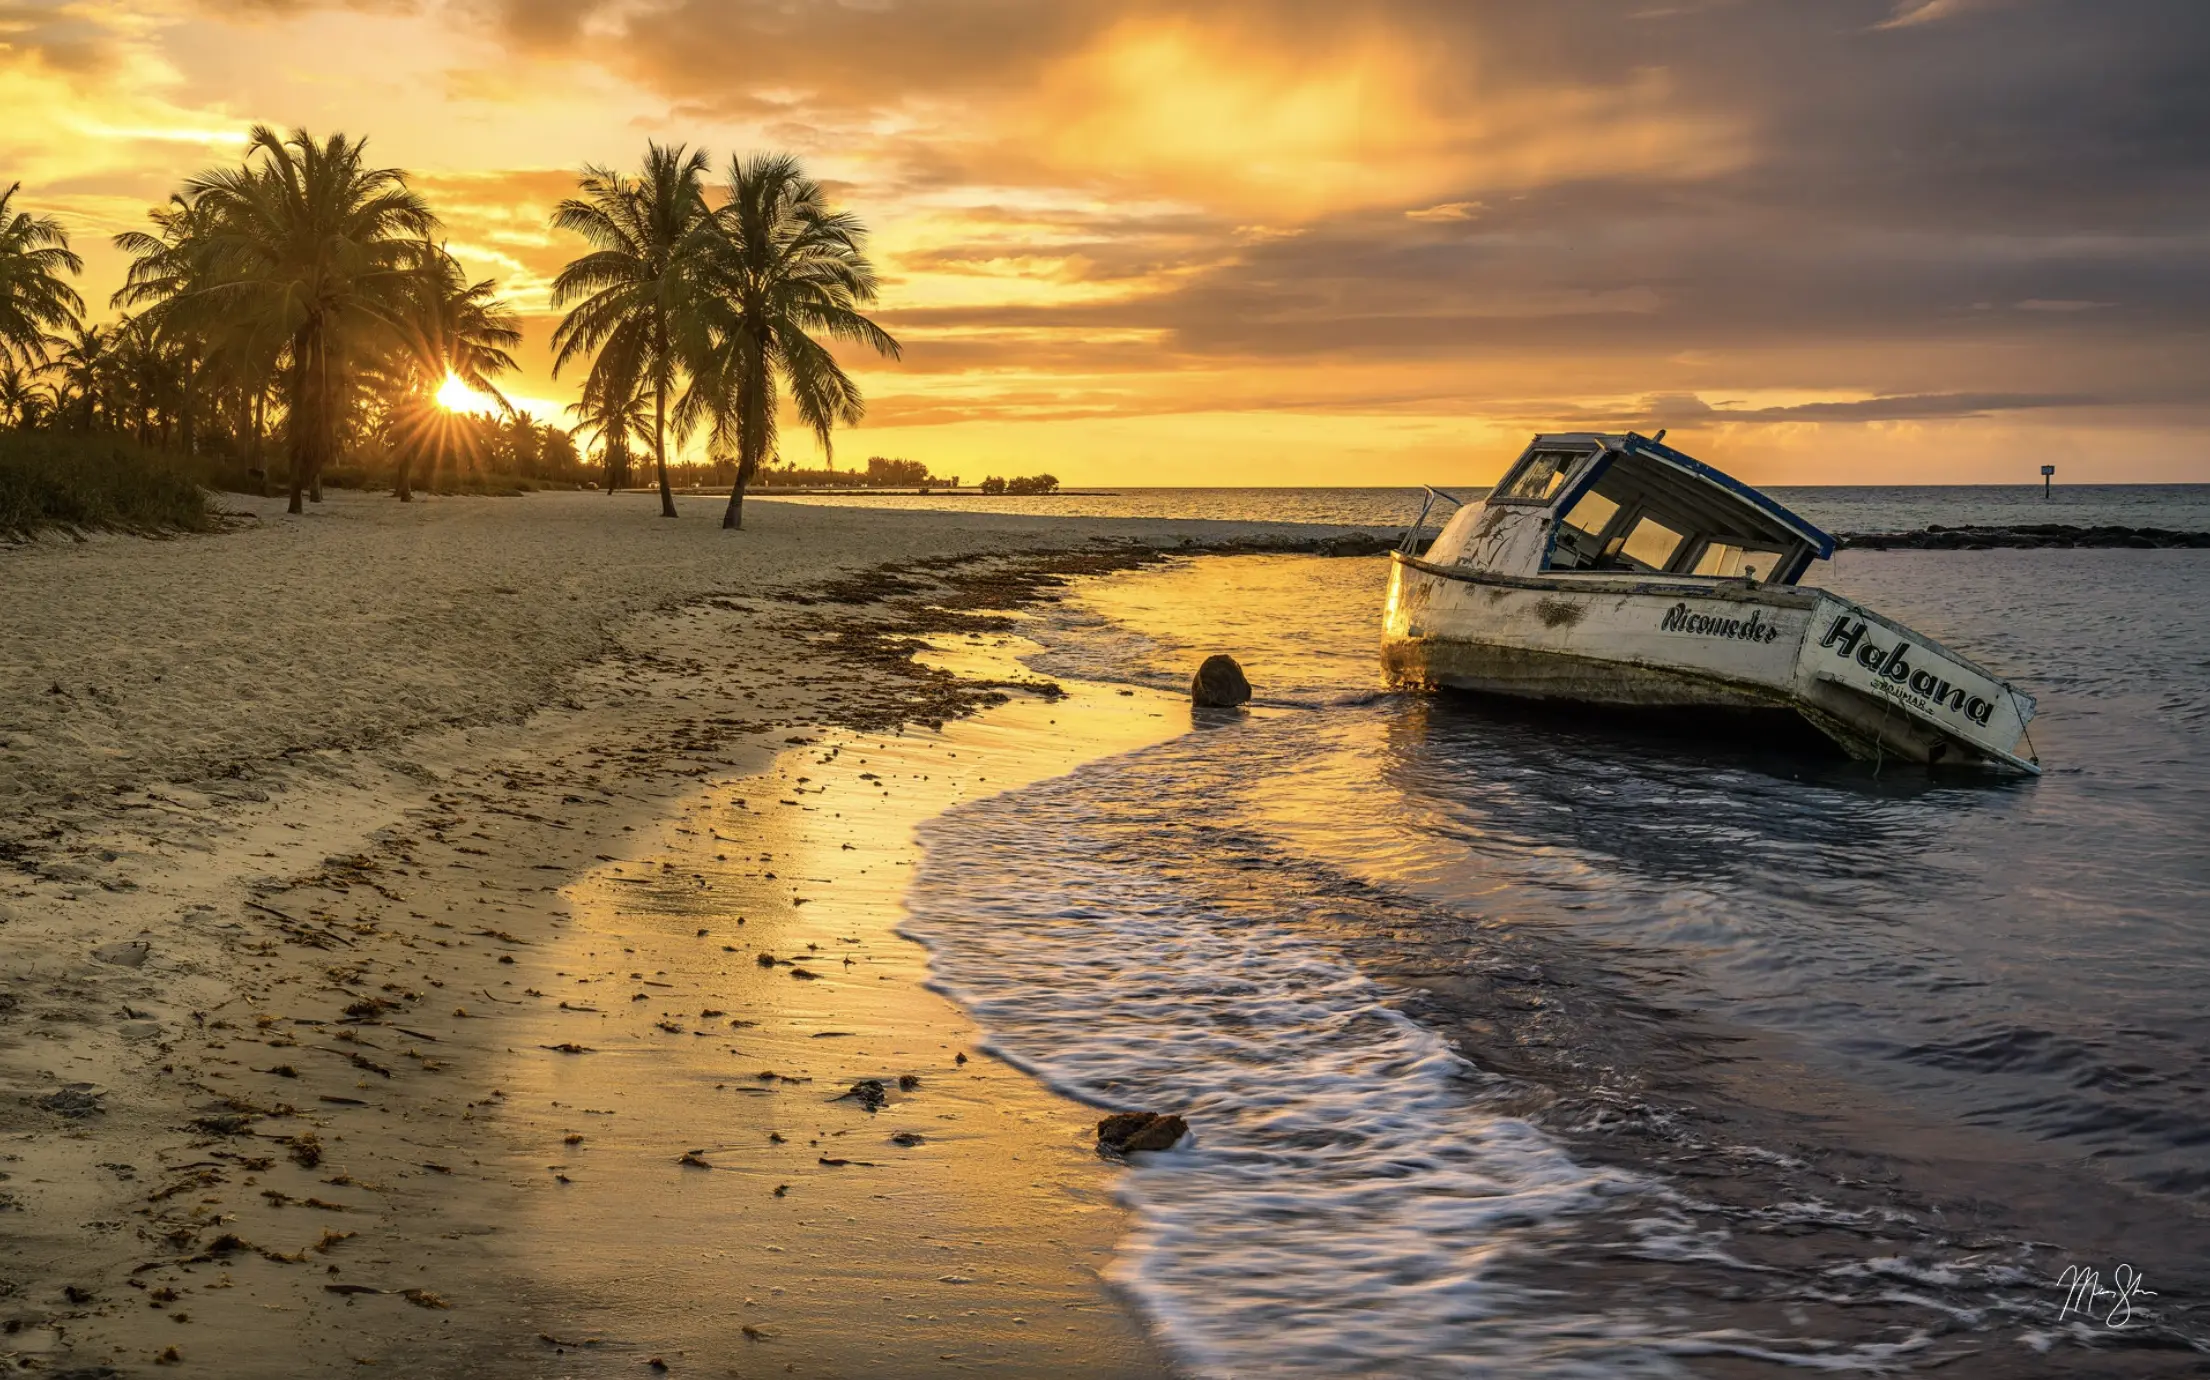
Sometimes, natural light can feel a bit different at the coast vs inland. Side-light and back-light during golden hour can reveal texture in not just the waves, but wet sand and rock formations as well. You can use warm tones to contrast with cool water that creates a beautiful depth and separation.
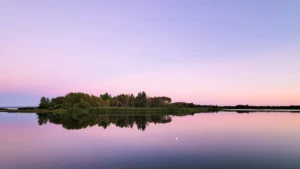
On the other hand, blue hour can emphasize mood. Shadows soften while color saturation increases. Artificial lights from coastal towns, harbors, and lighthouses can add another visual element. Even simple beach scenes can be visually rich by using reflections in wet sand during blue hour.
The angle of the sun and where you stand can make a difference, too. Front light can flatten the waves a bit, but can also emphasize color. Backlight can highlight the spray and foam as waves break towards the sun. Good side light can add motion and texture.
Weather, Tides, and Ocean Motion (Your Real Scene Shapers)
Tides are also crucial to a good scene. Depending on the tide level, foregrounds can change drastically. During low tide, a rocky shoreline might show, while a few hours later, it becomes completely submerged by the rising tide. Using these specific windows, you can use tide pools, reflections, and leading lines in different ways to create unique compositions.
The motion of the ocean can be helpful as well. If you observe long enough, you can sometimes catch larger swells to create moments of drama by catching a breaking wave against a cliff or sea stack to create a more powerful image.
As with all outdoor photography, weather plays an equally vital role. Keeping an eye on marine haze, storms, and low clouds can give you different effects from added contrast to natural diffusing of the light. Learn to embrace these conditions to get the effects you want.
Coastal Composition That Works (Even on Flat Beaches)
Layering can be a strong compositional element in your coastal photography. Using foregrounds, midgrounds, and backgrounds can guide the viewer’s eye when you work with foam patterns, receding surf lines, or reflections. These types of elements can create great visual elements.
The rule of thirds also still applies, but coastal scenes can reward flexibility as curving shorelines, repeating waves, and diagonal surf lines can naturally pull the eye into the frame.
Coastal Geography Changes Your Light and Compositions
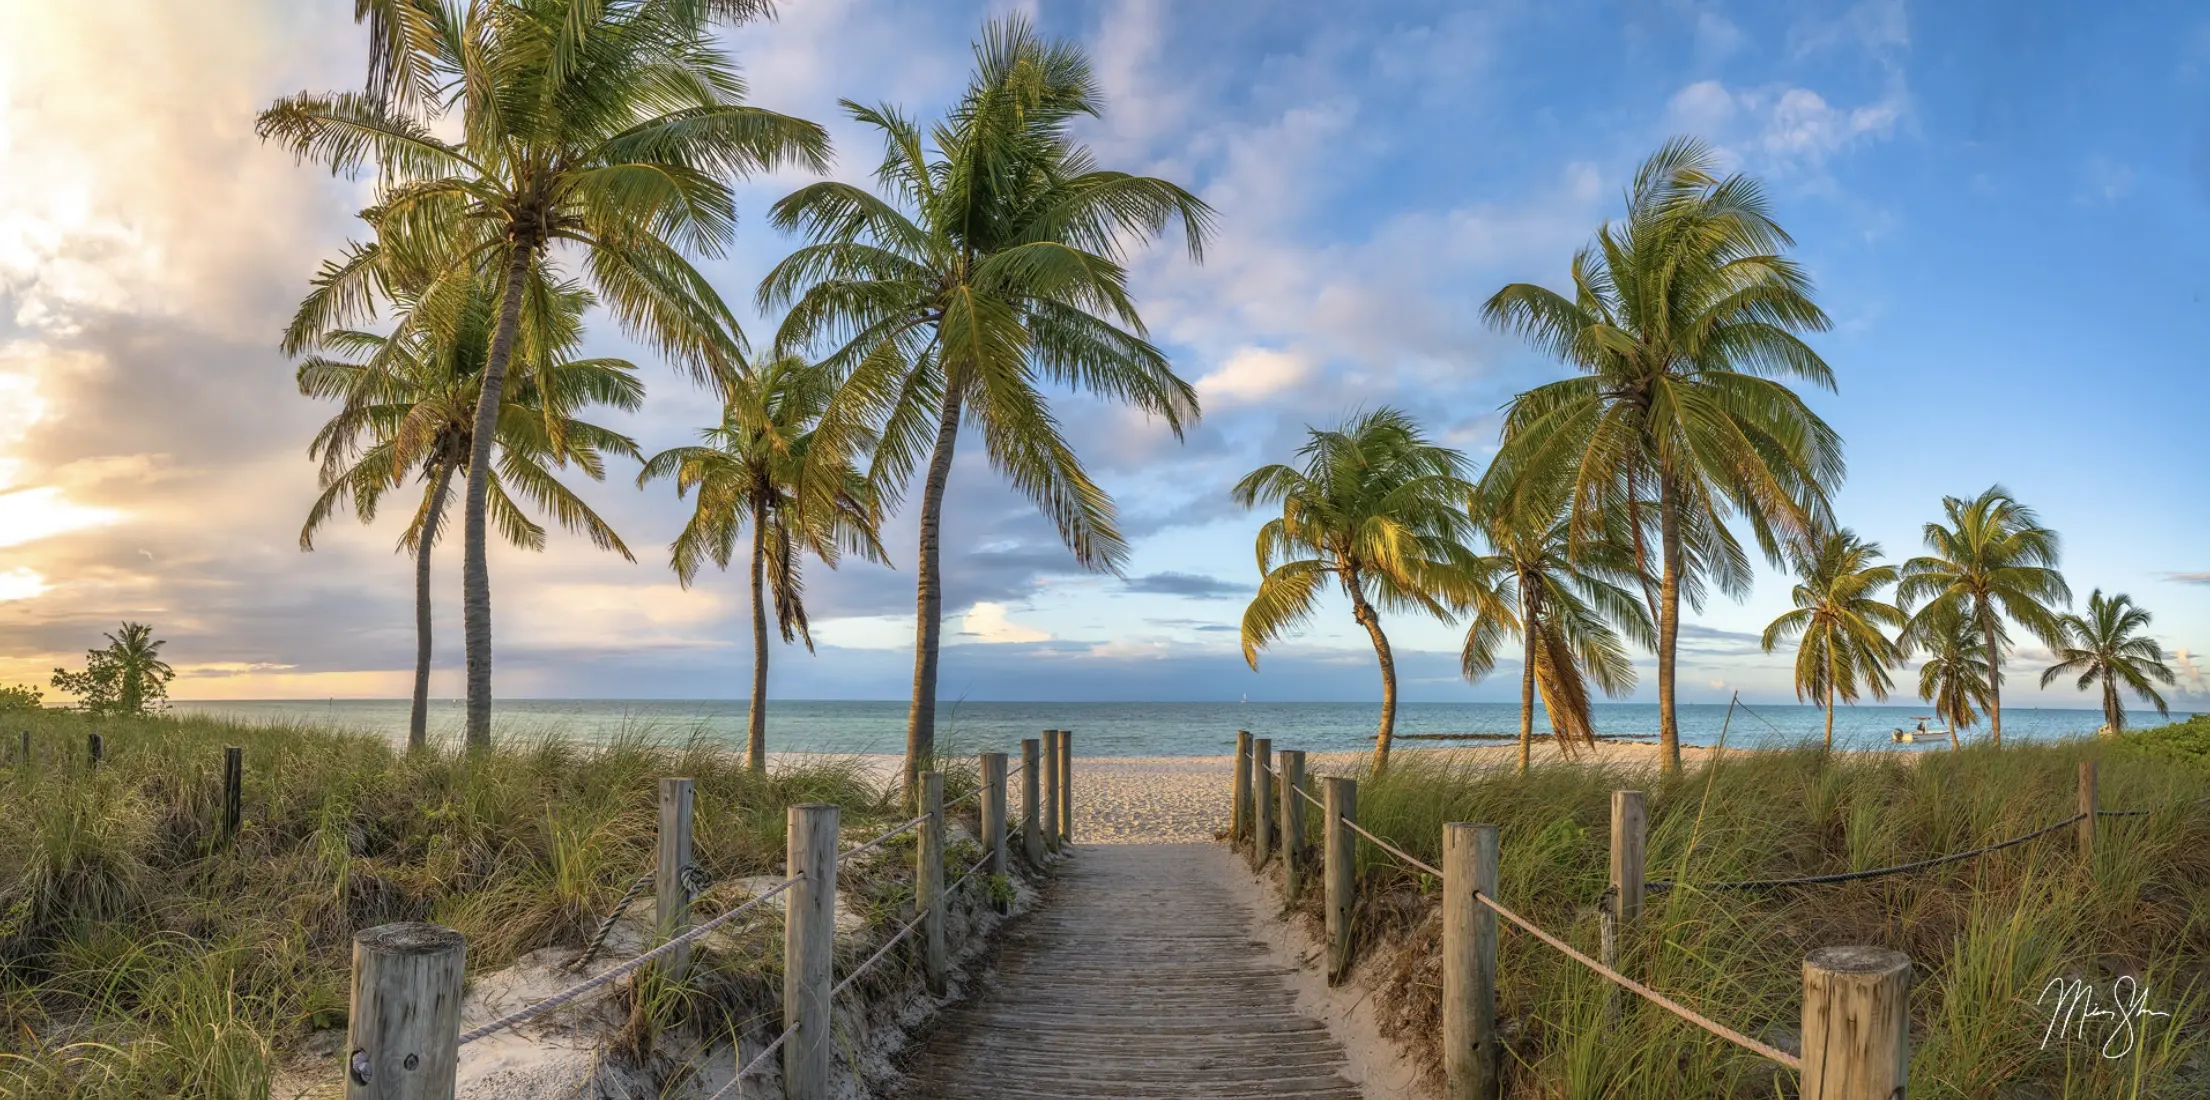
Different types of locations can give you different lighting and compositions. While sandy beaches often emphasize sky, waves, and reflections, photographing the ocean cliffs can provide depth and natural framing. Whereas natural coves can create nice curved leading lines, photographing a harbor can introduce storytelling elements like boats and piers. Choosing your location can greatly enhance what kind of story you want to tell with your image. Coastal scenes can easily go from soft and calming to powerful and dramatic depending on the geography, conditions, and location.
Essential Equipment for Coastal Shoots
Great coastal images can be made with almost any camera if you compose carefully. However, the environment can place unique demands on your gear. We’ll talk about some of the equipment that might help in your coastal photography below.
Camera Options (DSLR, Mirrorless, Smartphone)
Regarding camera options, some of the most important things to consider are weather resistance and lens flexibility. Mirrorless and DSLR systems offer a lot of great options. Even modern smartphones can still capture compelling coastal scenes in good light. Look for good image stabilization in a camera as well, as that can be especially helpful during windy conditions and blue hour shooting.
Lenses for Coastal Variety
Having a variety of lenses from wide-angle to telephoto can give you the most options for your shooting. Wide-angle lenses capture scale and foreground drama, while telephoto lenses can compress distance and isolate waves, sea stacks, or patterns in the water. Having a wide variety of focal lengths with the lenses in your camera bag can give you an advantage and allow you to look at scenes vastly different between, say, 24mm and 200mm.
Must-Have Accessories (That Save Your Shoot)
A sturdy tripod is a great tool to have! Wind can be strong at some ocean locations, so having stability can be a lifesaver. That said, hand-holding can be helpful at coastal locations sometimes. IBIS in some modern cameras can be a huge help to hand-hold while shooting different waves.
When photographing moving subjects like waves, a number of filters can be worth having along on your shoot. Circular polarizers reduce glare and help with contrast, while a good neutral density filter can enable long exposures to show a blurred motion in the water.
Other helpful tools include microfiber cloths, a lens blower, rain protection gear, and a weather-resistant bag. Salt spray finds everything, and having ways to combat it is crucial in ocean photography. Especially when the wind is whipping water up, or the spray from crashing waves is getting all over the place.
Drone Coastal Photography
Drones offer dramatic perspectives but require caution. Wind limits, salt spray, wildlife disturbance, and local regulations must all be considered. Always check no-fly zones and respect coastal environments when planning to fly.
Techniques for Stunning Coastal Images
Technique is where intention becomes visible. Using long exposures, panoramic shots, and mood can make a stunning coastal image!
1- Camera Settings Recipes (Quick Start Guide)
If you’re looking for some quick and easy starting points, here are some camera settings to try. Keep in mind, these are just starting points. Time of day, weather, etc., will alter these somewhat.
- Silky water: ISO 100, f/8–f/11, 1–30s, tripod, ND filter as needed
- Frozen waves: 1/1000s+, ISO as needed for light, burst mode can help as well
- Blue hour: f/8-11, ISO 100 (going up to 400 if needed), 0.5–5s+, tripod for stability as needed
2- Freeze vs Blur the Action (Shutter-Speed Choices)
Fast shutter speeds can freeze waves and spray. Catching a wave hitting a sea stack can highlight power and detail. As mentioned above, slower speeds introduce motion blur, creating a mood. Panning can work well with boats or shoreline activity.
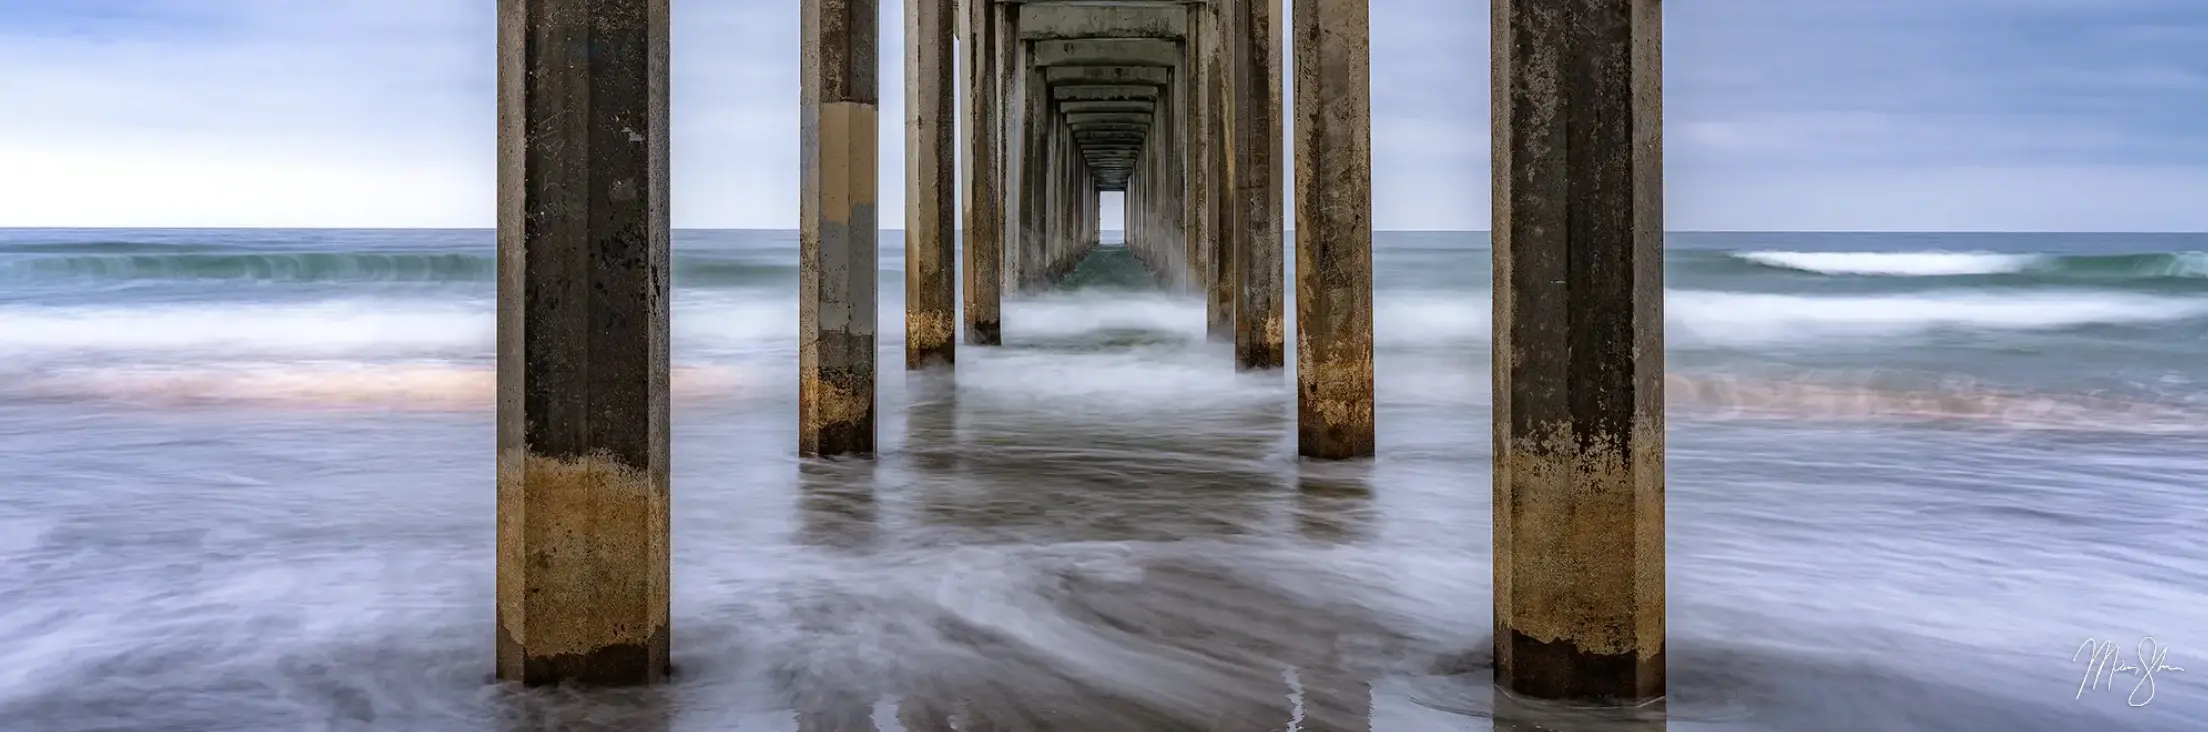
3- Panoramas for Big Scenes (Without Ultra-Wide Distortion)
Panoramas are a great way to showcase the ocean as well. It allows for wide coverage without extreme distortion. If you plan to stitch frames together, keep exposure and white balance consistent, and watch that you keep your horizon level. Panoramic photos of the ocean can really draw the viewer in across a long horizon. Panos makes an excellent choice when you really want to emphasize the scene without the sky or closer foreground as distractions, too.
4- Monochrome and Mood (When Color Distracts)
While I don’t really shoot much black and white myself, it can create some striking images under the right conditions. On coastlines, stormy conditions, graphic cliffs, and minimalist scenes can be shot with black and white in mind for some awesome results! Focus on contrast, texture, and shape rather than color to maximize your images.
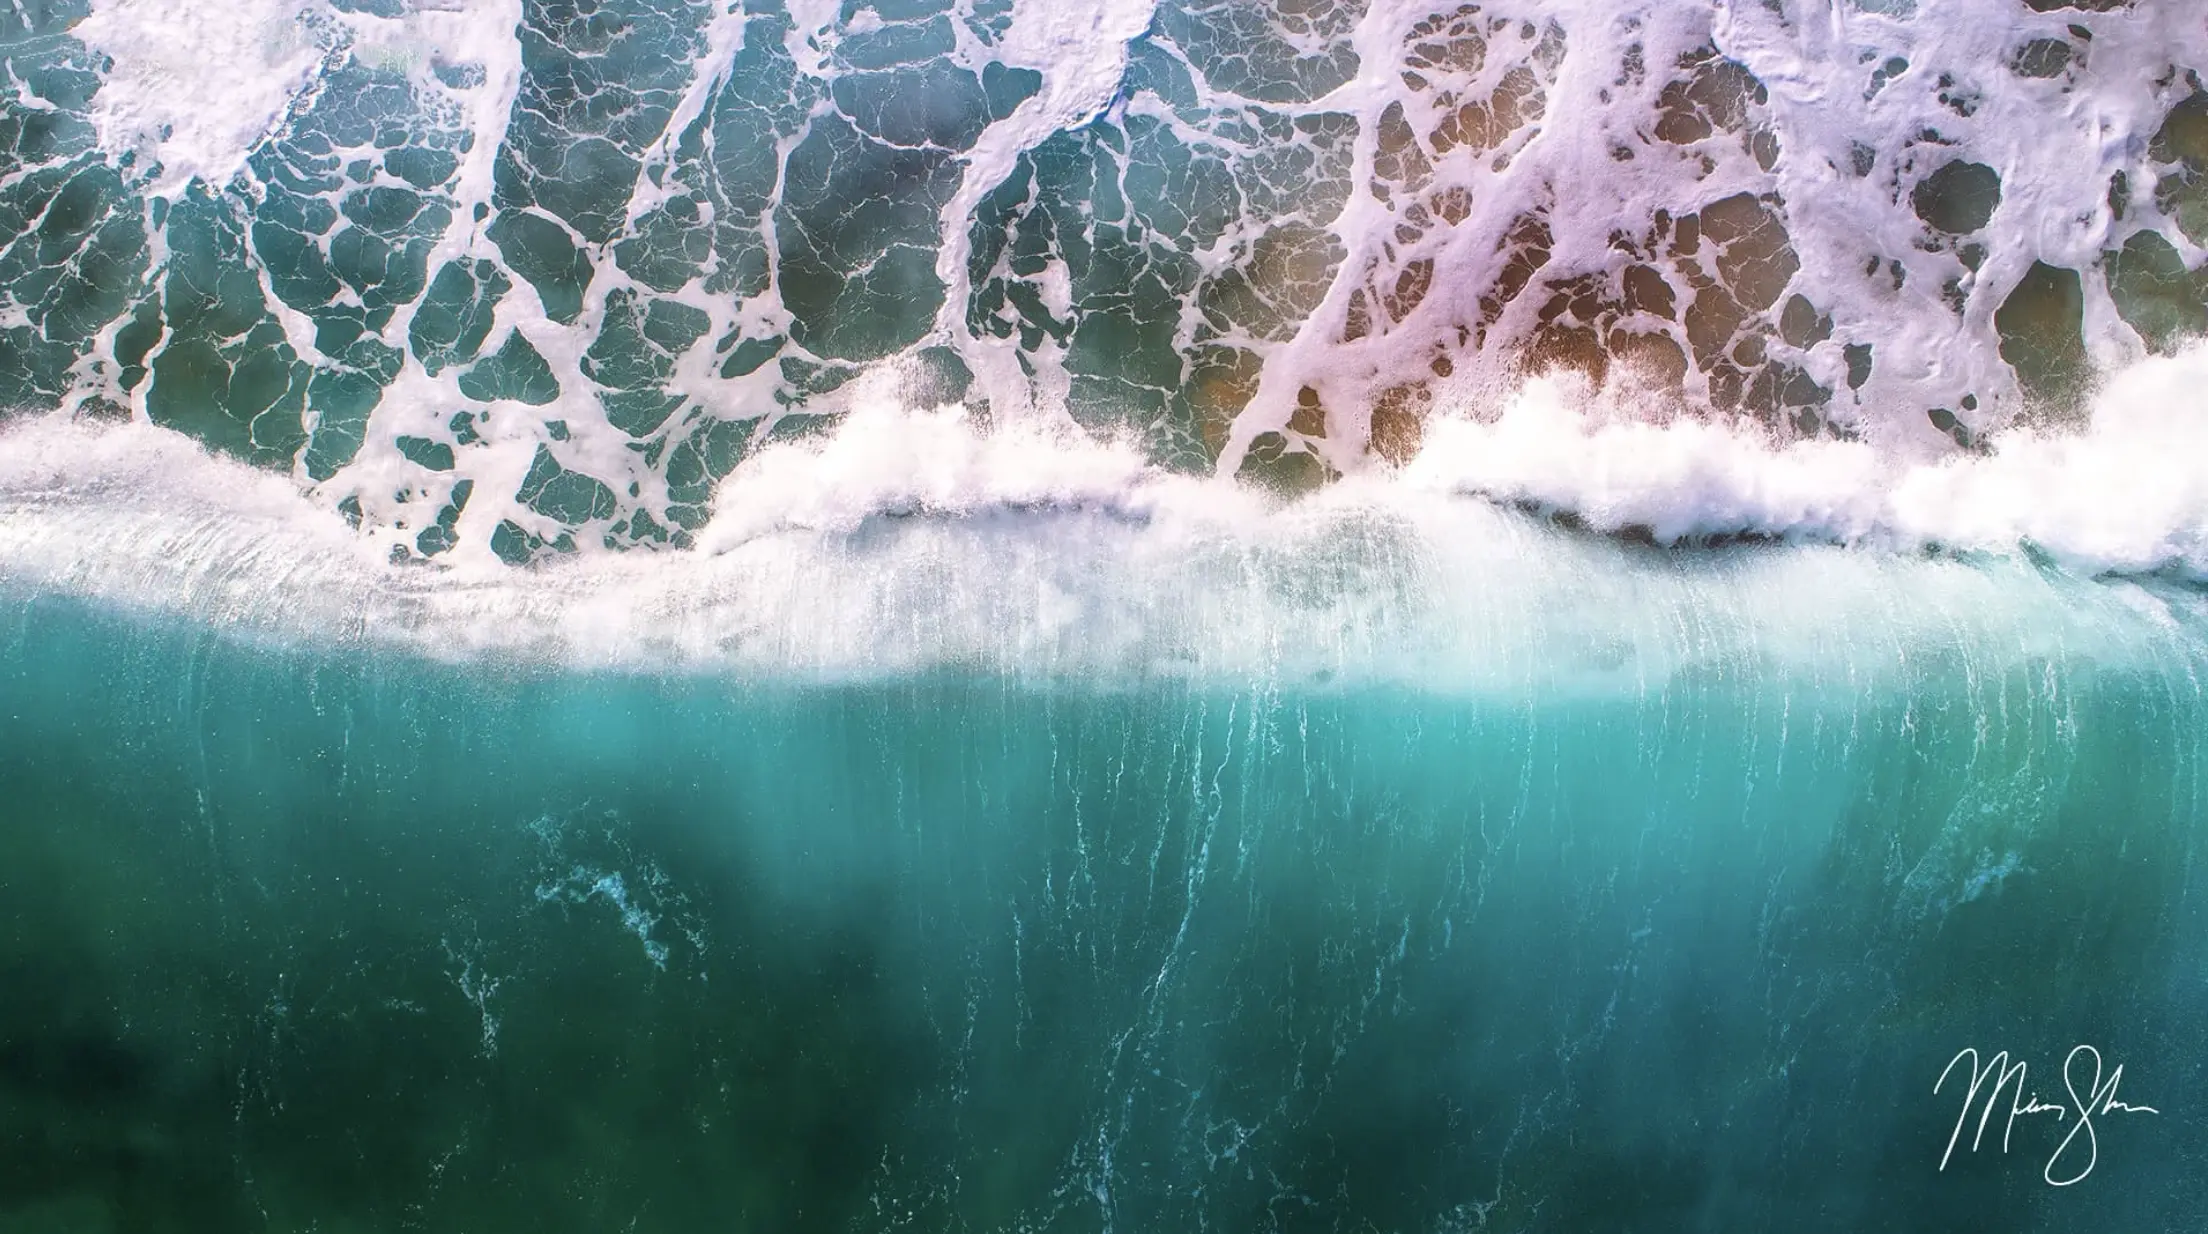
5- Long Exposure Seascapes (Silky Water, Moving Clouds)
Long exposures can create unique images where chaotic water becomes smooth. These types of shots usually work best where solid foreground elements can anchor the frame. Rocks and other solid elements should remain sharp even as you blur the water with a longer exposure.
Keep in mind that long exposures don’t work everywhere. Heavy surf can become messy, and fast-moving clouds can lose structure. Extremely windy days can also make long exposures unusable.
Post-Processing Coastal Photos (From Good to Great)
Post-processing refines what the camera captures. Nothing can fix a poorly composed scene, but if you nail that, the opportunity to process your images to your artistic needs becomes much easier!
Fix Common Coastal Issues Fast
Dust spots can appear quickly in skies or blurred water and should be removed early. Horizon leveling is something you should fix immediately if needed. Sometimes Haze and mist can benefit from gentle dehaze and clarity as desired, but try to avoid halos along horizons.
Balance Dynamic Range
Recover highlights in clouds and lift shadows carefully. For those who print their work, keep an eye on the noise in the shadows when lifting it. Graduated masks can help balance skies, and if you photographed multiple exposures, bracketed images can be blended subtly if desired.
Color That Looks Real (Not Neon)
Water easily becomes over-cyan and sunsets over-magenta when pushing saturation and vibrance. The last thing you want is a neon sky in a fantastic scene. Make sure to set white balance for mood, then fine-tune selectively. Sand tones can be a reliable reality check.
Sharpening and Noise (Selective, Not Global)
Sharpen rocks and structures more than water or sky. Bumping your shadows too much can make even minor noise stand out, especially in areas where color and structure are fairly consistent, like the sky and smooth or calm water.
Expanding Your Perspective Beyond A Pretty Landscape
Coastal photography becomes stronger when it tells a solid story. Using a strong foreground and different elements can really create a story to go with your photography.
Build Strong Foregrounds
Look for interesting foregrounds to create a strong composition. Everything from piers to tide pools or even patterns in the sand or rocks can easily add depth and scale to a scene. Reflections can also add symmetry and calm.
Twilight and Night Coastal Photography
If you are looking to blend natural and artificial light in a realistic way, twilight is a fantastic time of day to photograph. It gives you the ability to include lights from a nearby harbor or lighthouse without blowing out highlights or having your shadows completely black. Waiting until night introduces the ability to photograph stars over the ocean. The Milky Way along a rugged coast can make a fantastic scene!
You can even blend a blue hour foreground with the night sky shot a few hours later for stunning scenes. By leaving your camera in the same position on a tripod and taking two different images a few hours apart, then blending them in post-processing, you create a scene that captures enough light for the foreground, along with the beauty of the night sky. Don’t forget to try the moon, either. A beautiful moonlit surf can make a great scene, too. Make sure to keep tides and safety in mind.
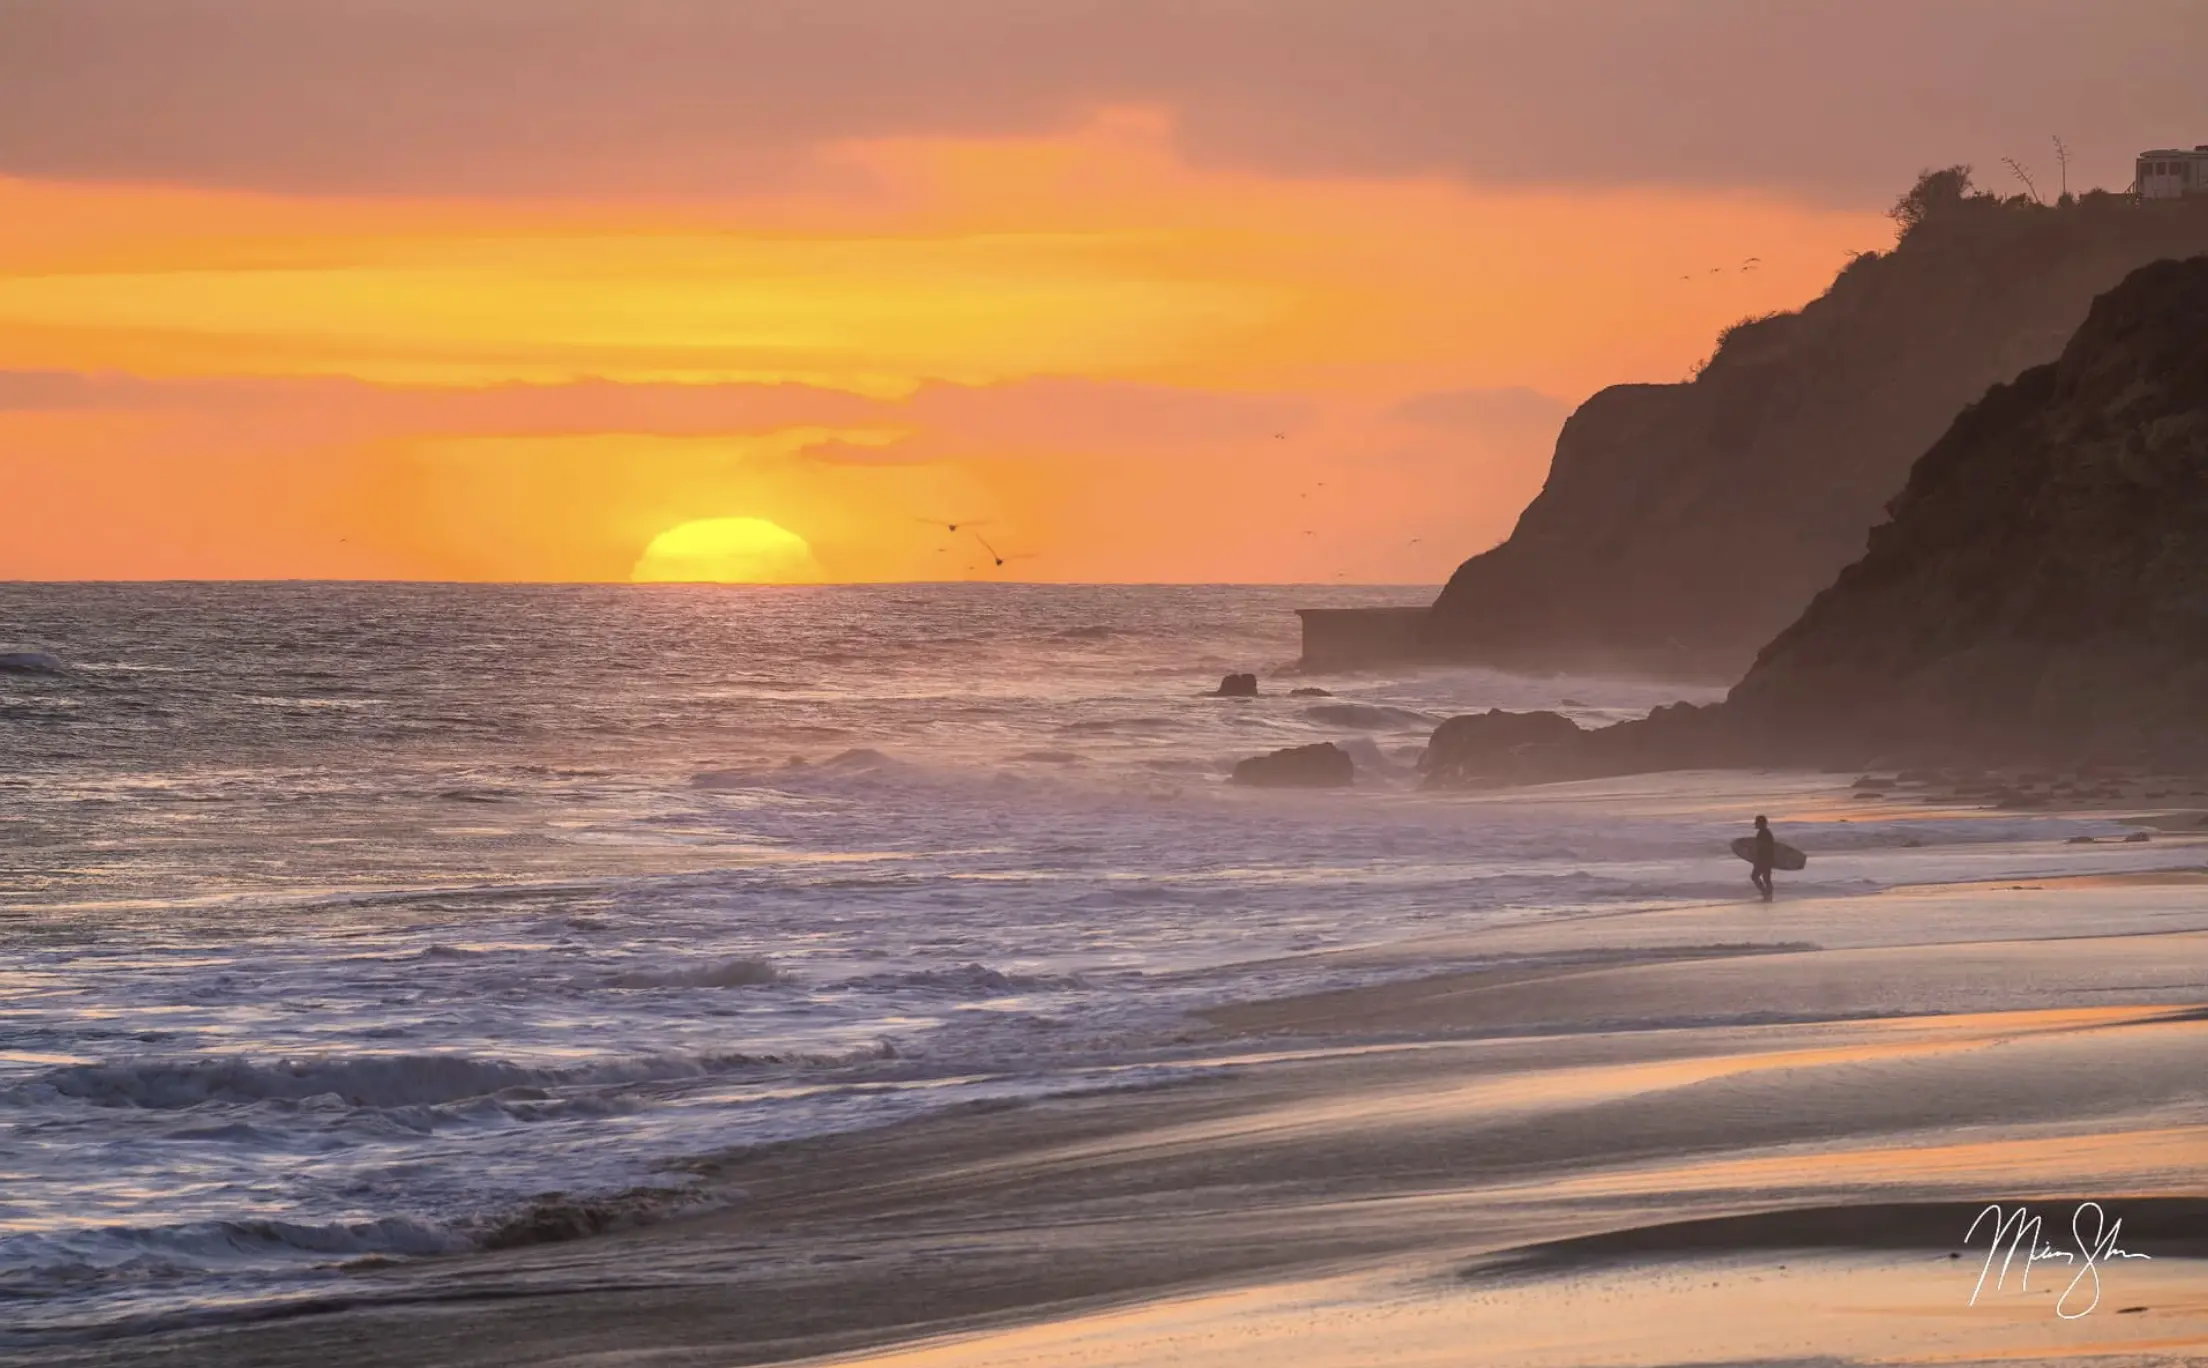
Add Story With People and Place
Including surfers, fishermen, or other people can add a sense of scale to an image. Take the photo below as an example. I used a telephoto to highlight the best part of the sunset and included the surfer as a focal point to get a sense of scale and tell a story of life on the beaches of Malibu.
Cultural Considerations
Using the image below of the surfer, I was able to create a scene that shows the culture of Southern California. Warm sunsets, seagulls flying around, and waves crashing, surfing is a major part of life for many in communities like Malibu.
Challenges at the Coast (And How to Beat Them)
Photographing at the ocean can be one of the most rewarding places to build your image portfolio, but it can also be highly unpredictable. The light is ever-changing, and the weather moves fast. The environment itself can be hard on both you and your camera equipment. Learning how to anticipate the challenges of a shoot will make your job much easier when out on location.
Managing High Contrast and Changing Light
There are very few environments that change as drastically as the coastline. From bright skies and reflective water to dark foregrounds that push dynamic range to its limits. As someone who prints my work often, I use ETTR (Expose to the Right) in most of my photography. I also bracket so that I can combine exposures as needed to make sure I have skies that aren’t completely blown out or shadows that are unrecoverable. This will help you compose your images without losing precious details.
Clouds can also be helpful. Overcast conditions can act like a natural diffuser, softening contrast and revealing textures in objects like rocks, sand, and even water that harsh sunlight can ruin.
Protecting Your Gear From Sand, Salt, and Water
Photographing along the coast can be tough on equipment. Fine sand can find its way into just about anything, while salt from the spraying ocean leaves can corrode over time. Wiping down gear after your shooting is over can help keep it in the best possible shape.
If you have to change lenses, doing it away from breaking waves or blowing sand will help. The last thing you want is salt water or sand stuck in there. Temperature changes can also cause condensation. Sealing your camera and lenses in a bag before going indoors can let them acclimate gradually and prevent moisture from forming inside the gear.
Safety and Access Basics
Understanding tides is essential to coastal photography. Not just for composition, but for safety. Always check tide charts before heading out. A rising tide can cut your access point off quickly, and a sneaker wave can arrive without warning, surging beyond the typical shoreline. Give waves a lot more space than you think you need and always keep an eye on changing conditions. It’s best to use the old rule of “never turn your back on the ocean” while photographing the coast.
Also, respecting nesting areas, wildlife closures, and private property can go a long way. The last thing you want to be doing is disturbing endangered seabirds with your drone or presence. Erosion is also constant, so keep an eye on unstable footing and cliff edges and be aware of places to retreat as needed.
Finding Inspiration (And Keeping It Fresh)
Even with ever-changing conditions, sometimes a location can start to feel repetitive. To stay inspired, it often means slowing down and paying attention to subtle changes or being open to simpler scenes. Even small changes in light, timing, or a different perspective can reveal a new composition you can easily overlook.
Discover Coastal Locations Near You
If you live near the coast, don’t feel like you have to have iconic coastlines with dramatic cliffs or interesting rock formations in every photograph you take. Sometimes, a simple pastel scene of waves coming in can make a fantastic scene. Using maps and satellite views can reveal hidden coves or tidal patterns that are easy to overlook from the road.
Sometimes the details are in the small things within the foreground. Pay attention to orientation as well. One location might be great at sunrise, but not as good at sunset. Or vice versa. It pays to watch how light interacts with cliffs, beaches, and offshore features.

Using Social Media Without Copying
While social media can be a powerful source of inspiration, it is easy to fall into repetition. Instead of copying compositions, try to study light, weather, and timing. Ask why a scene works rather than how it was framed and see if you can come up with something new.
Photograph With Respect
As we’ve talked about, coastal landscapes are fragile places. Staying off dunes or sensitive vegetation helps preserve those locations. Giving wildlife space allows them to thrive in their natural habitat. As always, it is important to follow Leave No Trace principles. Ethical decisions matter, regardless of who is watching. Your photograph loses its value if it has to come at the expense of the landscape itself.
Conservation Through Photography
Photographs that document erosion and restoration efforts or cleanup initiatives can bring awareness to important conservation issues and encourage stewardship. When photographed thoughtfully, your work can both celebrate the coast and help protect it for the future. Photography has the power to educate on many conservation topics.

Conclusion
Photographing the coast rewards those who are prepared and have both patience and respect. Using all of the tips and techniques above can help you build a better portfolio. From planning around weather, light, and tide, and carefully composing your scene, you can create images that go beyond the surface beauty.
Share your images with your friends and family or on social media. Telling people your stories through photography is a vital part of sharing that experience with others.
If you are looking for more inspiration, feel free to visit my ocean and beach collection of photography for images from the coastlines of Florida, California, Hawaii, Europe, and more!