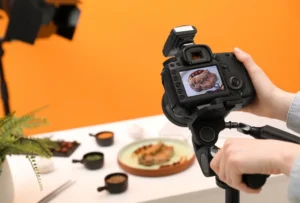
Food photography looks effortless when you scroll past it online, bright salads glowing in soft window light, glossy desserts catching the perfect highlight, bowls of soup that somehow feel warm through a screen. But behind every beautiful image is a moment of experimentation, curiosity, and sometimes total chaos. I didn’t always know how to make food look delicious in a photo. I learned by pulling together whatever I had in my kitchen and slowly discovering what makes an image feel alive.
Whether you’re using your phone, a DSLR, or something in between, food photography becomes a lot more enjoyable once you understand the small things that create a big impact: light, angles, props, and a willingness to try without waiting for perfection. Think of this guide as a walk-through of the foundations, practical, honest, and shaped by years of trial, error, and unexpected wins.
Contents
- Getting Started with Food Photography
- Basic Setup: What You Actually Need
- Working with Light in Food Photography
- Must-Have Food Photography Angles
- Gear and Camera Settings for Food Photography
- Props, Surfaces, and Scene Design
- Garnishes, Crumbs, and Beautiful Messes
- Building Layers for Depth and Story
- Adding Context & Product to Your Food Photography
- Building a Food Photography Portfolio
- Photograph What You Love to Attract Ideal Clients
- Your “Why” in Food Photography
- Final Encouragement and Next Steps
Getting Started with Food Photography
Before diving into lighting setups and camera settings, it helps to begin with the mindset that makes food photography enjoyable instead of overwhelming. This section lays the groundwork for getting started, even if you don’t feel fully ready yet.
Embracing Imperfection
If you are just beginning with food photography, here’s the most freeing mindset you can adopt: “Imperfectly done is better than non-existent.” You can spend months waiting for the perfect day, the perfect gear, the perfect setup, but the real growth happens when you shoot anyway.
Every attempt teaches you something. One photo shows you how shadows fall. Another reveals how the background changes the mood. Bit by bit, you build intuition, not through theory, but through doing.
My First Food Photography Win
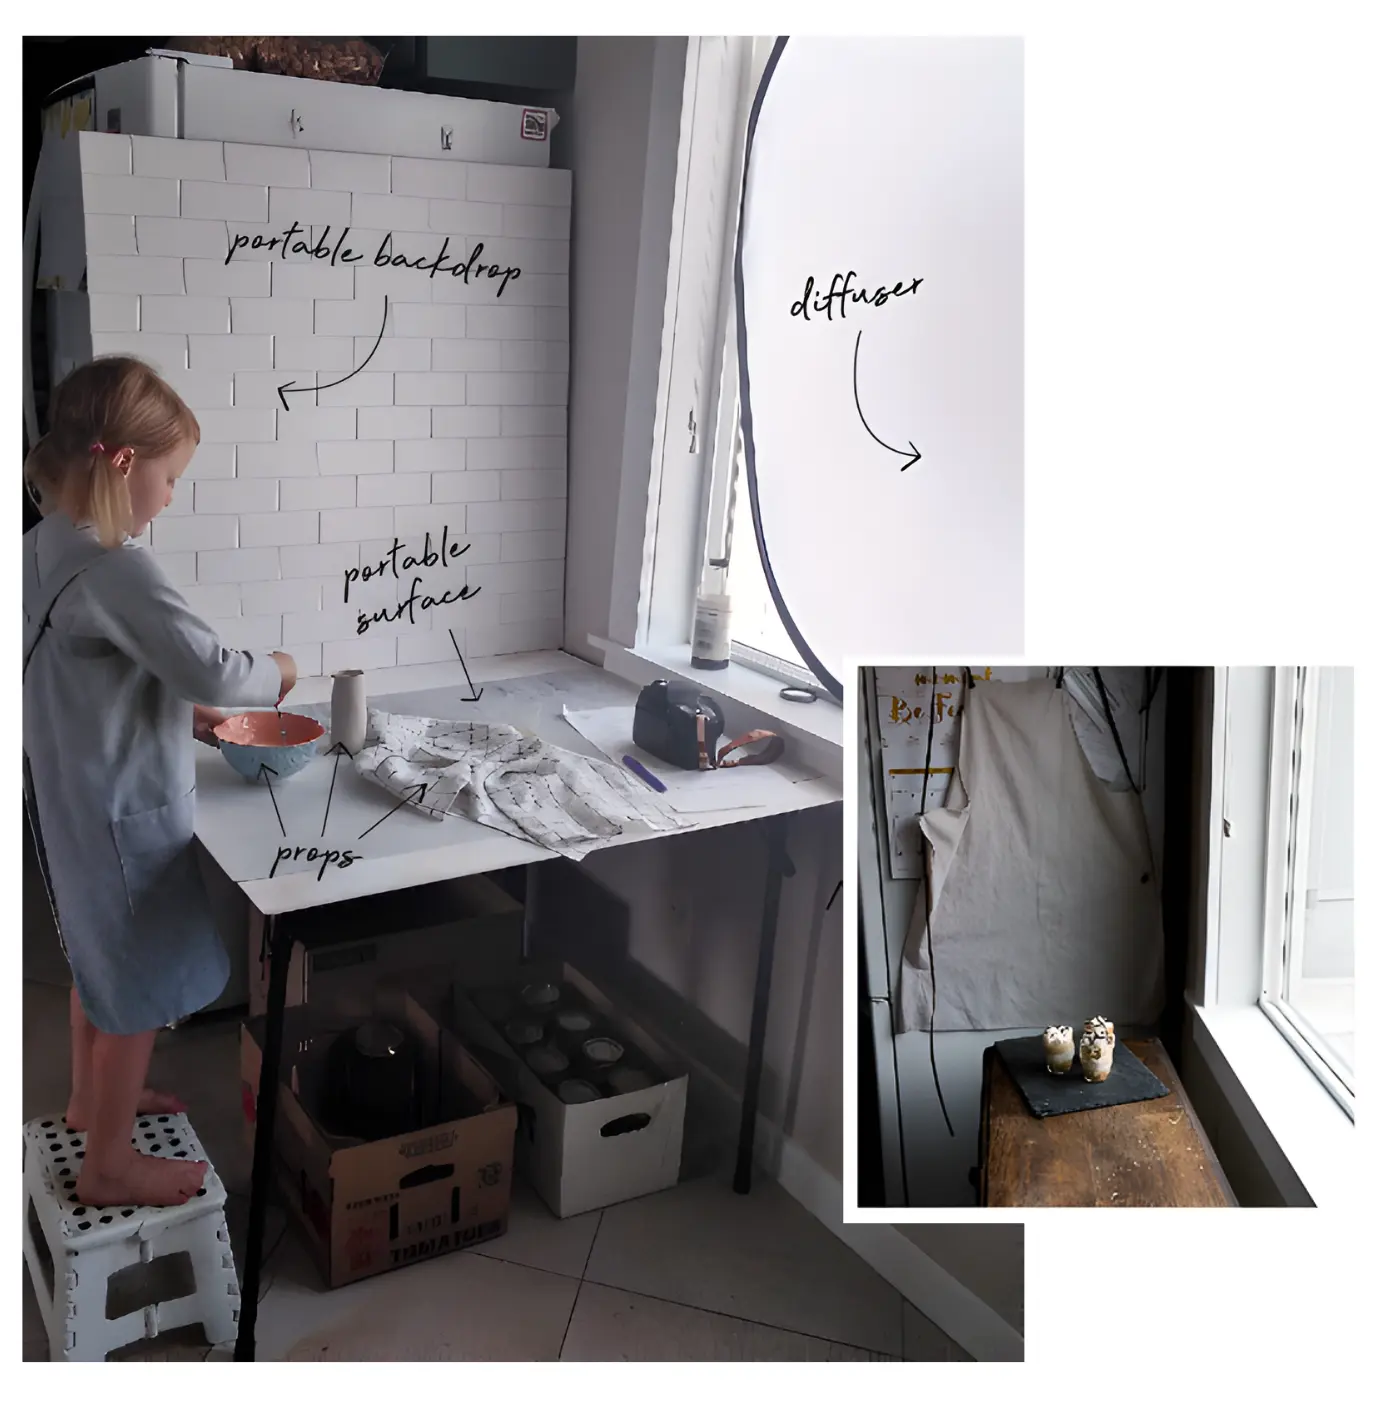
My first “real” win was a shot of a tiramisu pudding trifle I made on a whim. I dragged a table to the kitchen window, clipped my apron to the wall to fake a clean backdrop, and placed the dessert on a slab of slate.
When I looked at the image, the light curved gently around the glass, and the textures looked almost touchable. It wasn’t perfect, but it had that spark, the moment where you think, Okay… maybe I can do this.
Practicing with What You Have
You don’t need an overflowing prop cabinet to get started. Some of the early photos I still love came from digging through my own kitchen.
Once, I styled a brownie using two mismatched cups, a couple of thrifted plates, a fifty-cent yard-sale fork, and a scratched cookie sheet. I sprinkled a few crumbs around the plate, and suddenly the scene felt intentional, even though nothing “matched.”
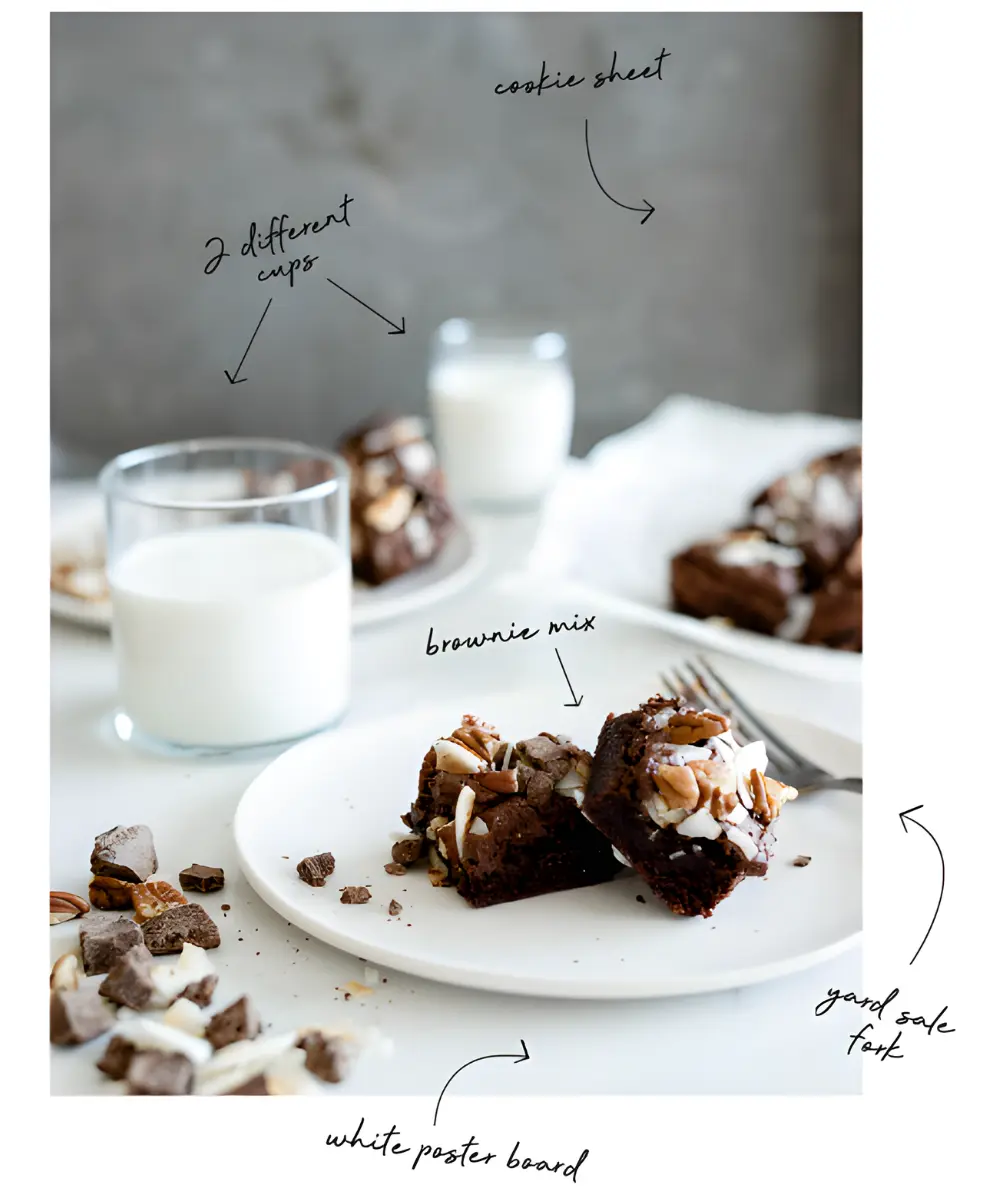
These small discoveries have a way of pulling you further in, long before you ever worry about buying a DSLR camera. The more you see potential in ordinary objects, the more accessible food photography becomes, especially when you’re still learning the basics of food photography.
Basic Setup: What You Actually Need
Before you start investing in gear or props, it helps to understand what truly makes a difference. This section breaks down the simple, inexpensive tools that form the heart of a solid food photography setup.
Essential Tools to Get Started
A simple, reliable setup is more than enough to create beautiful images:
- Food – your subject and your story.
- A window – natural light is your most forgiving teacher, especially before you experiment with artificial light or full studio lights.
- A diffuser – a sheer curtain or pillowcase softens harsh sunlight.
- A table – even a fold-up card table works.
- Portable surfaces – cutting boards, tiles, linens, or painted boards.
- Props – subtle items that support the food rather than distract from it.
You truly don’t need a studio. You need curiosity, light, and a willingness to start.
Working with Light in Food Photography
Light shapes the mood of your images more than any fancy camera setting ever will. Here, we’ll explore the simplest, most powerful way to use natural light so your food instantly looks more appealing.
Why Light Matters
Light tells your viewer what to feel before they even notice the ingredients. A cozy soup needs warmth; a crisp salad needs brightness; a glossy dessert needs a gentle highlight that hints at sweetness. When the light lands just right, even a simple dish becomes irresistible.
Using Sidelight as a Beginner Technique
Sidelight is the single easiest lighting method to master, and it also helps reduce harsh reflections on shiny surfaces. When light sweeps across the food from the side, shadows deepen naturally, textures come alive, and highlights feel organic.
Most days, I still shoot beside the same north-facing kitchen window. The light there is soft, reliable, and beautifully diffused.
Lighting Checklist & Common Mistakes
Before you start fine-tuning your lighting, it helps to know the small, easy-to-miss details that can make or break a food photo. These reminders keep your images clean, consistent, and true to how the food actually looks.

- Stick to a single light source from the side to avoid mixed indoor lighting that can muddy your tones.
- Keep overhead lights off to avoid strange color casts.
- Use a bounce board only if needed. Even a simple white sheet works to bounce light gently back onto your scene.
- Remember: mastering one type of light will take you further than dabbling with ten.
If you’re enjoying these tips so far and want to see exactly how I build my lighting setups, I’d love to have you join me in my food photography class. Sometimes watching it unfold in real time makes everything click.
Must-Have Food Photography Angles
Angles dramatically change how a dish feels. This section shows you how three simple perspectives can create a full visual story and help you capture any dish beautifully.
The Three Core Angles
These three angles cover nearly every dish:
- Overhead / Flat Lay
- 45-Degree Angle
- Straight-On Angle
Together, they create a complete visual story.
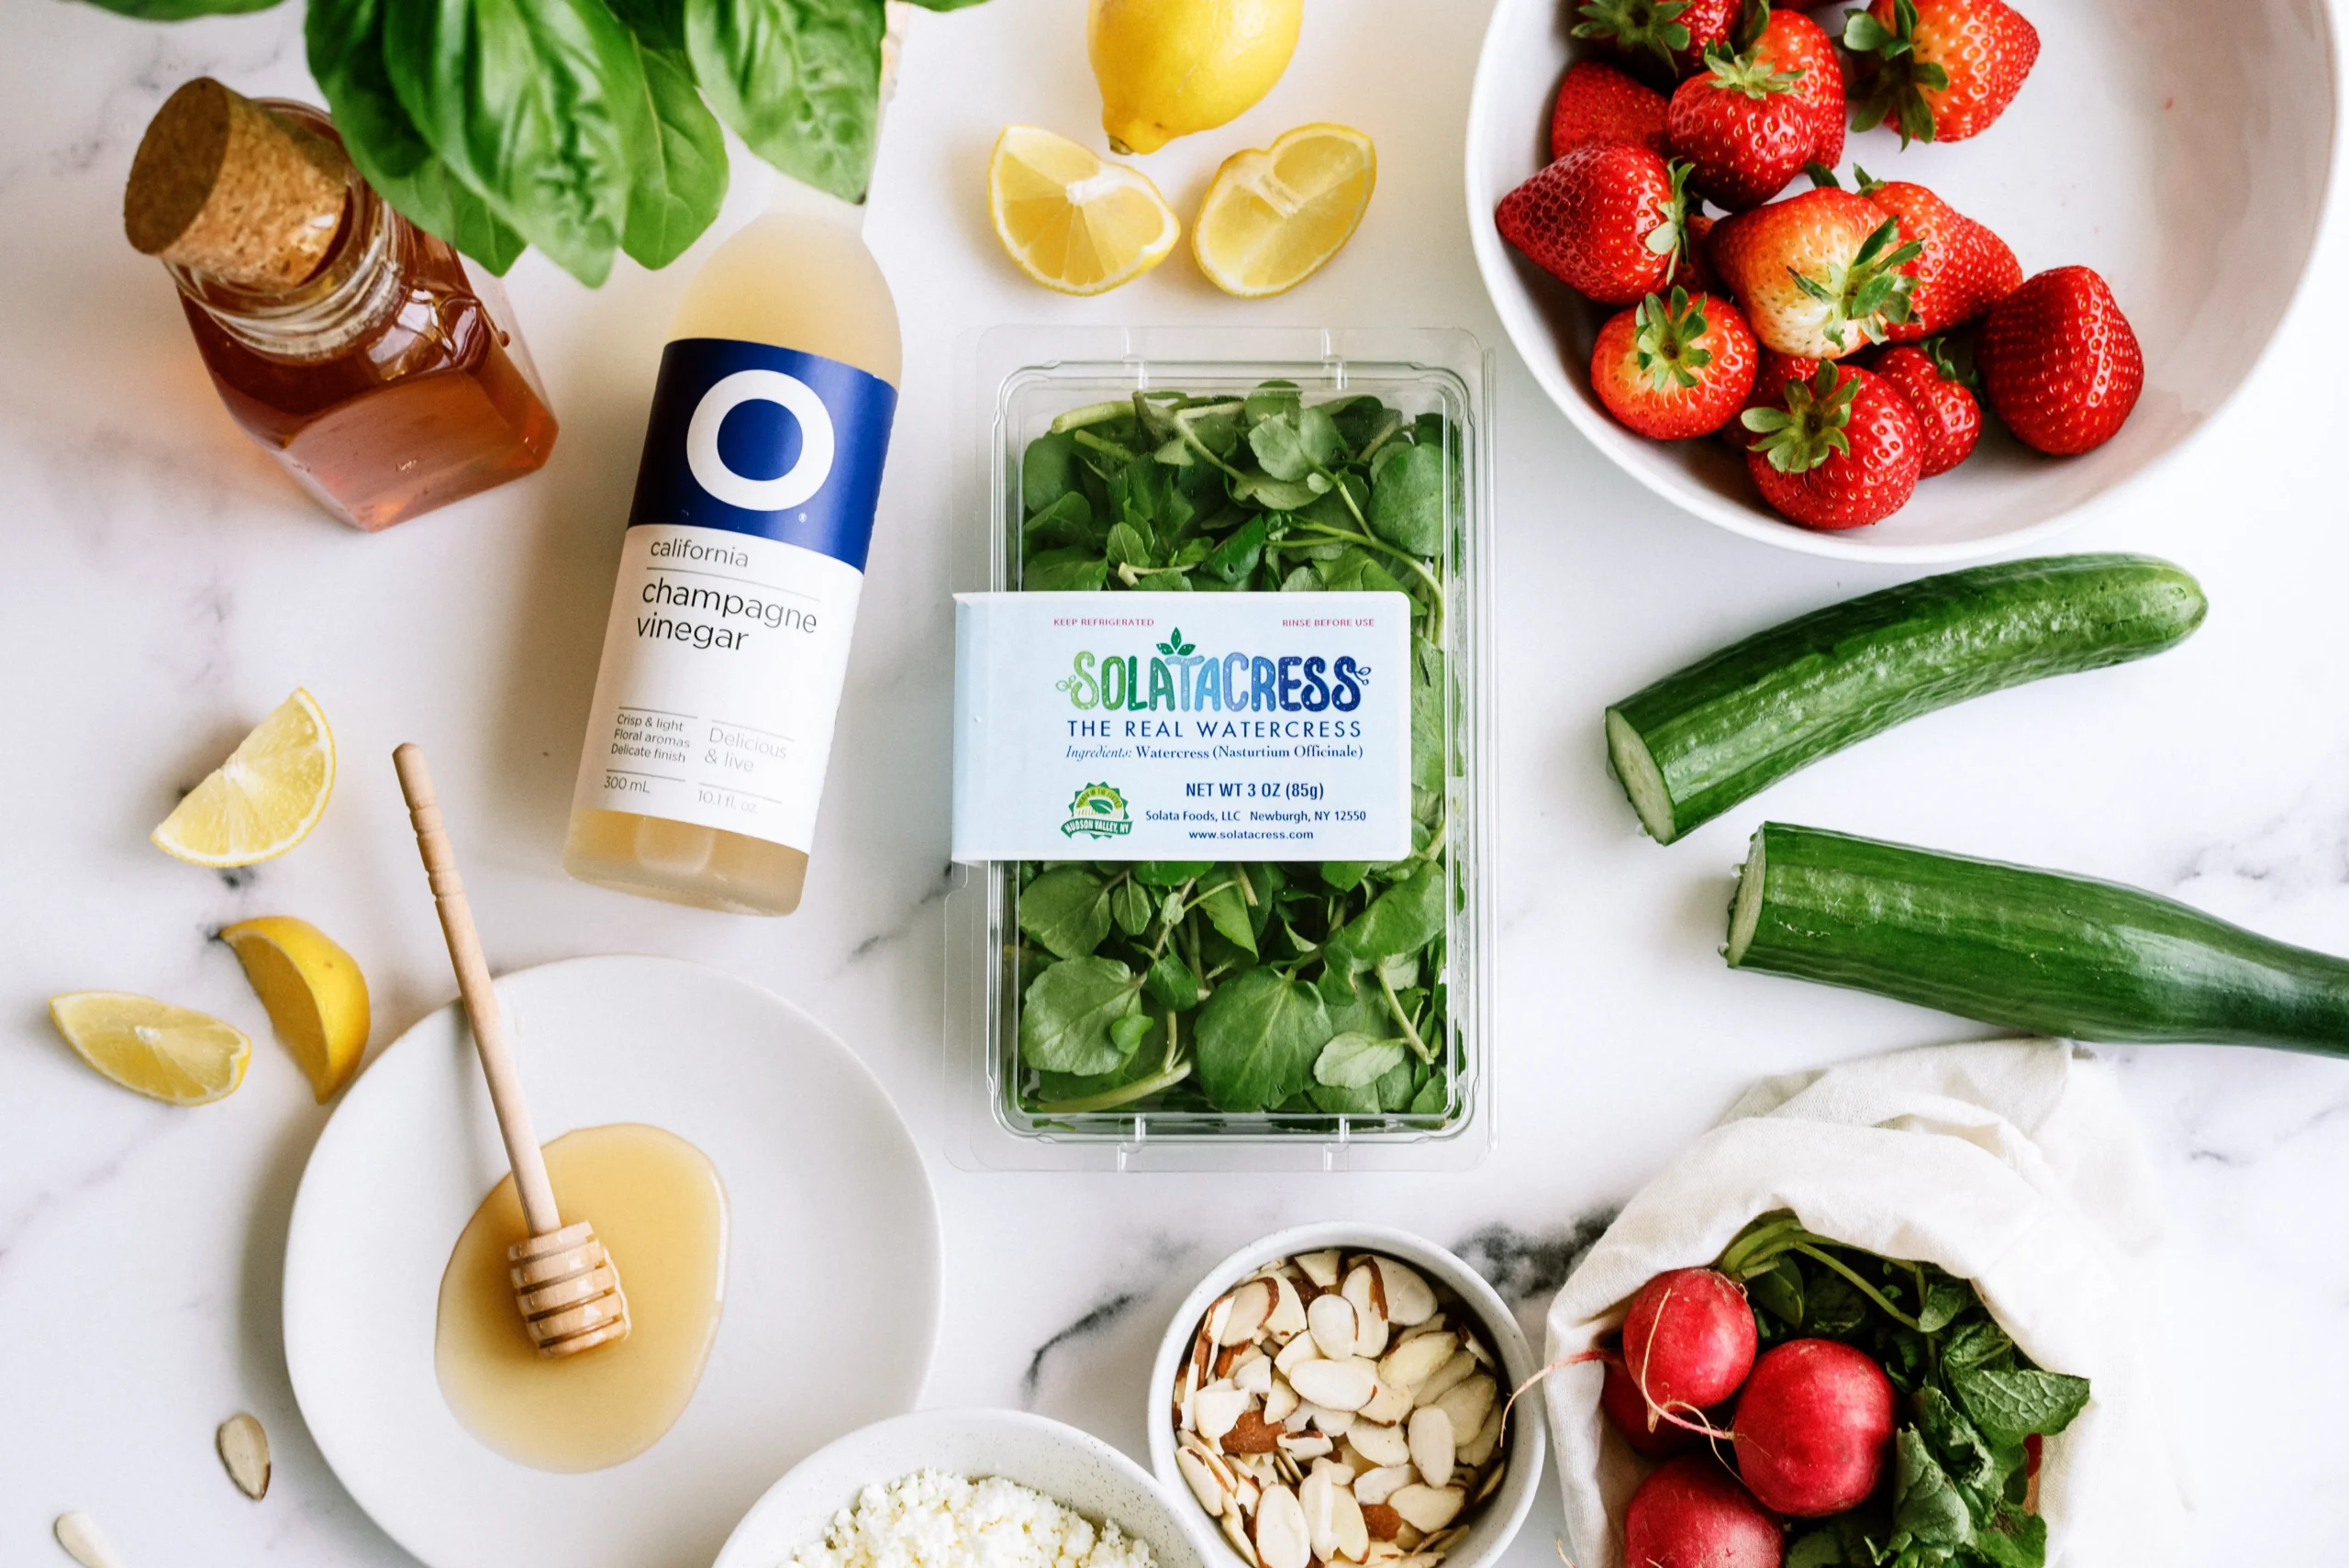
Overhead / Flat Lay Shots
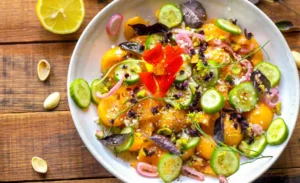
A graphic overhead shot that simplifies the scene, highlights pattern and texture, and shows how your main subject interacts with other elements around it.
When to Use It
Great for dishes full of ingredients or visual detail like pastas, salads, charcuterie boards, and ingredient lineups.
Examples

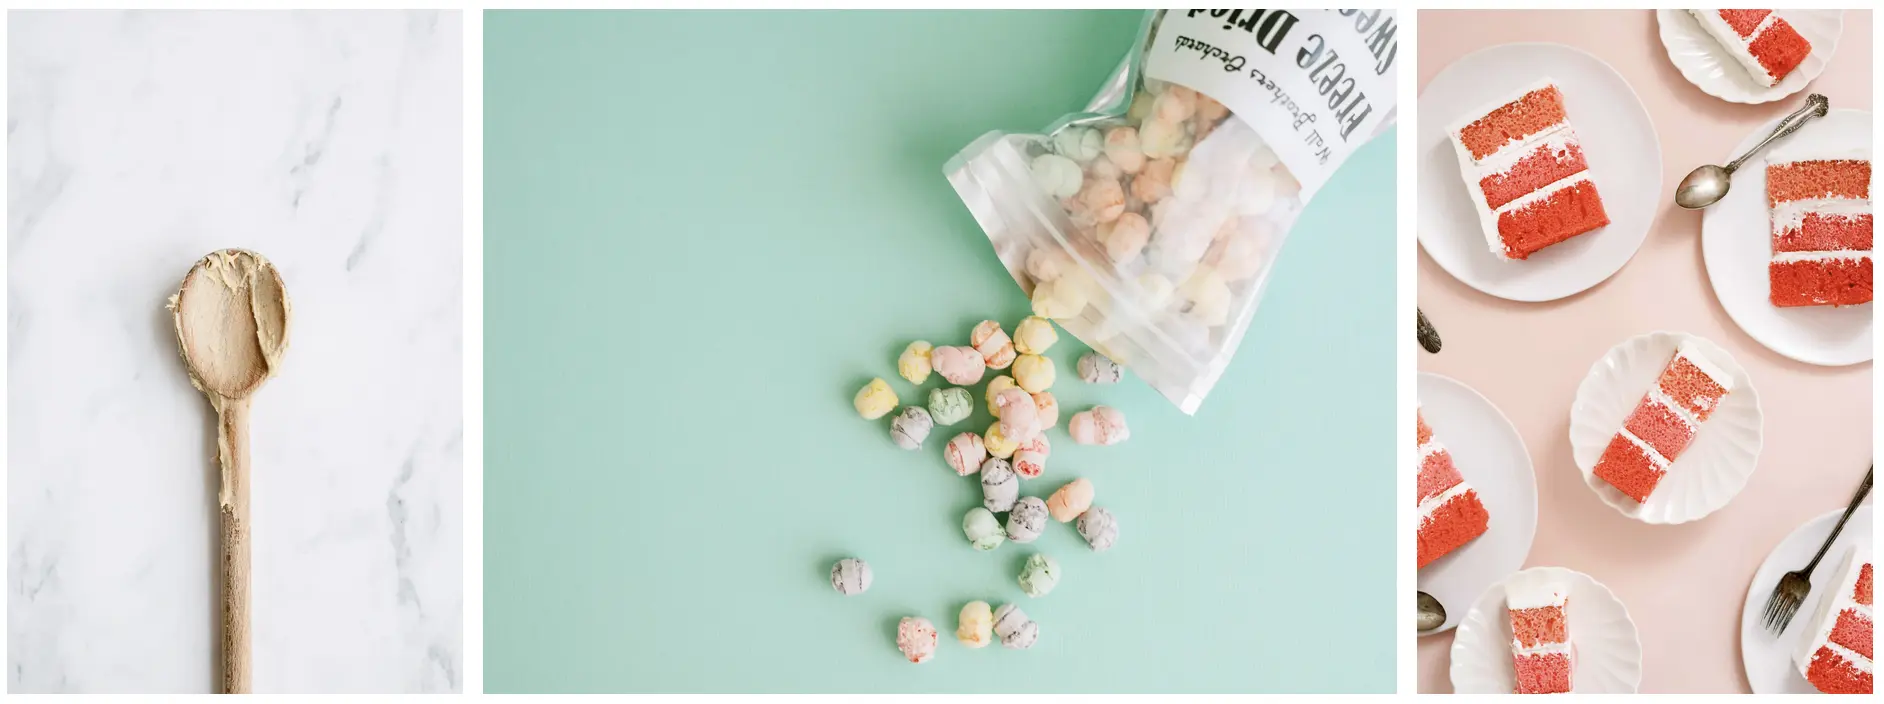
- Pumpkin cinnamon rolls rising into soft golden spirals.
- Cream puff cake dessert ingredients arranged as if you walked into someone’s kitchen mid-bake.
- No-bake strawberry bars laid out in clean, pastel slices.
45-Degree Angle
The “sitting at the table” angle.
Why It Works
It’s natural and familiar, like you’re about to take a bite.
Examples
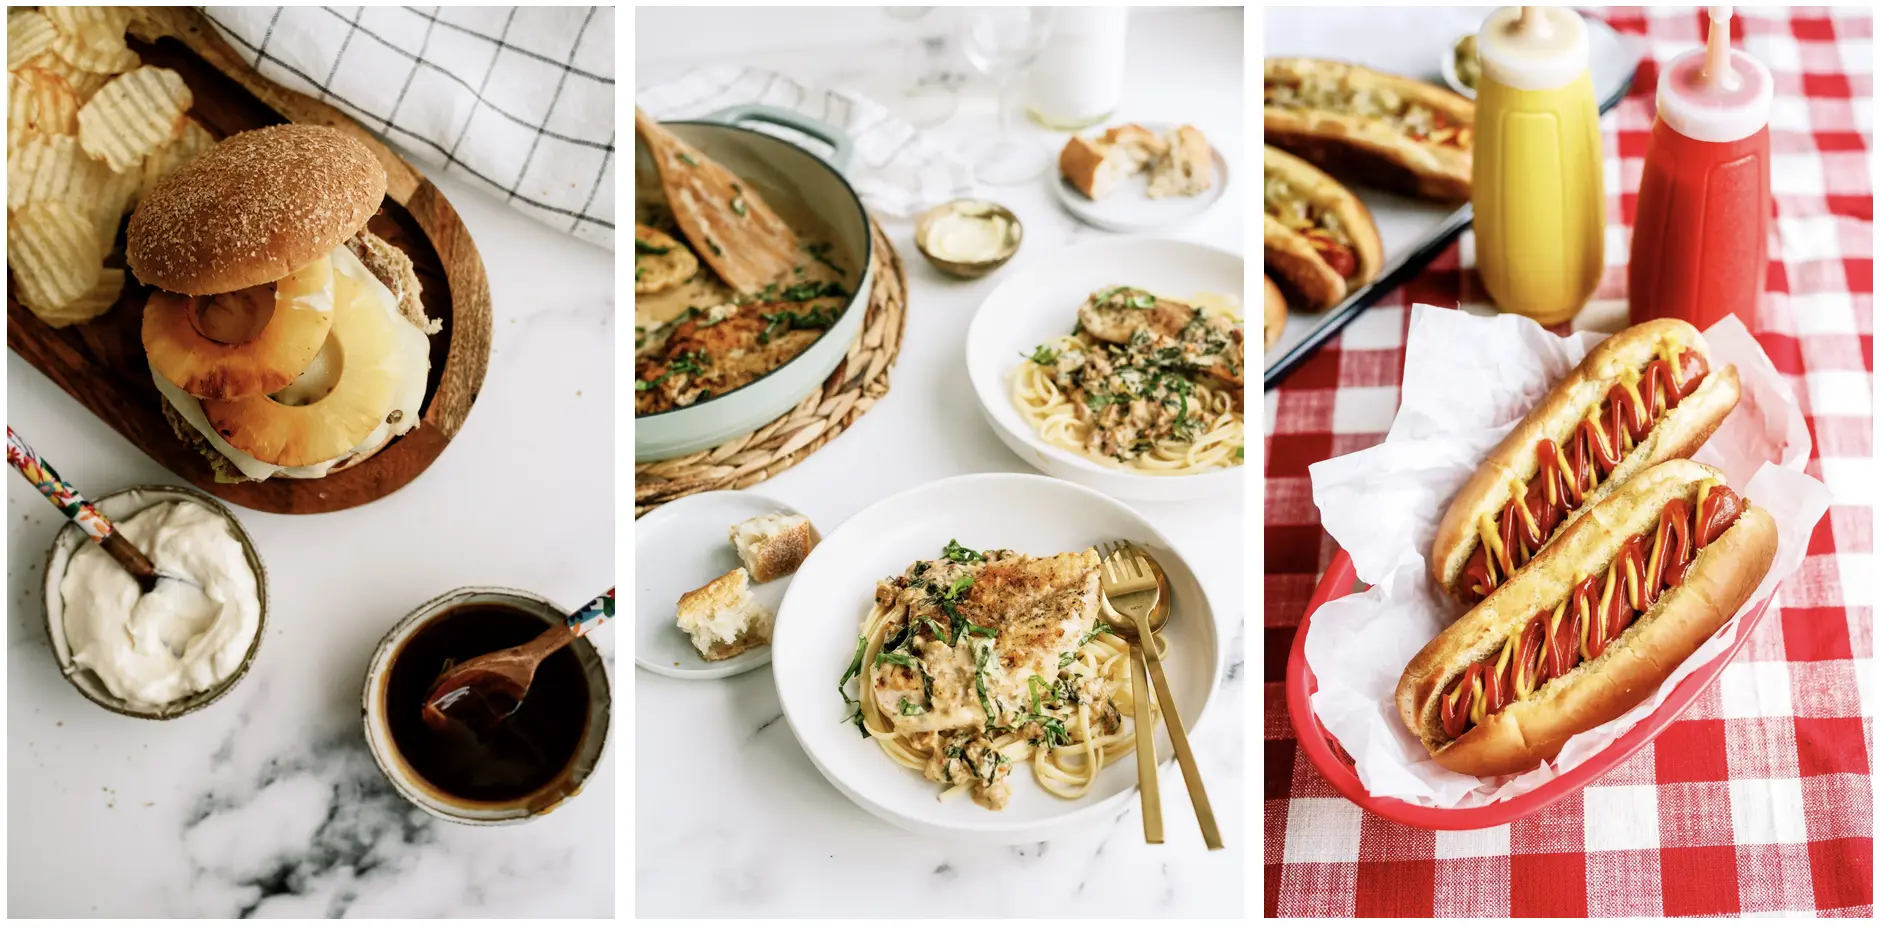
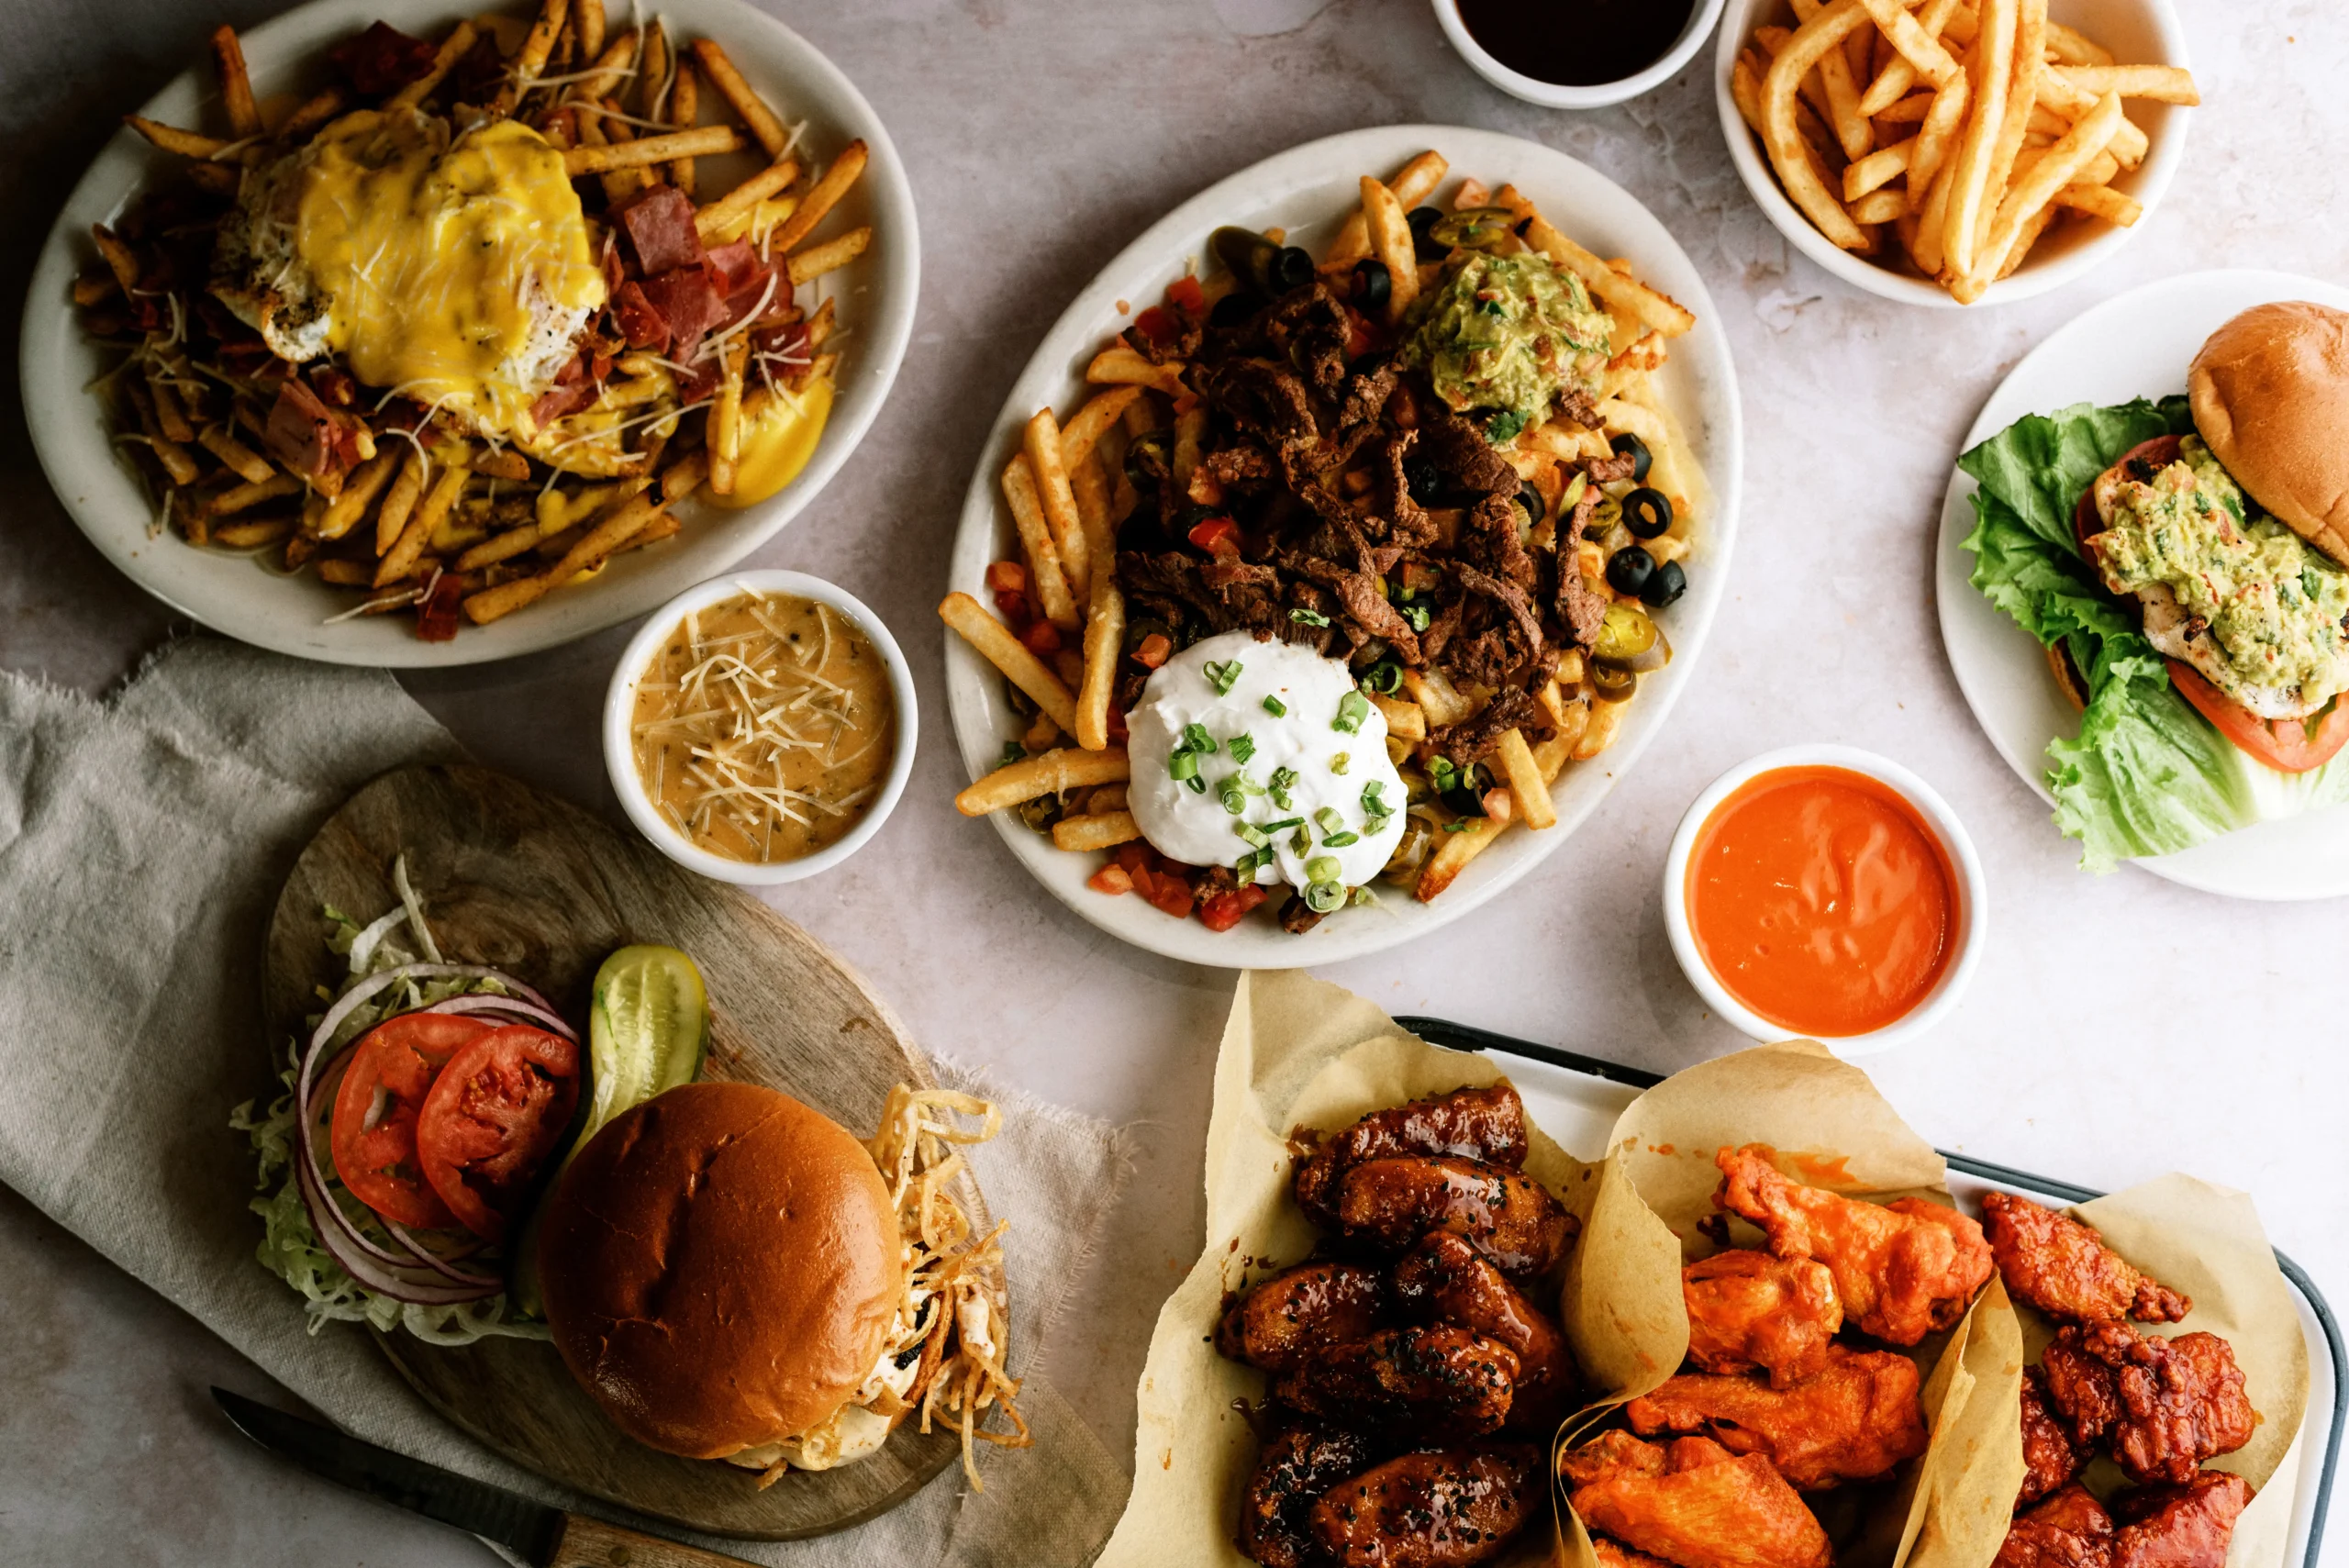
- A plated restaurant dish with intentional garnishes.
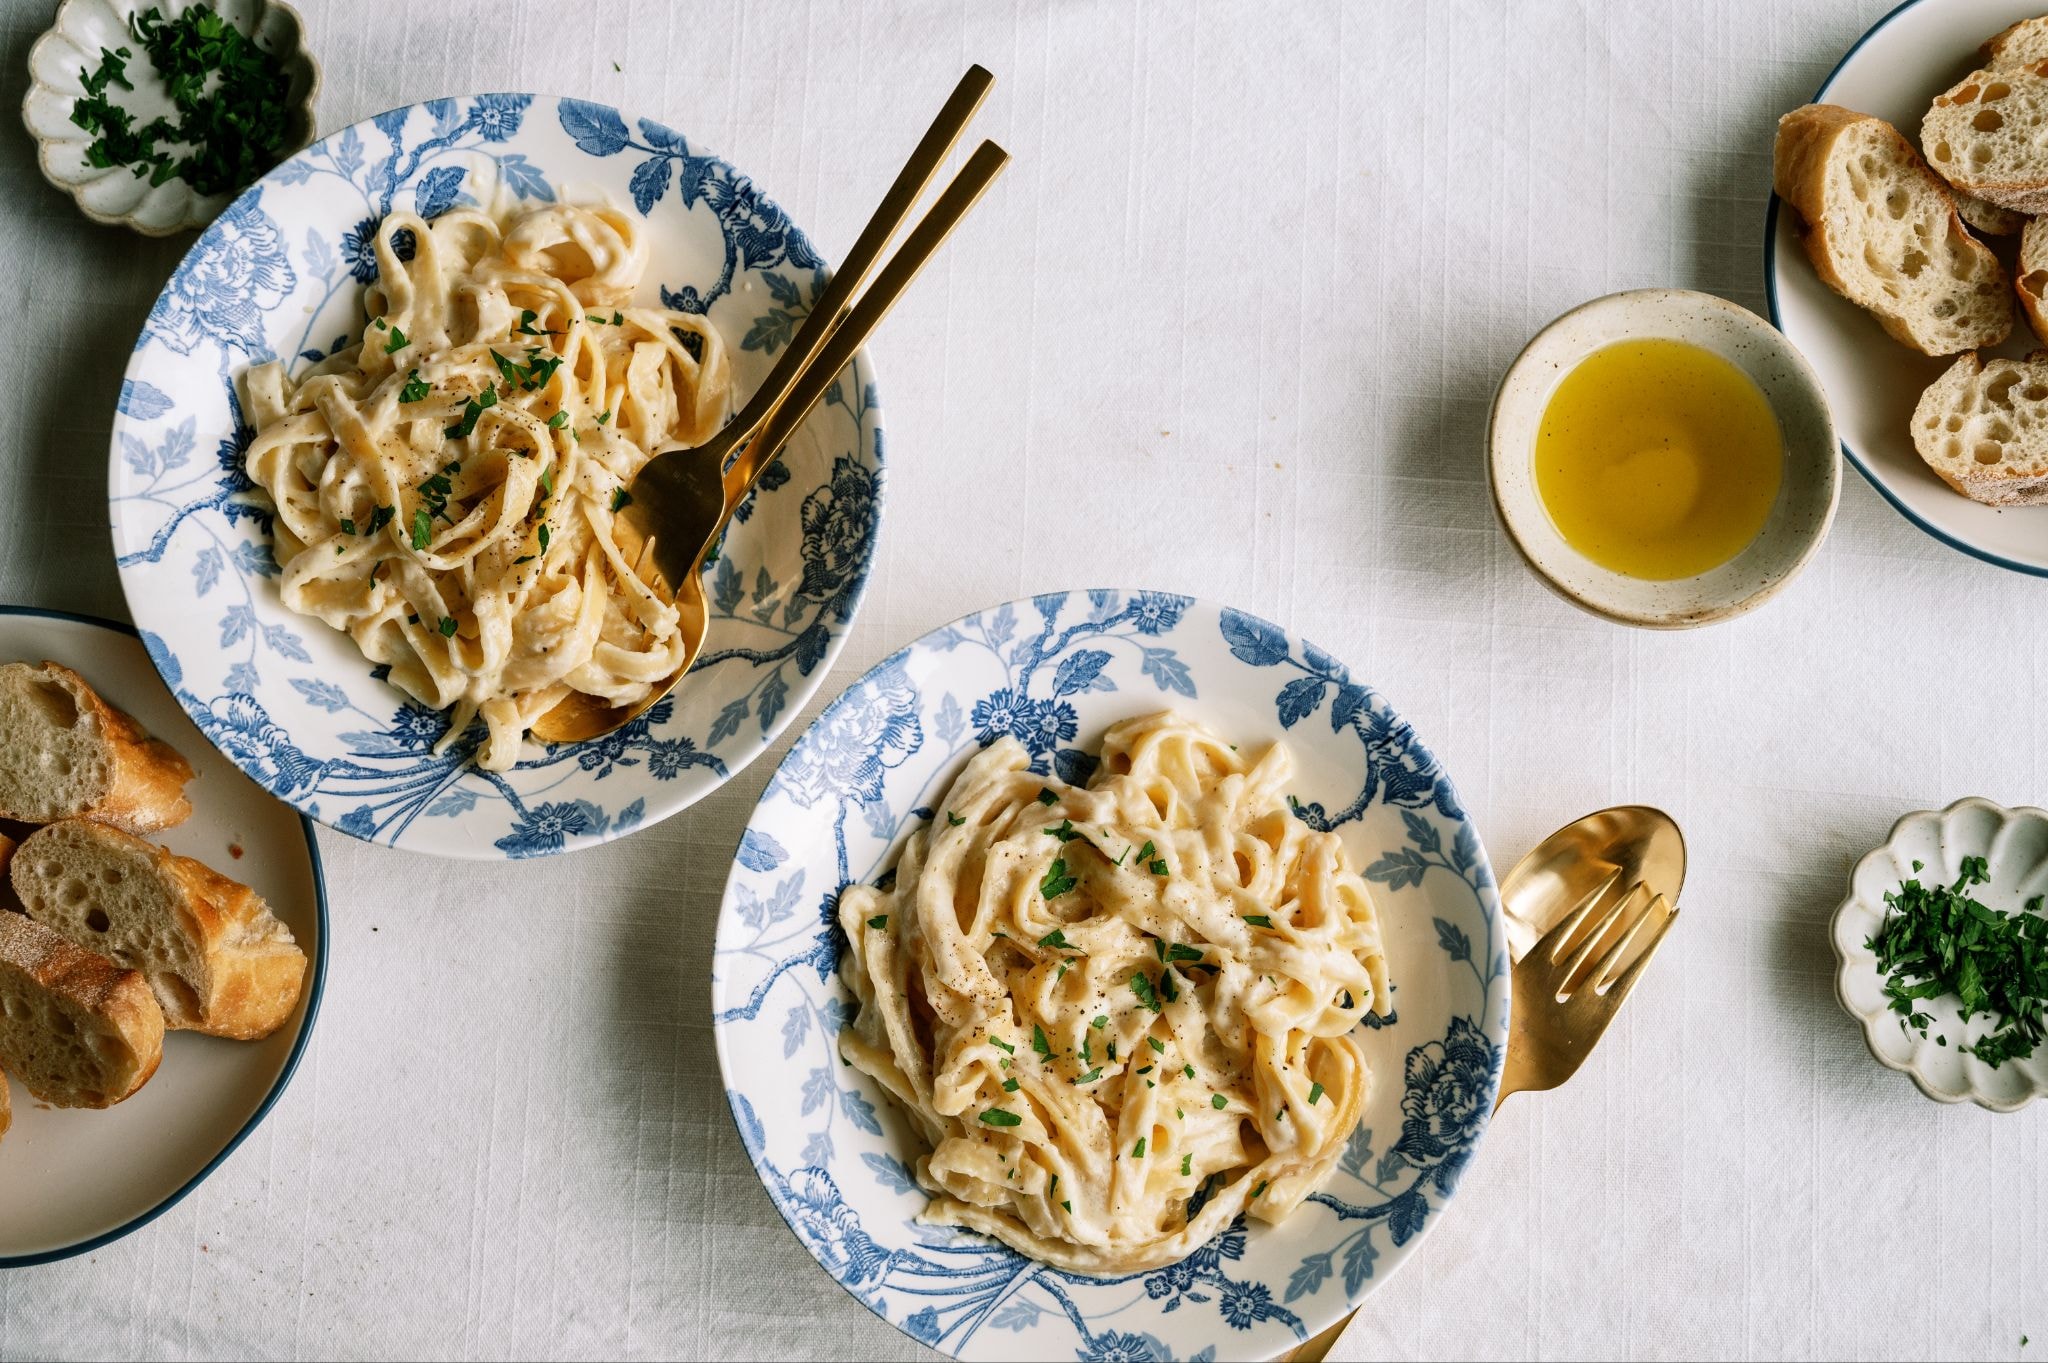
- A Tuscan pasta dish plated with herbs scattered with purpose.
- A lineup of hot dogs that suddenly feels nostalgic.
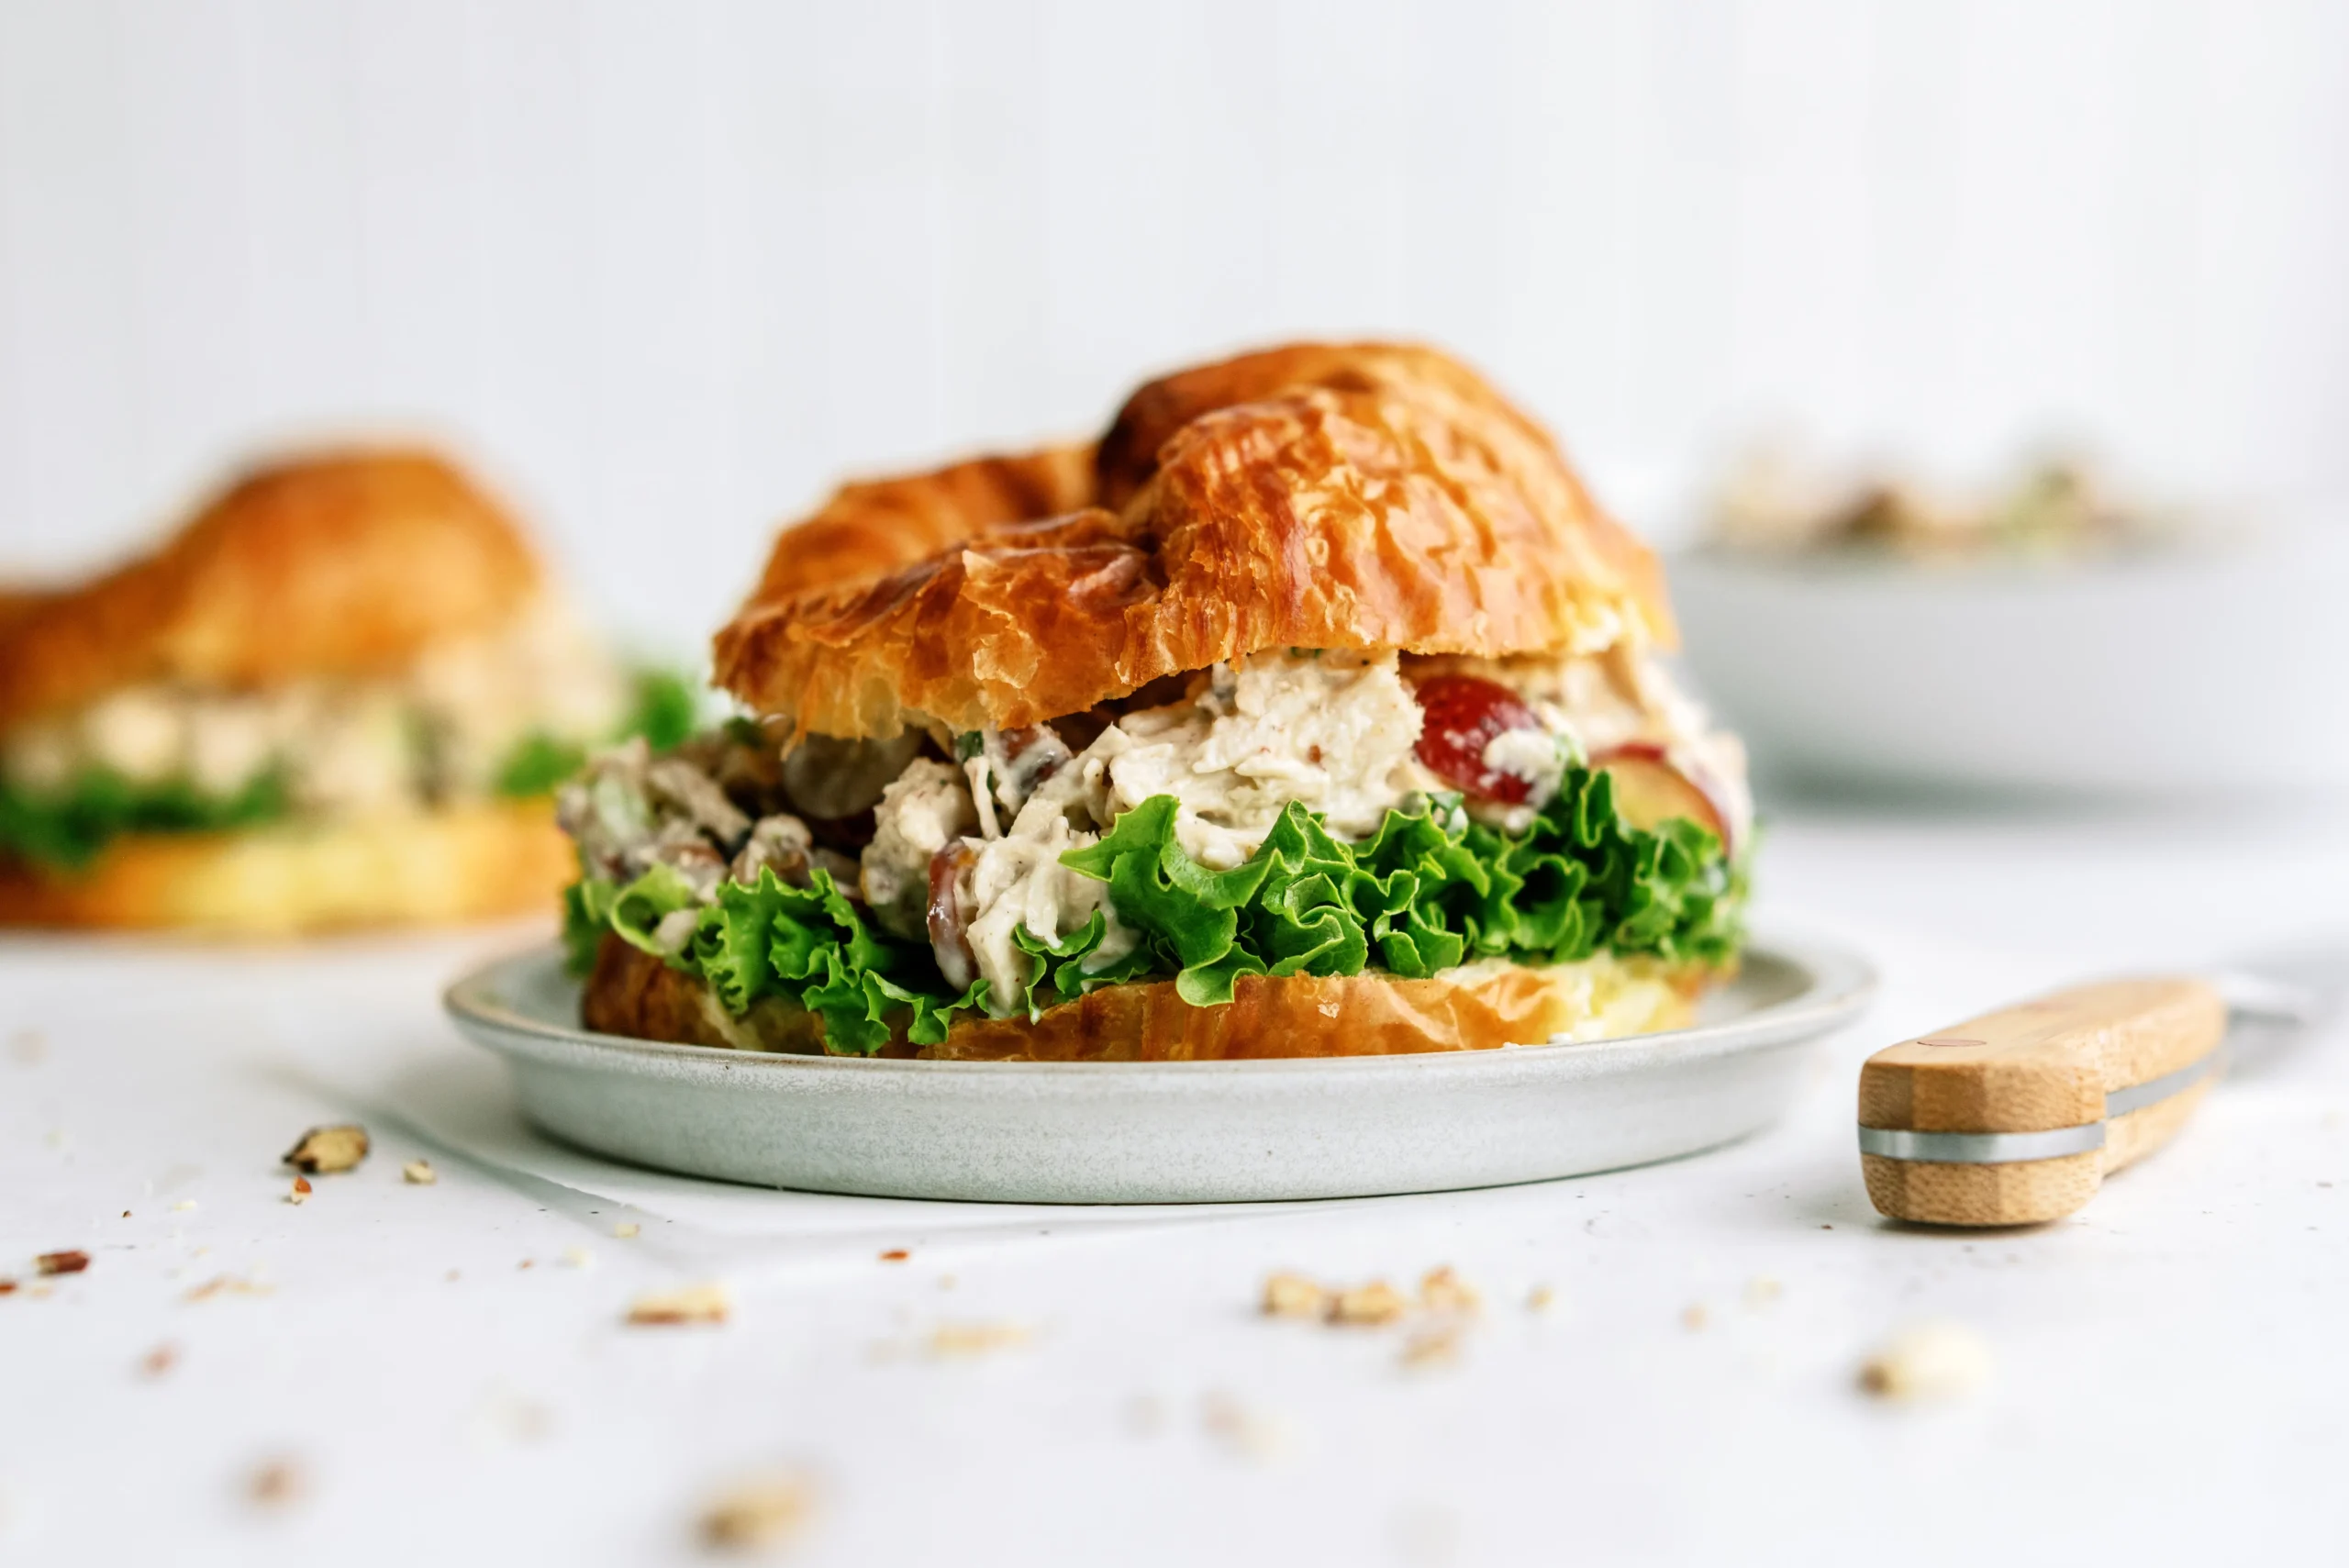
Straight-On Angle
Eye level with the food.
Why It’s Powerful
It highlights height and layers, perfect for burgers, cakes, sandwiches, or tall drinks.
Examples
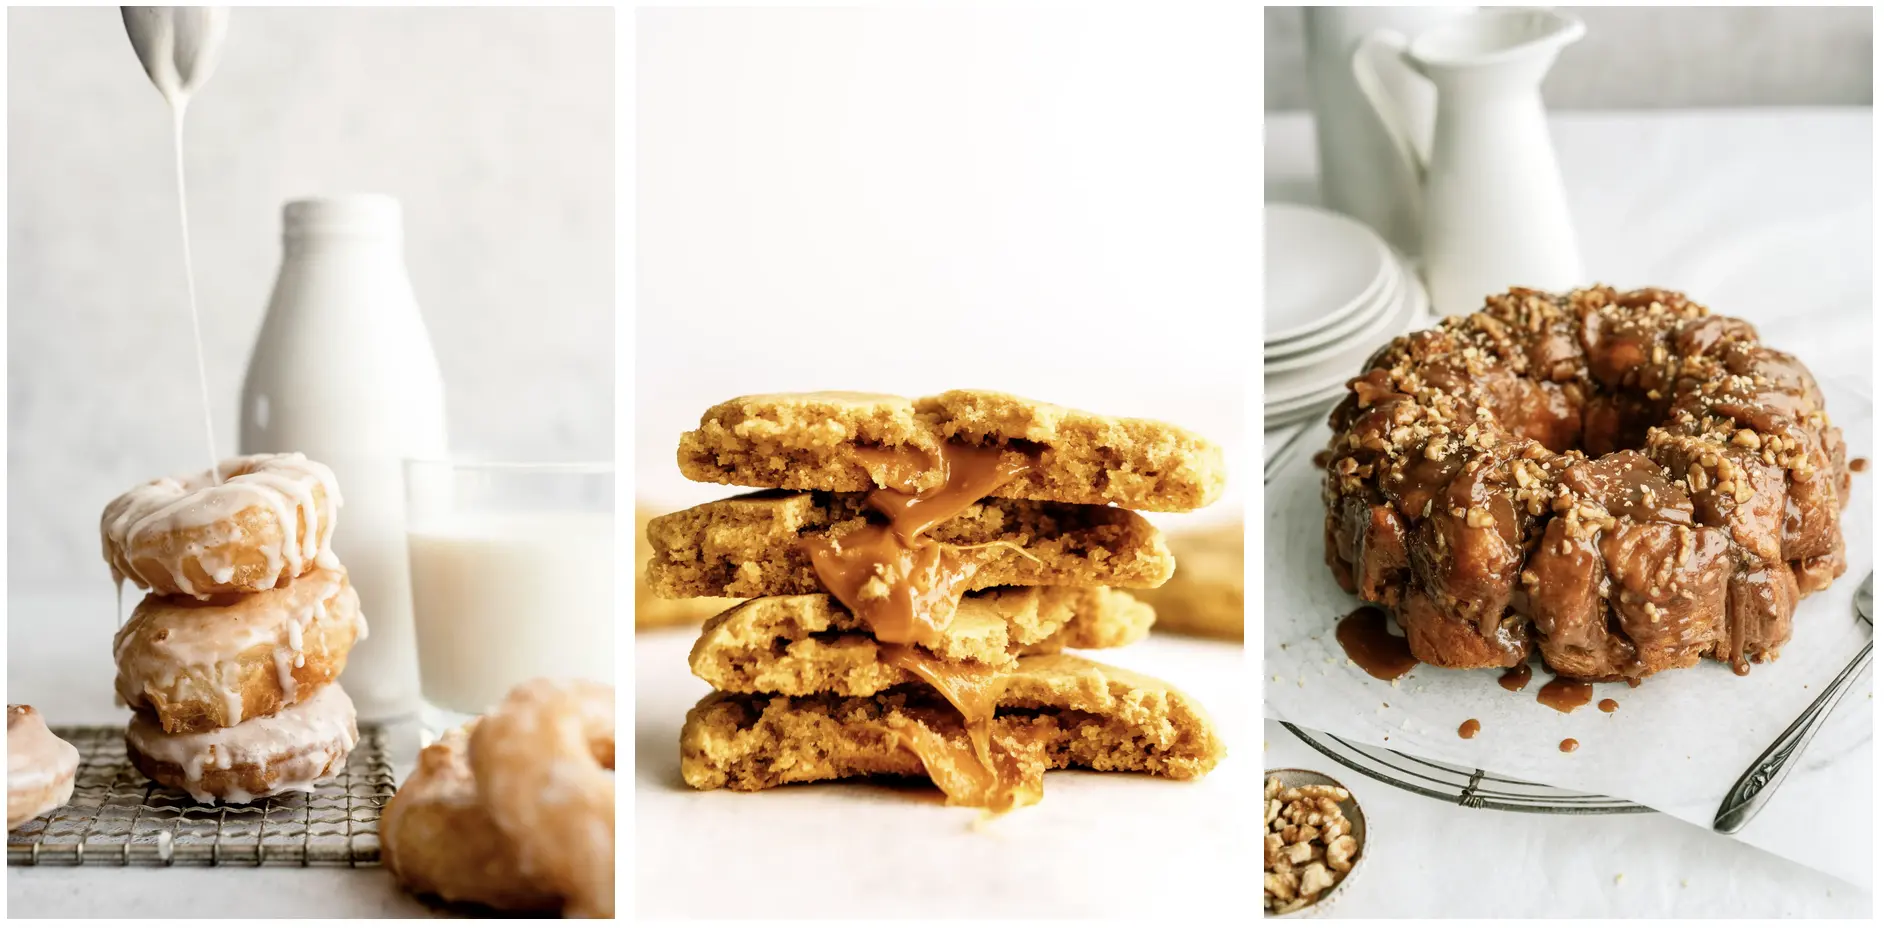
- A stack of glazed donuts caught mid-drizzle, soft, sticky, and indulgent.
- Caramel-stuffed cookies stacked high, with a warm center that slowly spills out.
- A pull-apart monkey bread cake drenched in caramel, rich, messy, and comforting.
Tip: A shallow depth of field can create soft background blur that pulls attention toward the food.
Comparing Angles on the Same Dish
Photographing enchiladas, steak, or cheesecake at all three angles reveals entirely different moods, from structured and neat to bold and intimate, and this is why capturing multiple angles during any food shoot is essential.
For more information, read our article on food photography composition techniques.
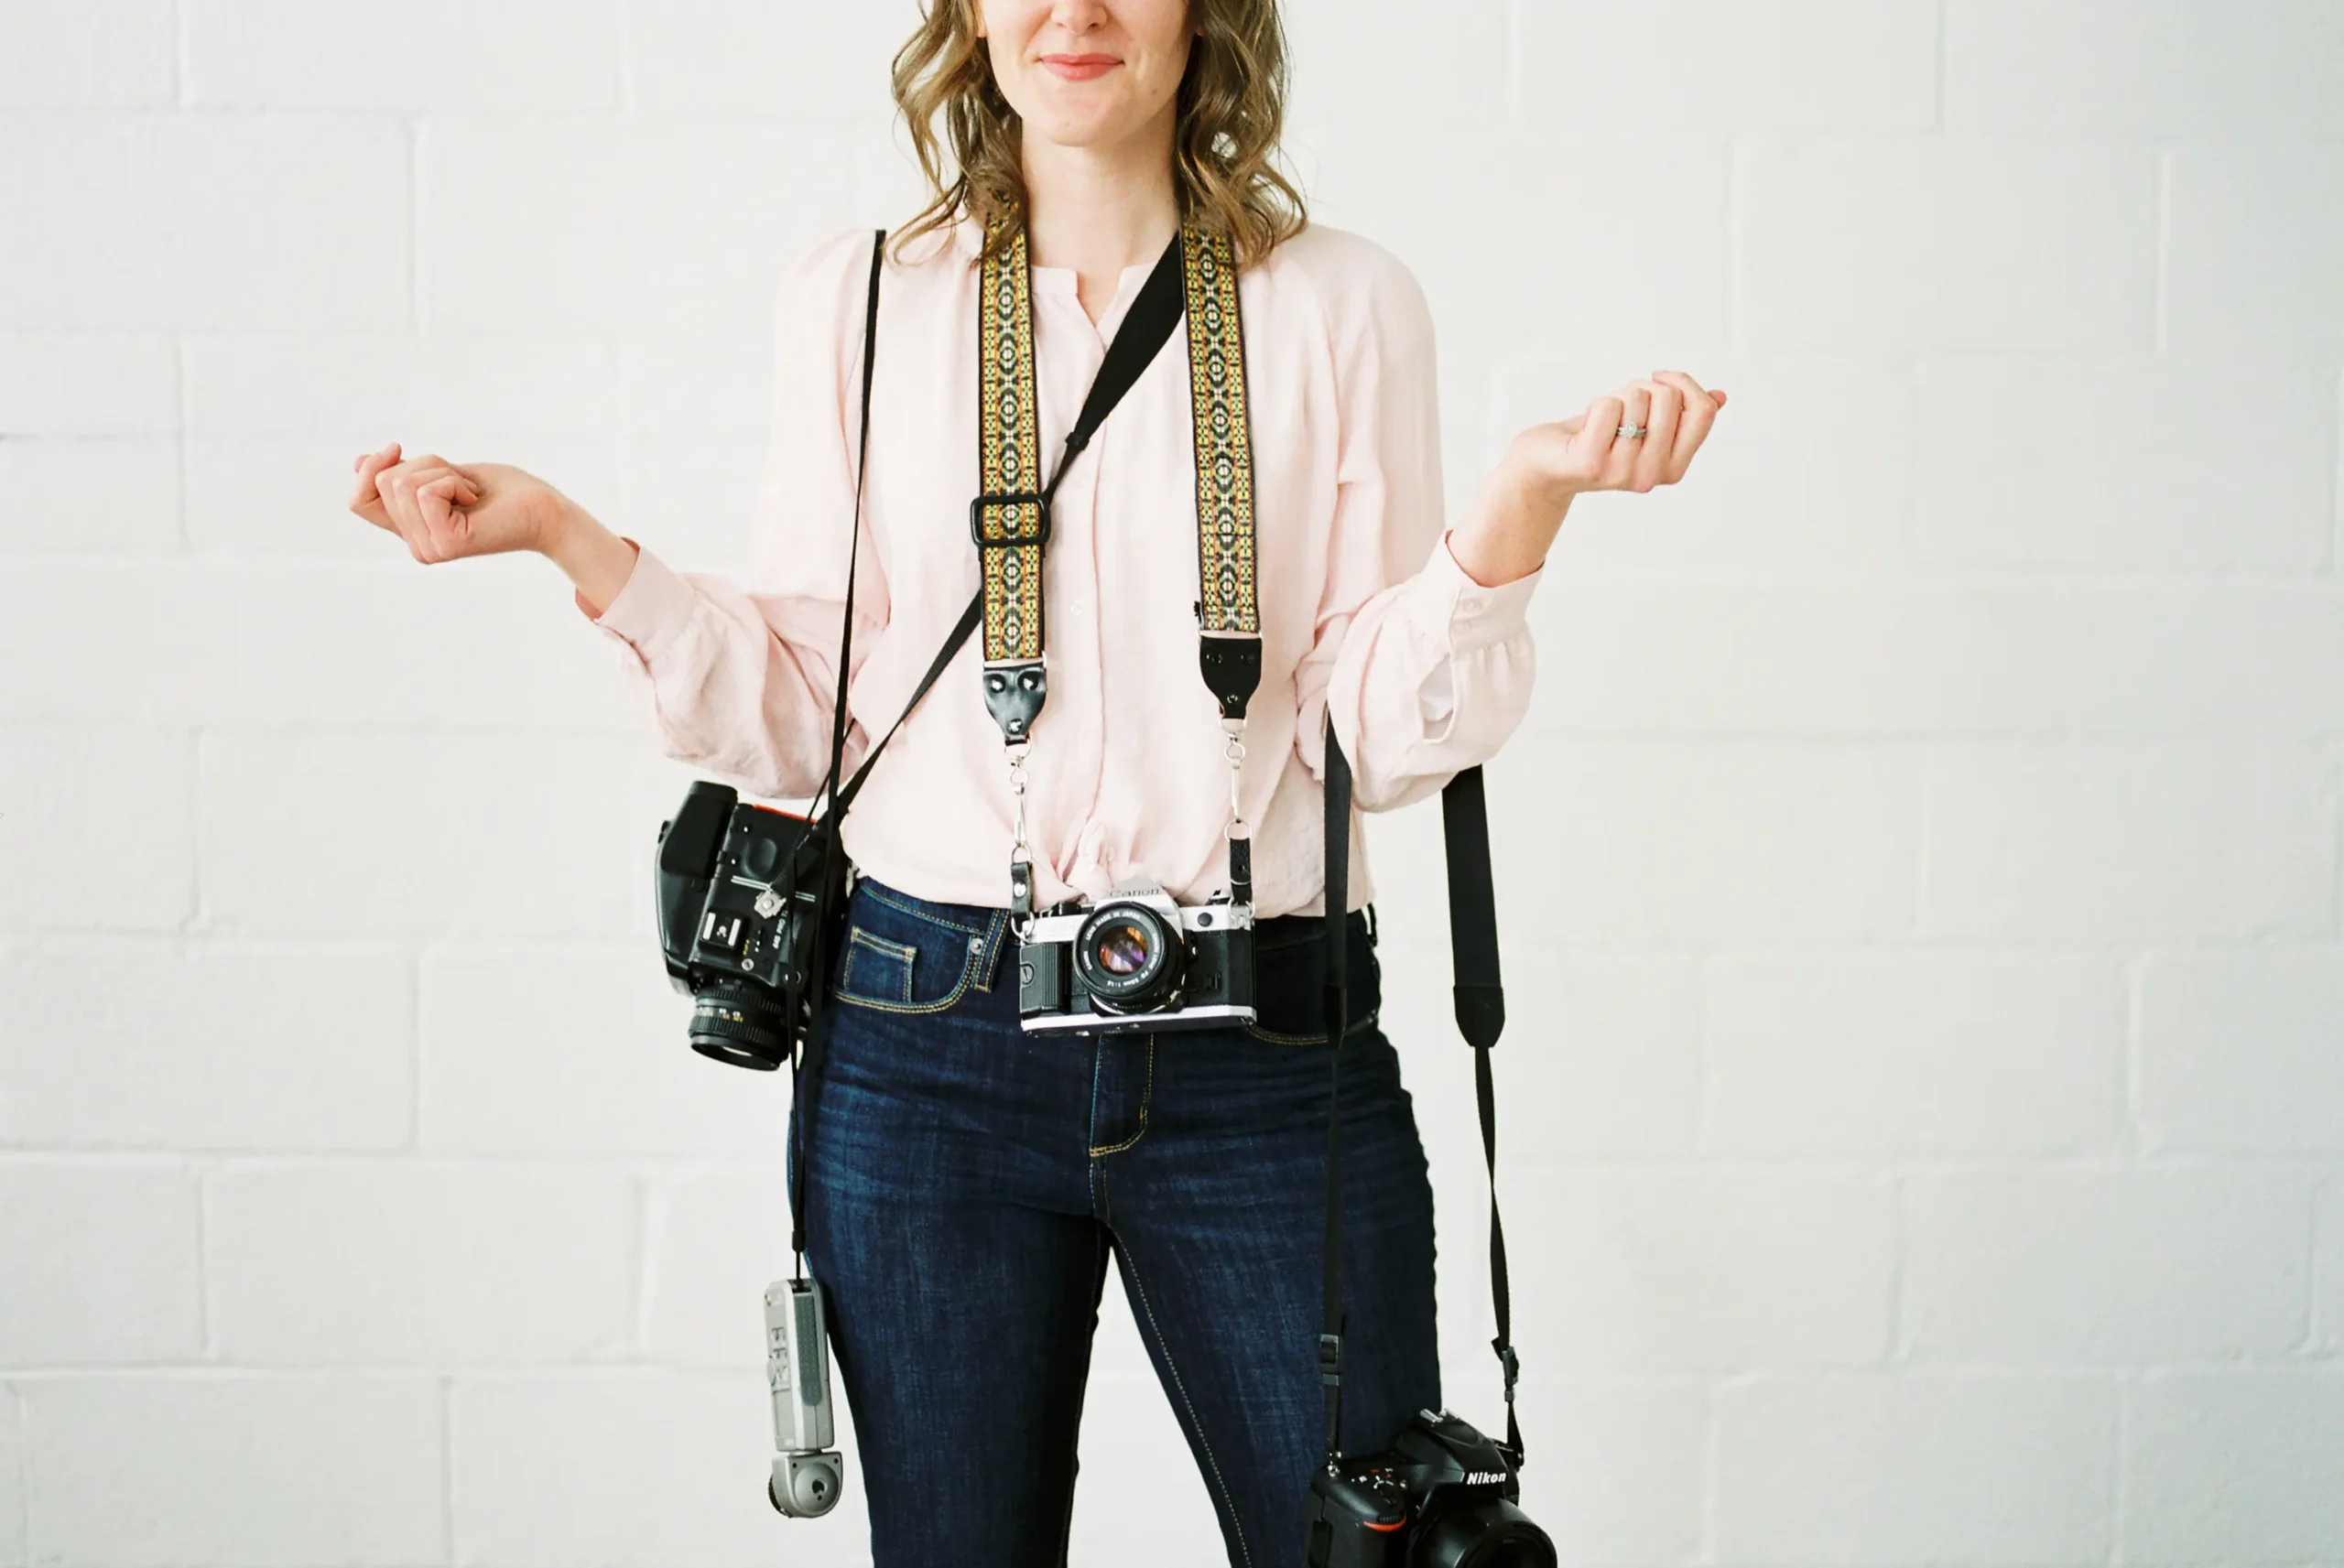
Gear and Camera Settings for Food Photography
Your gear doesn’t need to be expensive; it just needs to support your creative choices. This section helps you understand what’s worth investing in and how to get the most from what you already own.
When to Upgrade Your Gear
Upgrade only when your current gear holds you back. You don’t need cutting-edge equipment to be a great photographer or capture professional food photos; even an inexpensive lens can go a long way when you understand your light.”
For years, I shot professional work on a Nikon D750. It wasn’t trendy, but it delivered. The day I upgraded was the day I actually needed more flexibility, not the day a new model launched.
Sample Gear Setup
- Camera: Nikon Z6 II
- Lenses: 24-70mm, 105mm
- Accessories: Tripod, diffuser, spare battery
- Backup body: Nikon D750
Typical Food Photography Settings
I keep things simple and consistent:
- Mode: Manual
- Aperture: f/4 or higher
- Shutter speed: ~1/125 (higher outdoors). A faster shutter speed helps reduce blur, especially when shooting in direct sunlight.
- ISO: ~400 – but don’t be afraid of a high ISO if the scene needs more exposure.
These camera settings create sharp, texture-rich images without fuss. Shooting in RAW format also gives you far more control over white balance and color during post-production.
Props, Surfaces, and Scene Design
Props and surfaces give your photos personality. This section helps you choose pieces with intention, so your styling feels natural, not cluttered or forced.
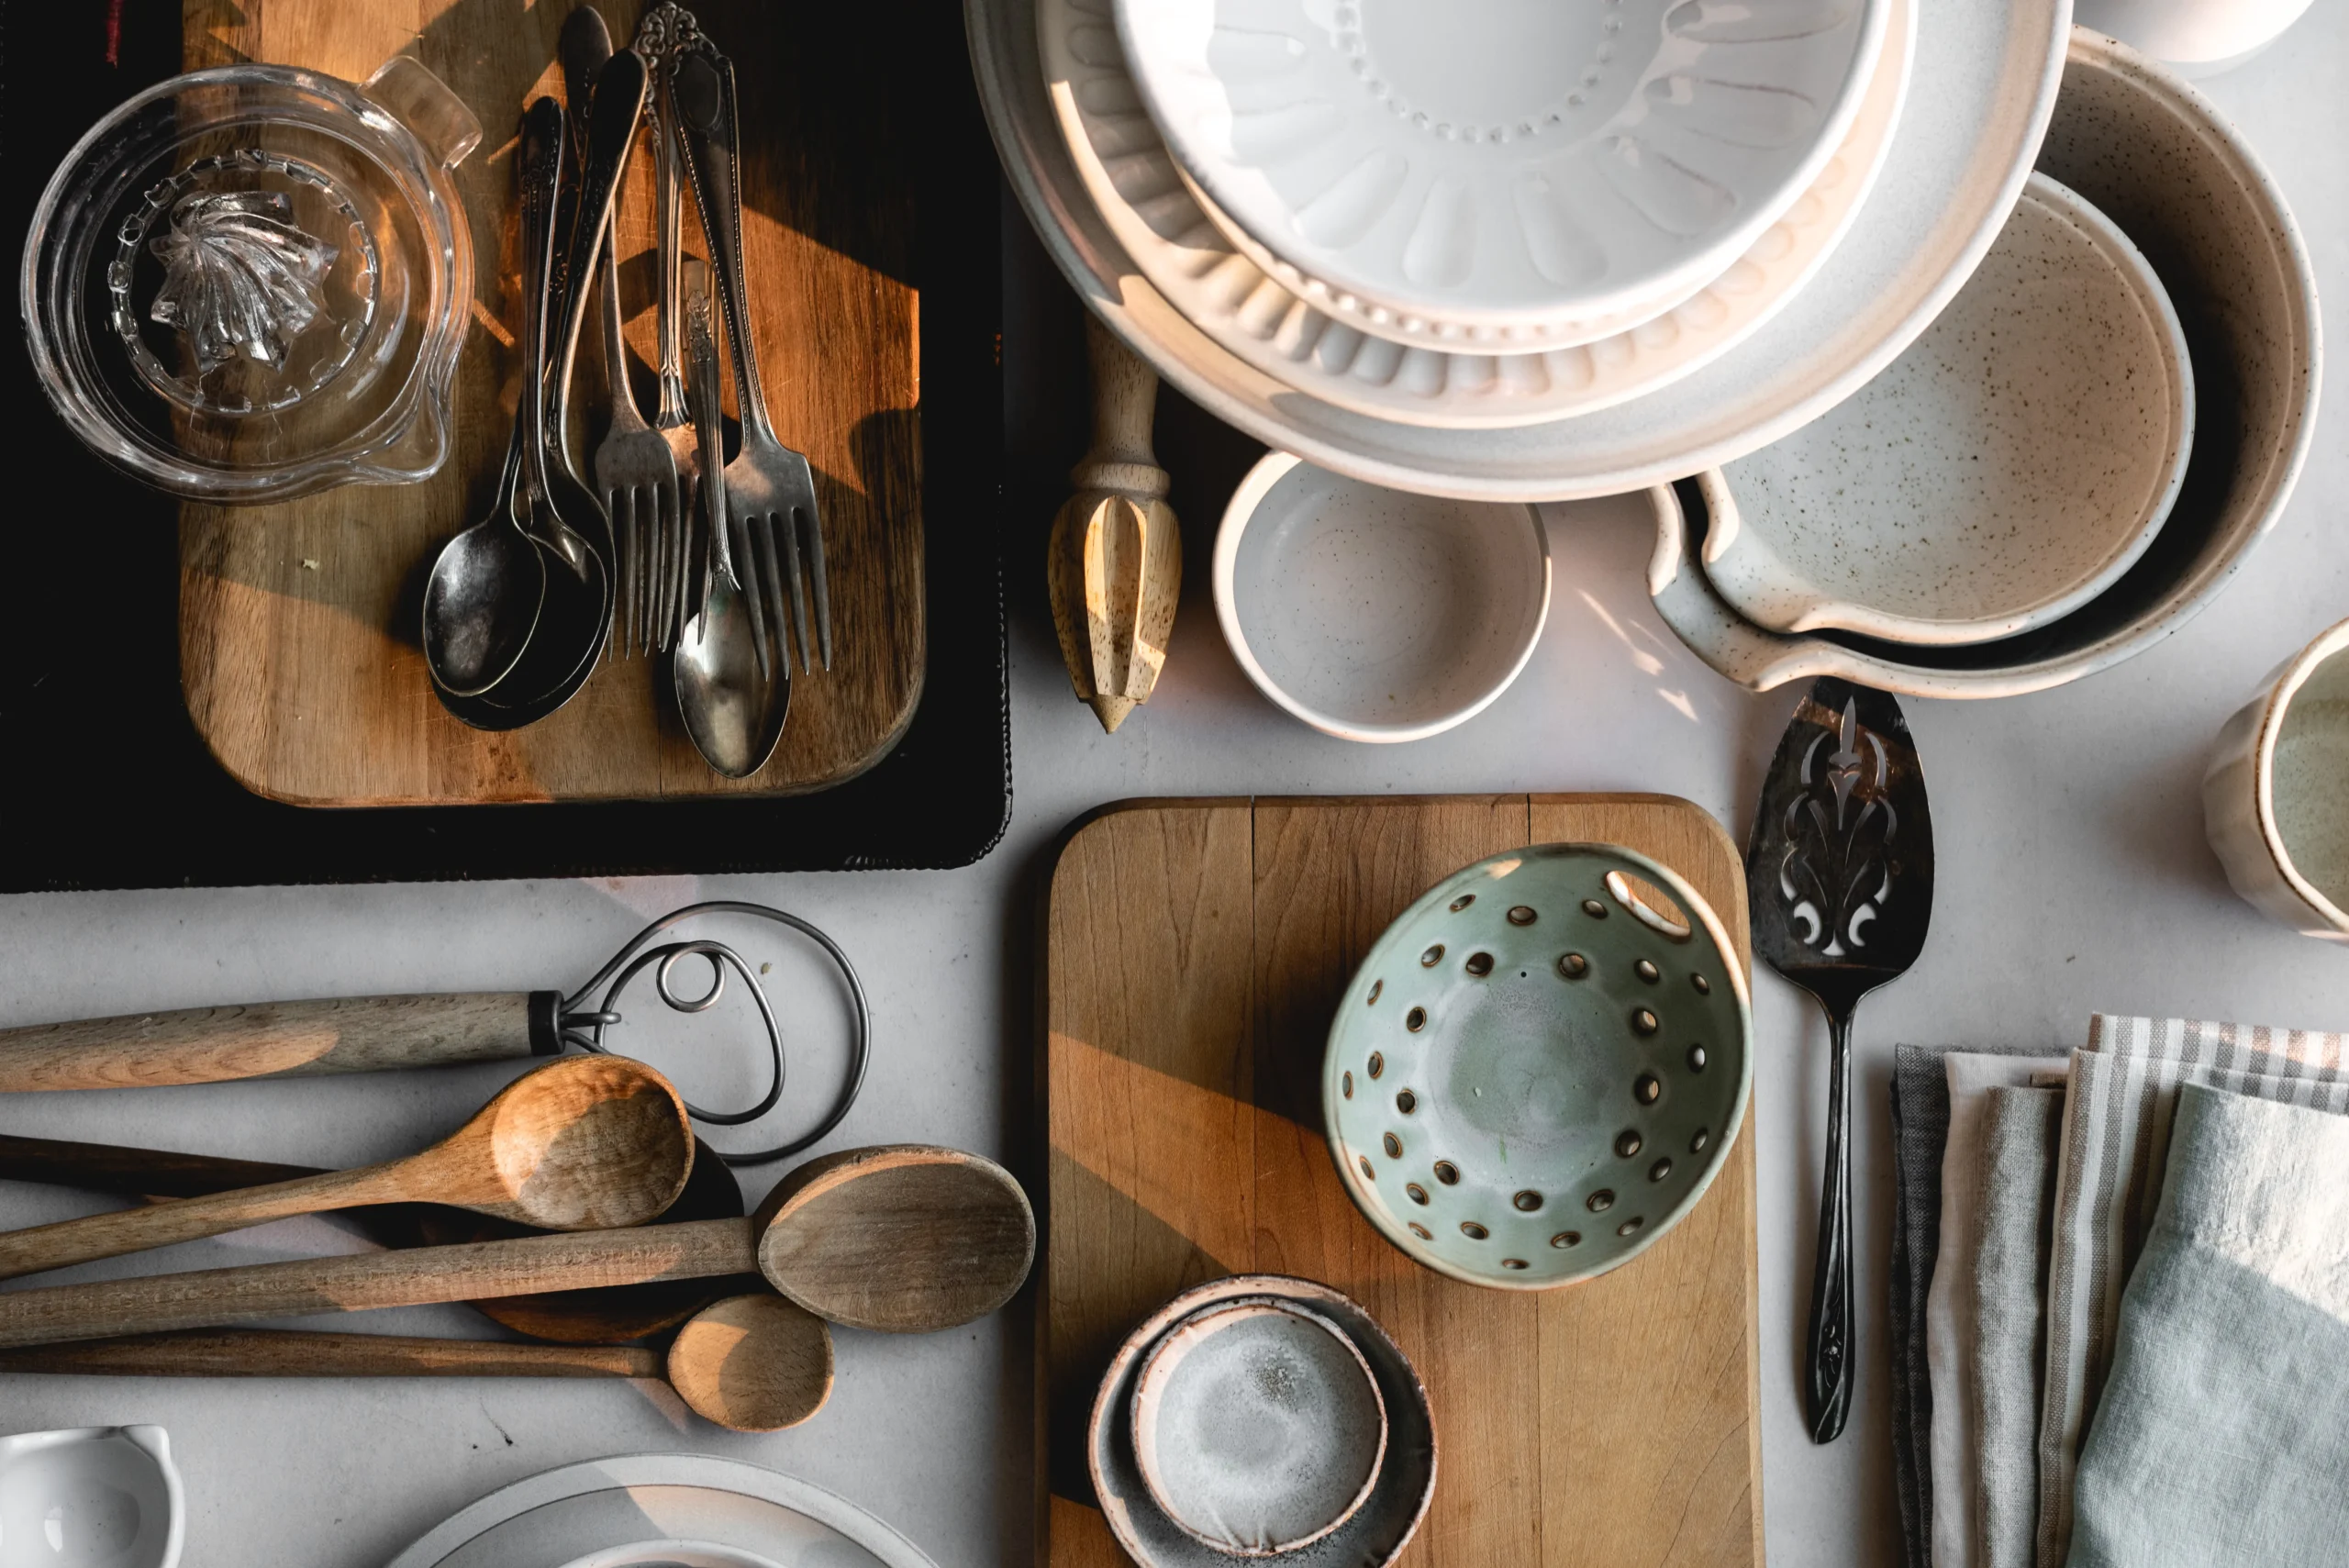
Building a Prop Collection Thoughtfully
Props don’t need to be expensive or extensive. Build slowly. Choose intentionally. A couple of wooden boards or simple ceramics can help you establish your own style without overwhelming your space.
I’ve bought pieces I adored but never used because they didn’t suit any real scene.
How to Dissect a Scene for Props
Before you start buying props, it helps to understand how to look at a scene the way a food photographer does, breaking it down into surfaces, colors, shapes, and subtle details that support the story.
Questions to Ask
- What mood does the surface create, and what complementary colors help support that mood?
- Which dishes match the type of food?
- Should the cutlery feel modern or vintage?
- What garnishes belong naturally?
- What context clues, like linens, flowers, and spills, add to the story?
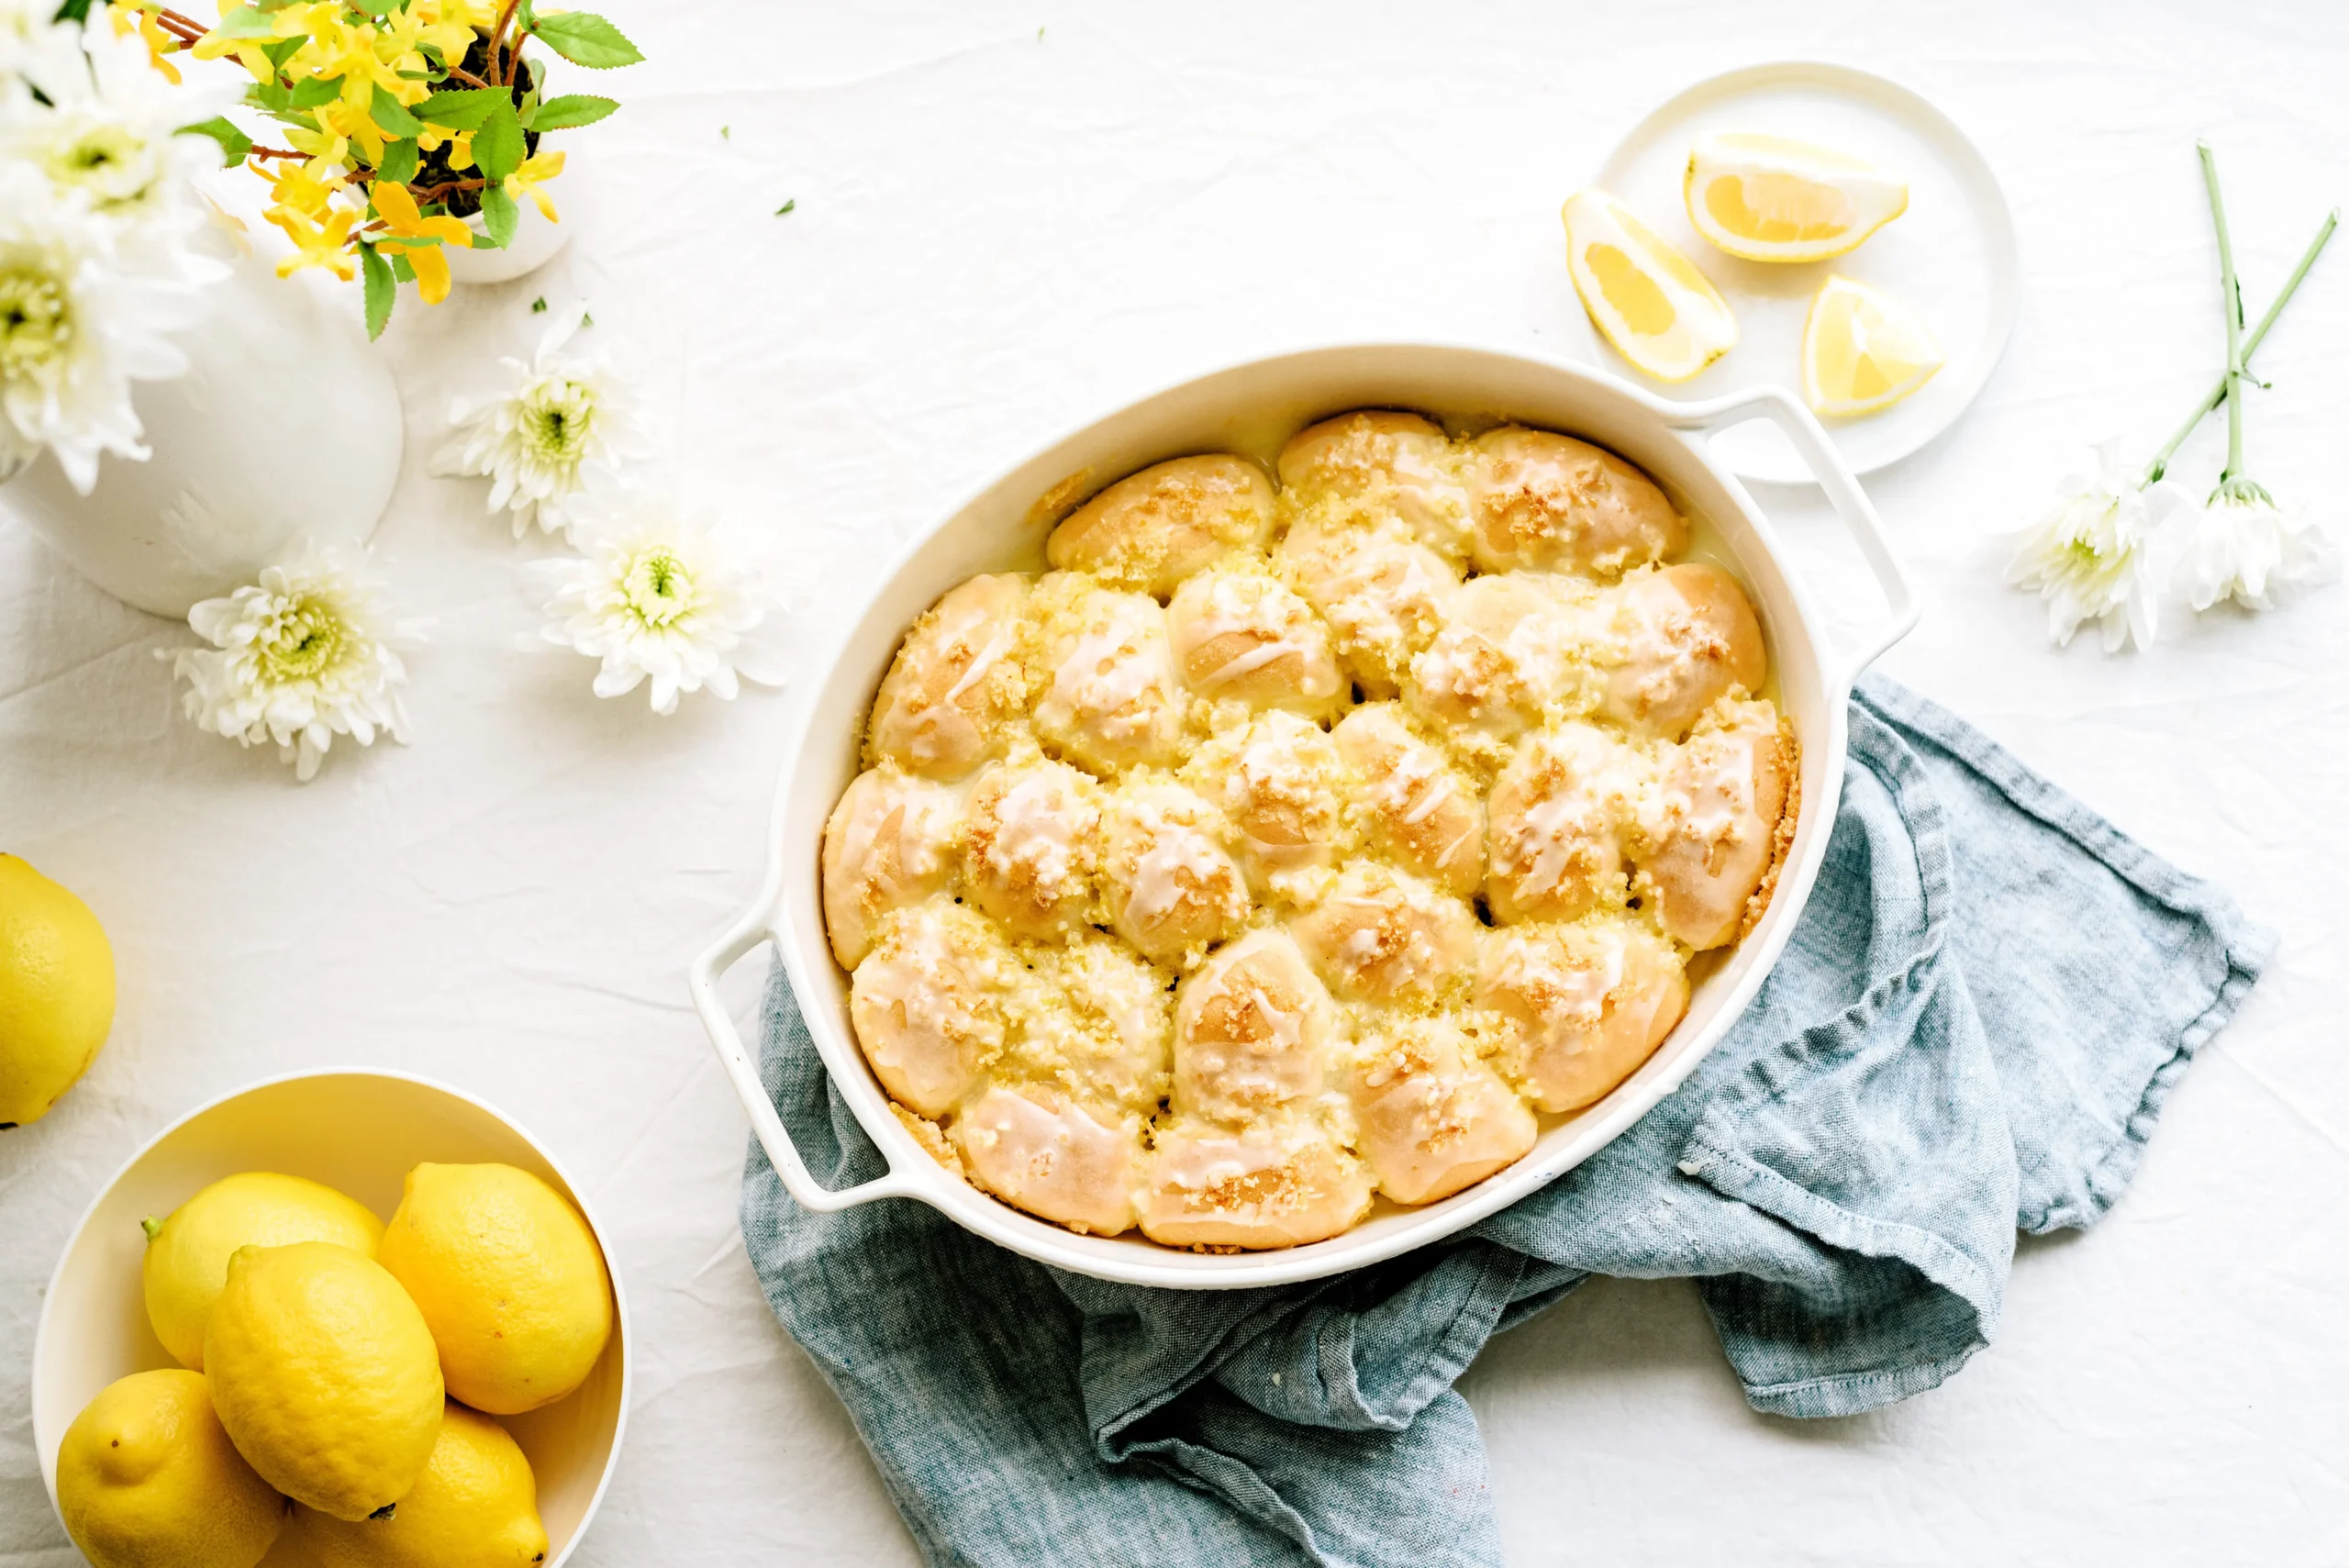
Scene Breakdown Example
Picture a white linen tablecloth.
A bowl filled with lemons.
A 9×13 oval casserole pan.
A vase with a few imperfect stems.
A small plate in the corner.
A soft blue linen.
Lemon zest scattered lightly.
Each element is subtle, but together they feel like a moment rather than a setup.
Surfaces and Backdrops Often Used
Marble for brightness.
Stone for grit.
Wood for warmth and nostalgia.
Fabric for softness.
DIY painted boards for precise color control.
Each one offers interesting textures that boost the visual appeal of your scene.
Garnishes, Crumbs, and Beautiful Messes
Garnishes and crumbs bring a sense of life to your photos. This section explores why small messes matter and how to use them intentionally to make food feel irresistible.
Why “Mess” Matters
Food is at its most inviting when it feels alive. A few crumbs, a stray herb, a smear of sauce, these aren’t flaws. They’re the heart of good food styling, and many professional photographers rely on this balance of precision and looseness. They’re evidence of movement, of cooking, of humanity.
I often finish a shoot with flour on my sleeves, multiple dishes in need of washing, and more than one rag over my shoulder to wipe my hands on.
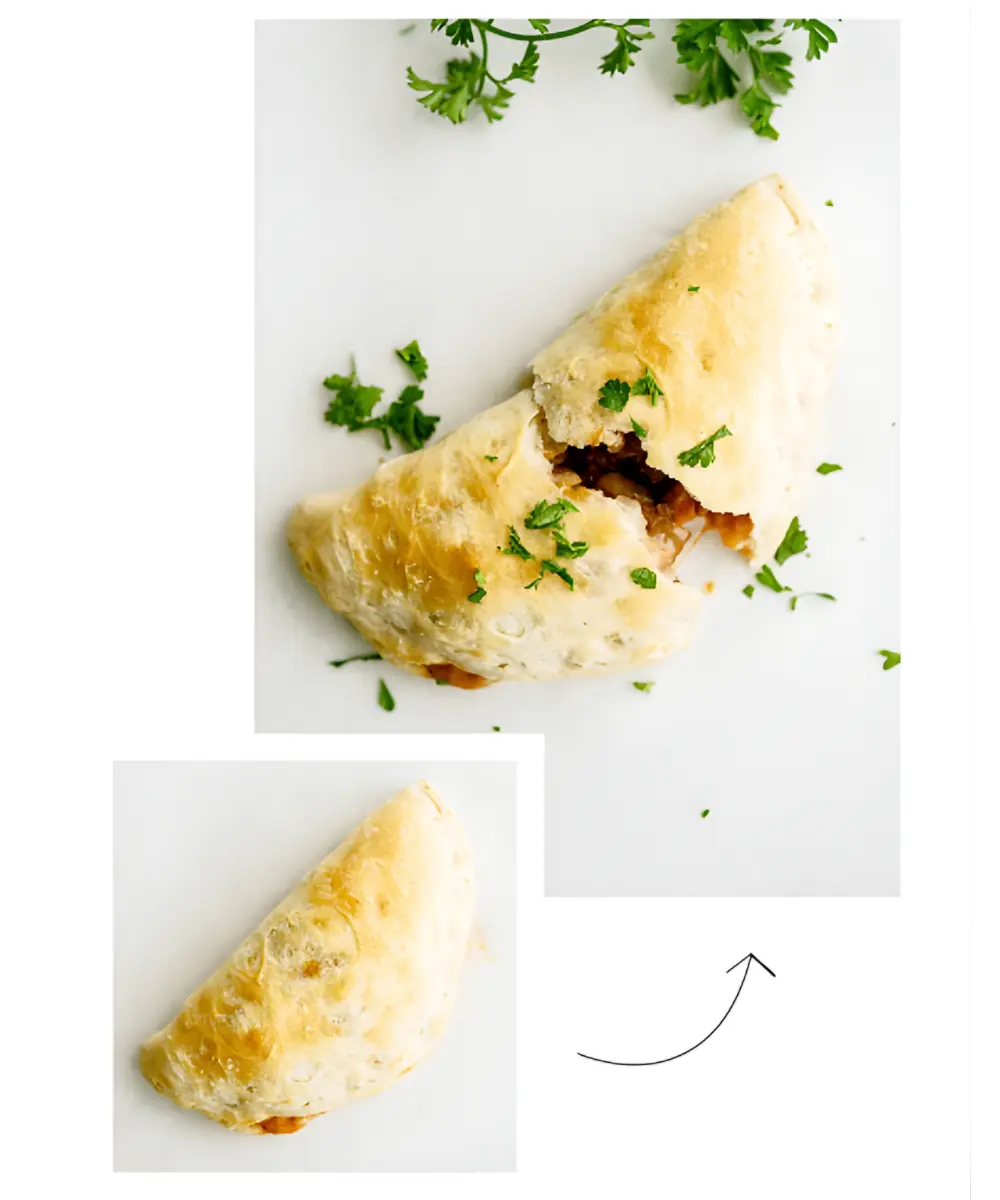
Elevating a Dish with Simple Garnishes
A pizza pocket once went from dull to delicious simply by opening it, letting cheese peek out, and adding a sprinkle of parsley nearby. The dish suddenly had a voice. A tiny detail like this makes a huge difference in the visual appeal of the final image.
Go-To Garnishes and Elements
- Herbs: rosemary, thyme, basil, dill, mint, chives
- Spices: cinnamon, salt, pepper, sugar
- Deconstructed ingredients: cocoa powder, caramel, chocolate chunks, fresh fruit, cheese
- Crumbs: bread, crackers, cookies
These details add aroma, texture, and authenticity, even through a screen.
Garnish Case Studies
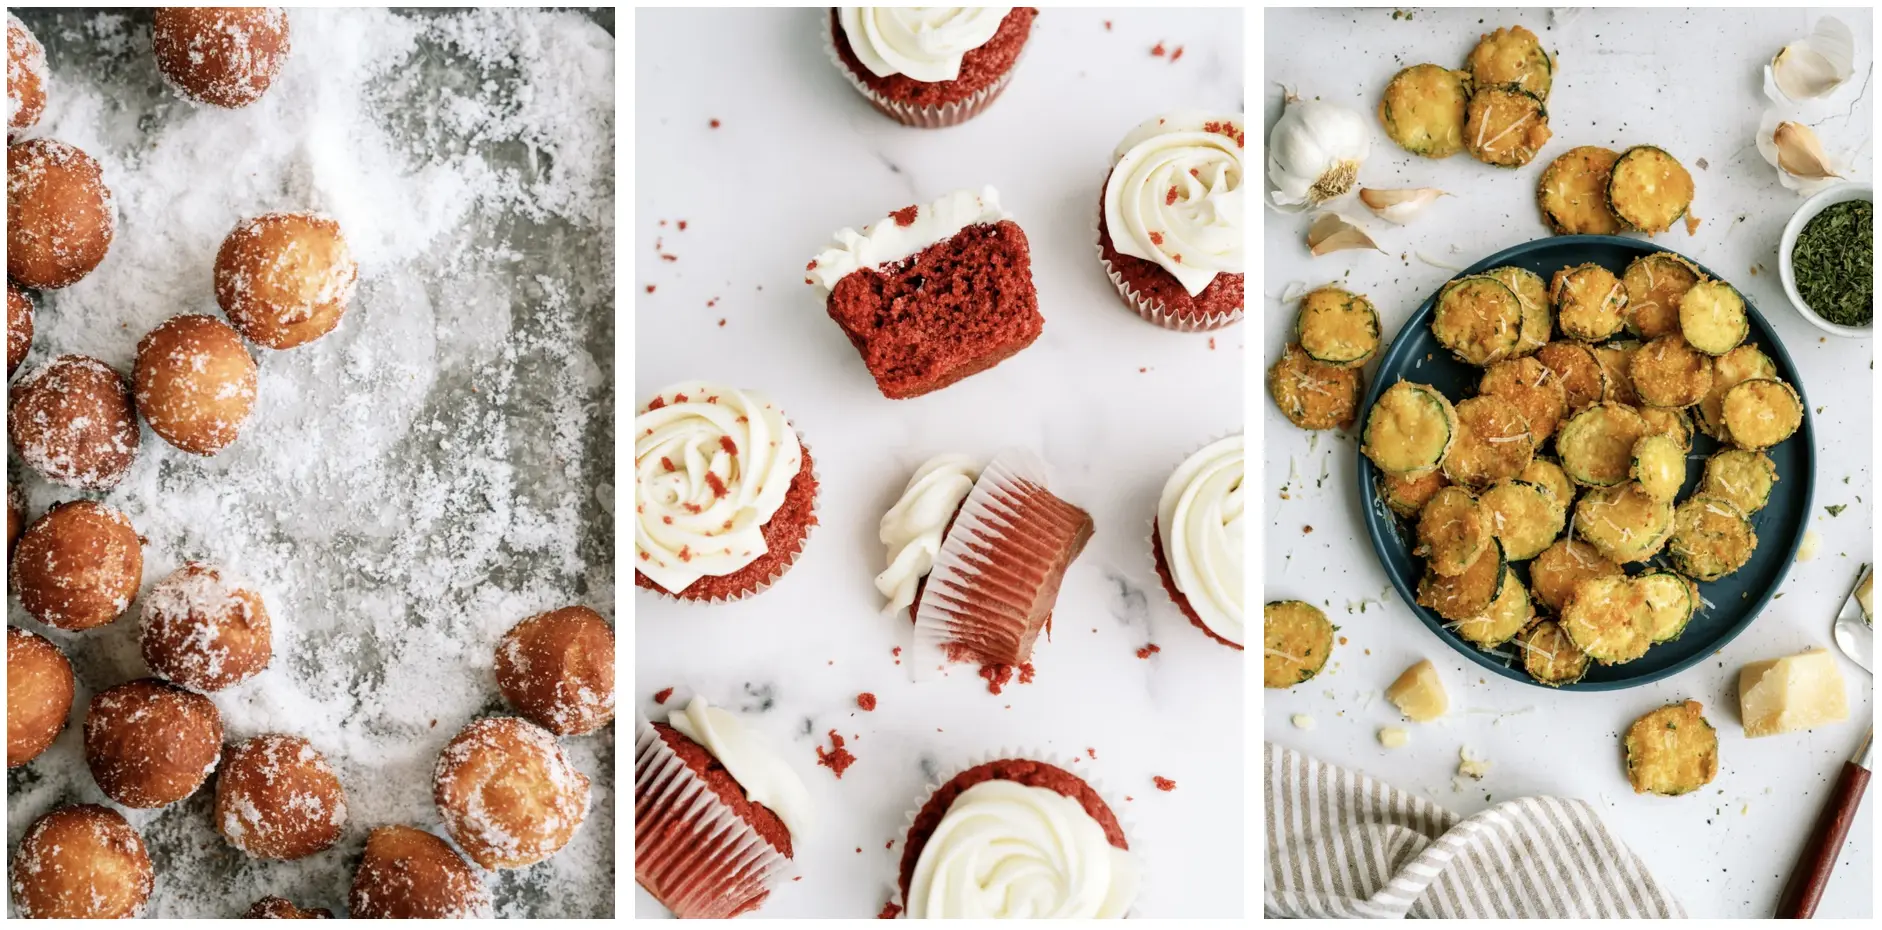
- Donut holes dusted with the sugar left behind in the pan.
- Red velvet cakes topped with cake crumbs.
- Fried zucchini finished with Parmesan crumbs.
Building Layers for Depth and Story
Layers turn a single dish into a full experience. In this section, you’ll learn how to build scenes that feel rich, dimensional, and full of meaning.
Thinking of Food Photos Like Paintings
Food photography comes to life through layers. You can enhance the feeling even more by playing with depth of field to guide the viewer’s eye through the scene.
The food is the subject. The surface is the setting. Props add context. Garnishes whisper detail. Together, they create a visual story, not just a recipe.
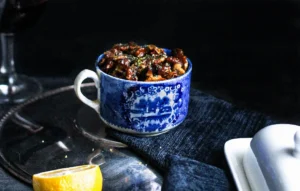
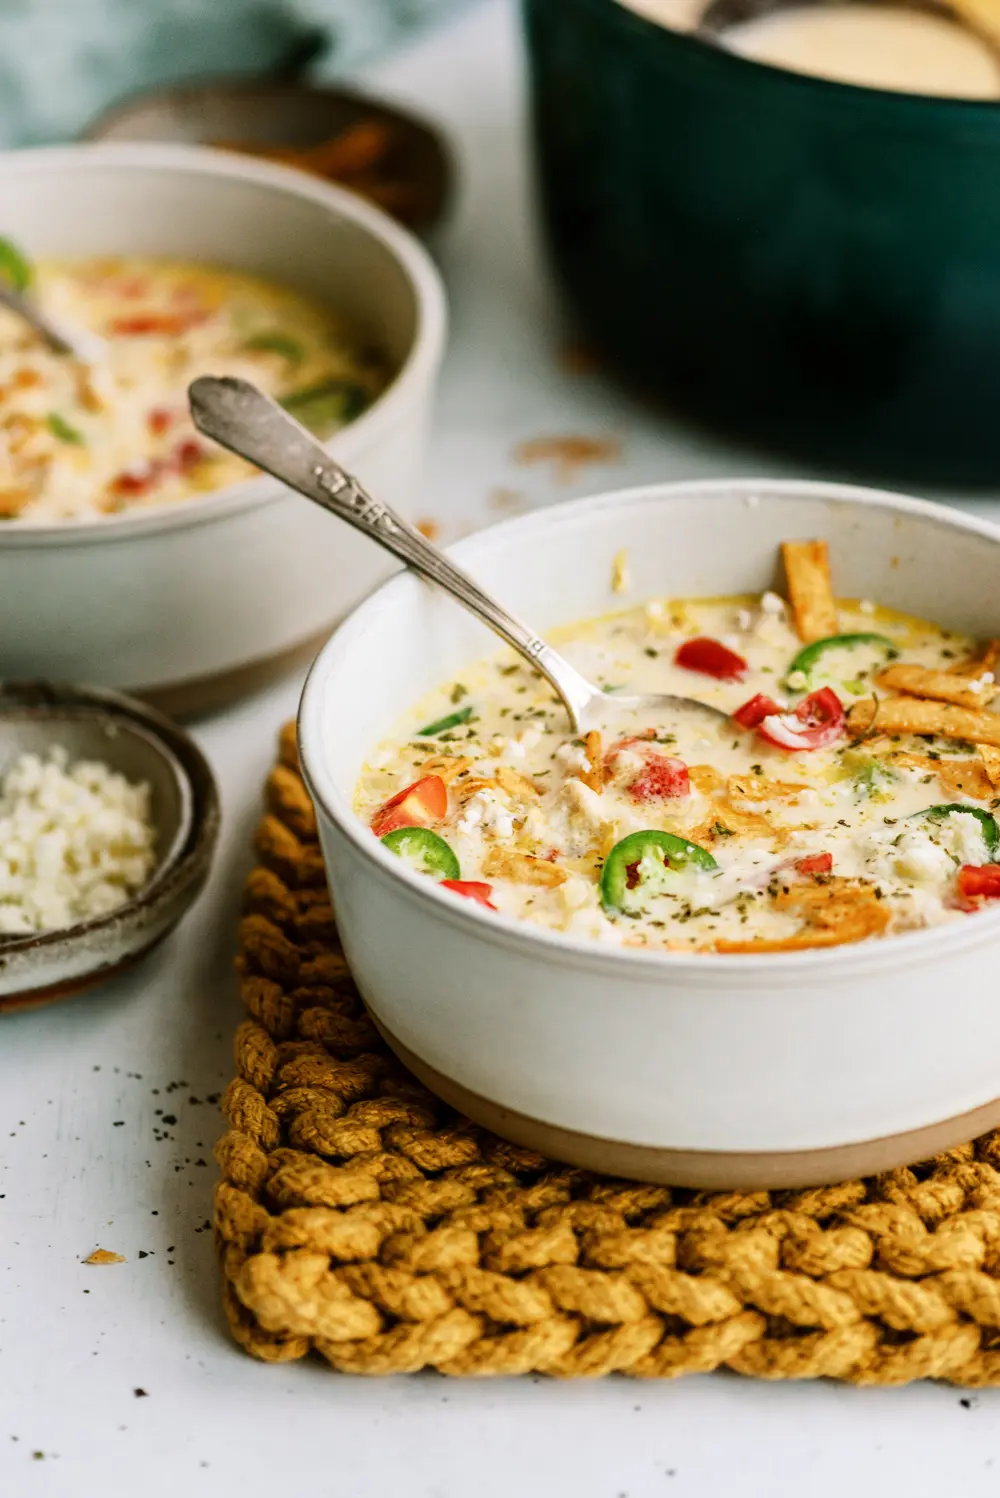
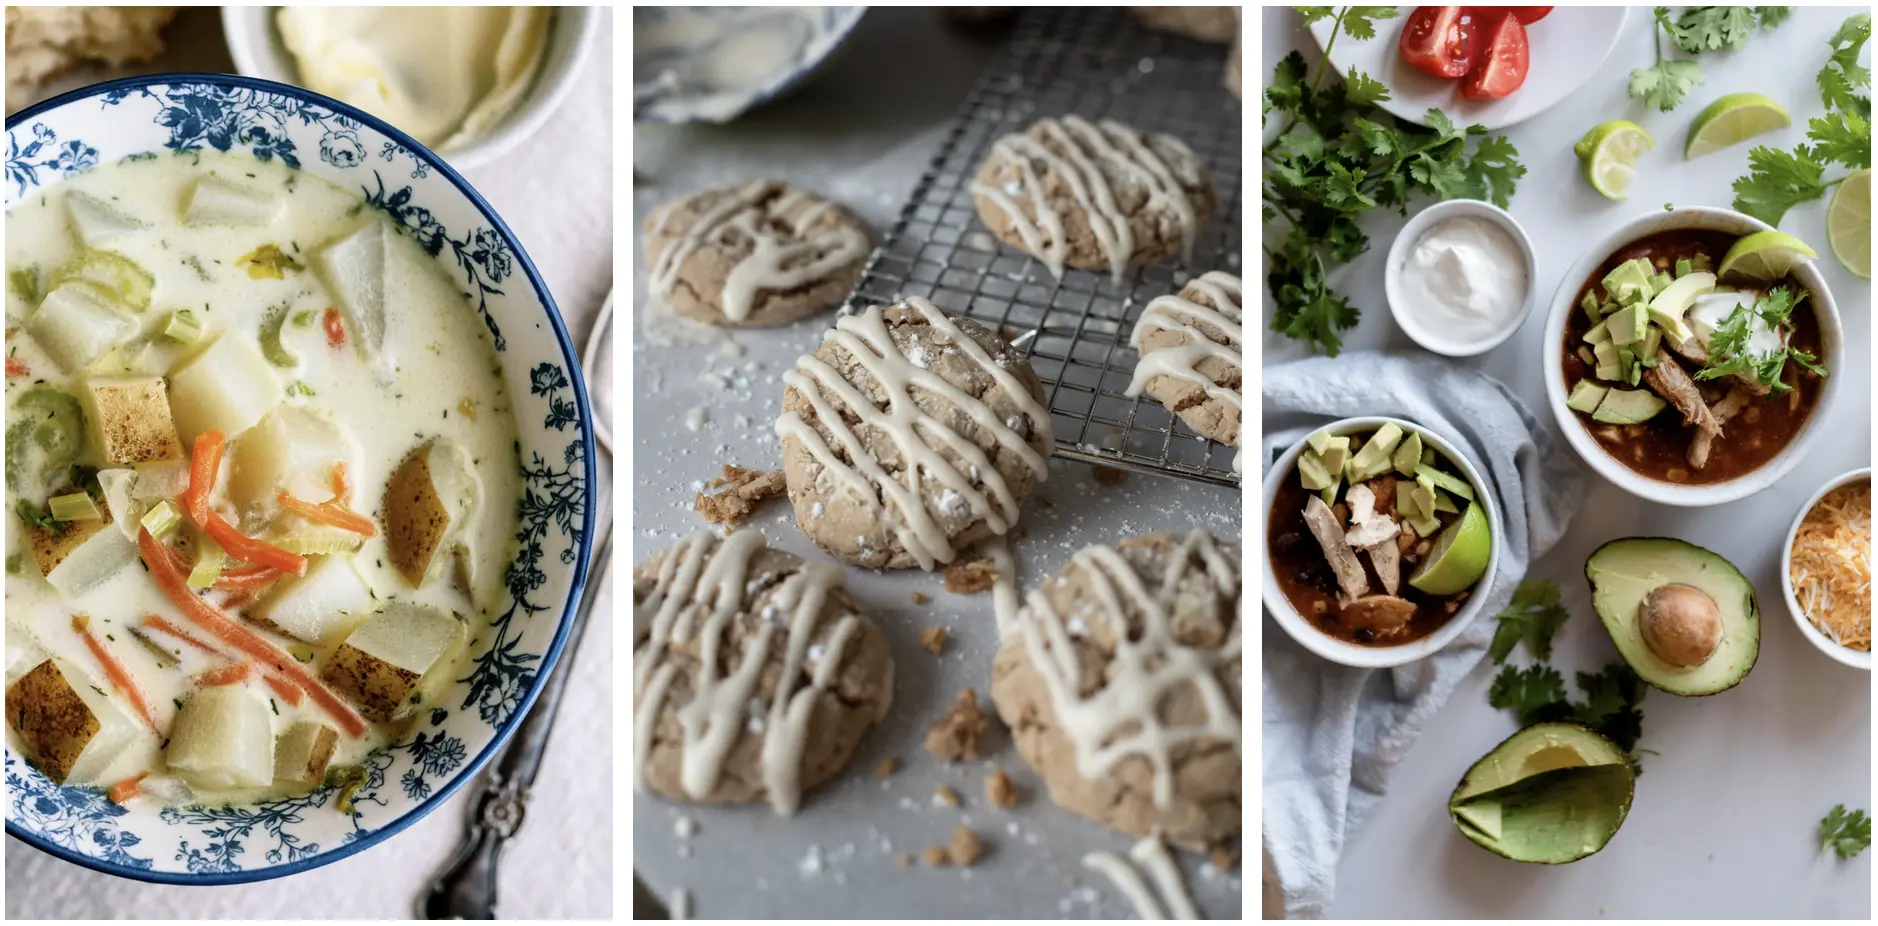
Chicken Tortilla Soup Layer Breakdown
Add a spoon, a hot pad, pinch bowls, a second bowl behind it, a pot in the corner, and a simple bowl of soup becomes dinner in someone’s home. These added elements support the main focus while giving the scene more depth without clutter.
Adding Context & Product to Your Food Photography
Whether you’re shooting for fun or for brands, context changes everything. This section shows how small details can elevate a dish and how to shift focus when the product, not the food, is the star.
Using Context Clues to Elevate a Dish
Context brings emotion into a food photo. With just a few thoughtful elements, you can guide the viewer toward the feeling you want them to experience: comforting, fresh, elevated, rustic, or anything in between.
Fancy Baked Potato Example
To elevate a baked potato without overstyling it, I added:
- A soft napkin
- A small appetizer plate
- Fresh herbs
- Flaky sea salt
- A light gray backdrop
- A vintage utensil
- A warm candle glow
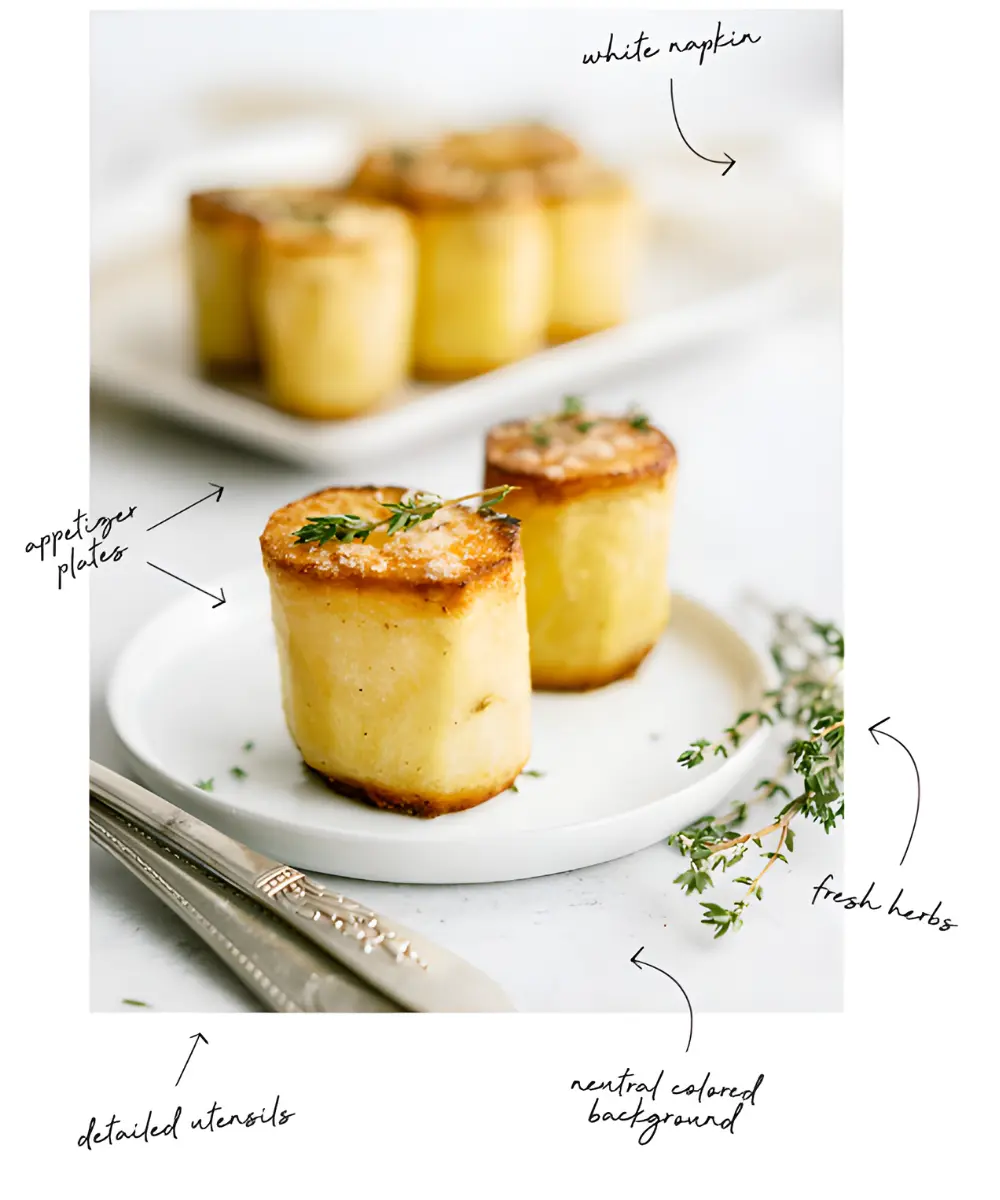
These small touches changed the emotional tone of the entire image, elevating it from a simple baked potato to a perfectly plated dish worth capturing.
Adding Product for Commercial Work
Shooting for brands requires a different approach than shooting purely for beauty. This is where you balance creativity with clarity, making sure the product stays the hero while still producing images that feel warm and inviting.
Shifting the “Star” of the Photo
With brand photography, the product (not the dish) takes center stage. That means clean compositions, space for text, and crisp labels.
Technical Considerations
Shoot between f/4 and f/8 for sharp product images. Avoid a narrow aperture unless you want every background detail to be visible.
Multi-Use Product Imagery
Create horizontal and vertical shots with extra whitespace so brands can crop and adapt the images for multiple uses.
Building a Food Photography Portfolio
Your portfolio is your visual résumé. This section shows how to build a body of work that reflects the kind of projects you want to be hired for.
Turning Practice into Proof
A strong portfolio begins with what you already have: your own meals, your favorite snacks, your weekend bakes. Practice becomes proof.
If you’ve ever shot weddings or events, you likely already have food photos tucked away. Don’t overlook them.
Using Personal Projects
Some of my strongest portfolio pieces came from personal experiments, recipes I was curious about, or moments I wanted to capture.
What Not to Include
If you don’t want to shoot a particular dish or type of food again, don’t display it. Your portfolio attracts the work it reflects.
Photograph What You Love to Attract Ideal Clients
Your passion is one of the strongest marketing tools you have. This section explores why photographing what genuinely excites you often leads to your most meaningful opportunities.
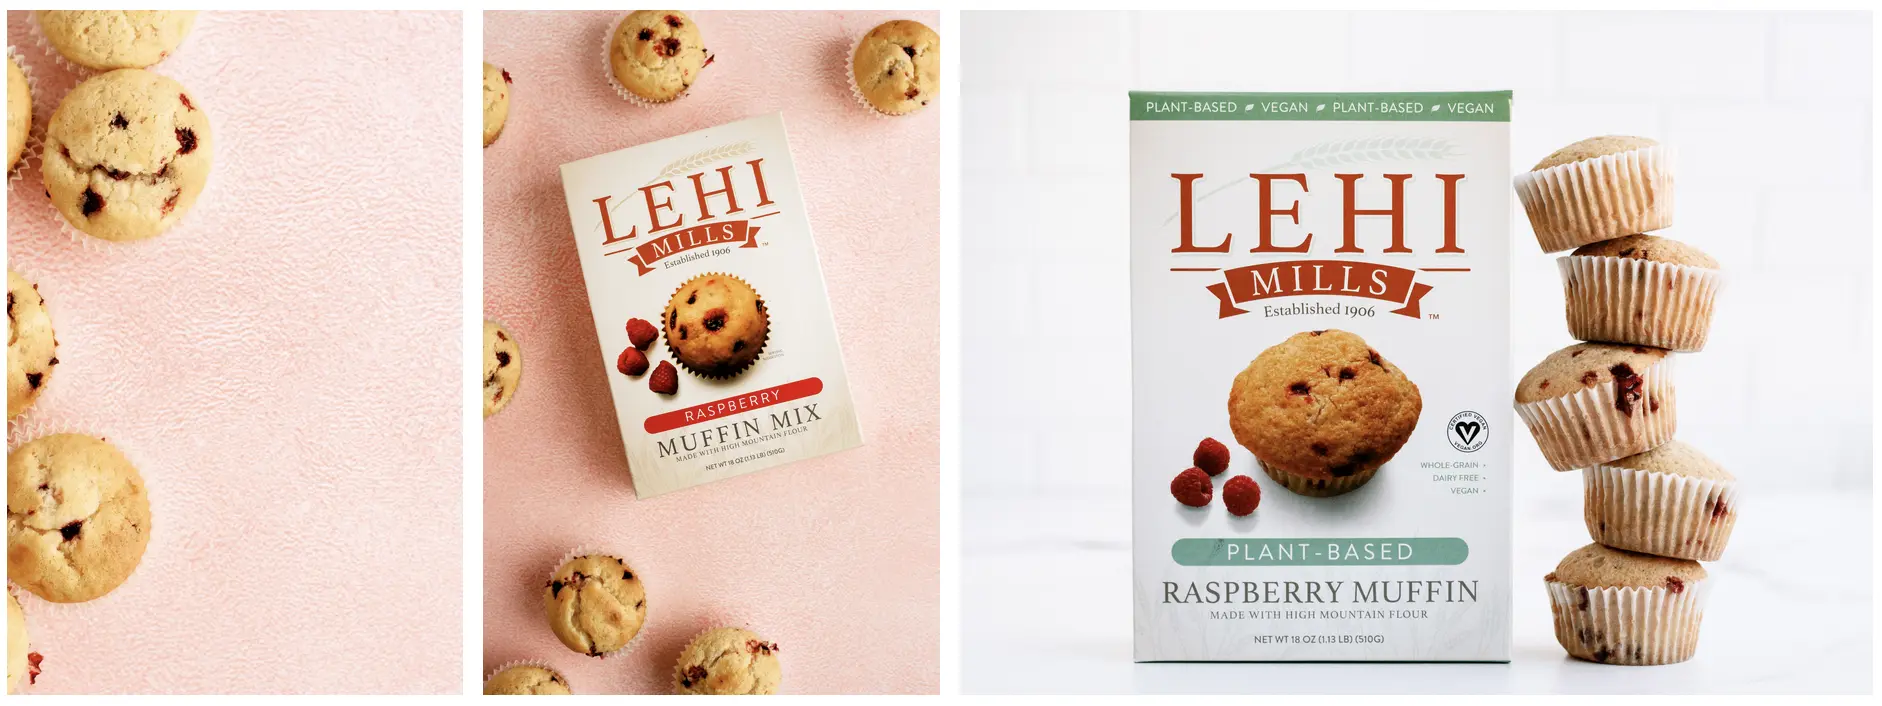
Working with a Beloved Local Brand
I once photographed a baking mix brand I adored simply because I wanted to. I baked muffins with a friend and her kids in her sunlit kitchen. The brand later reached out after seeing the images. That single passion project led to real collaboration.
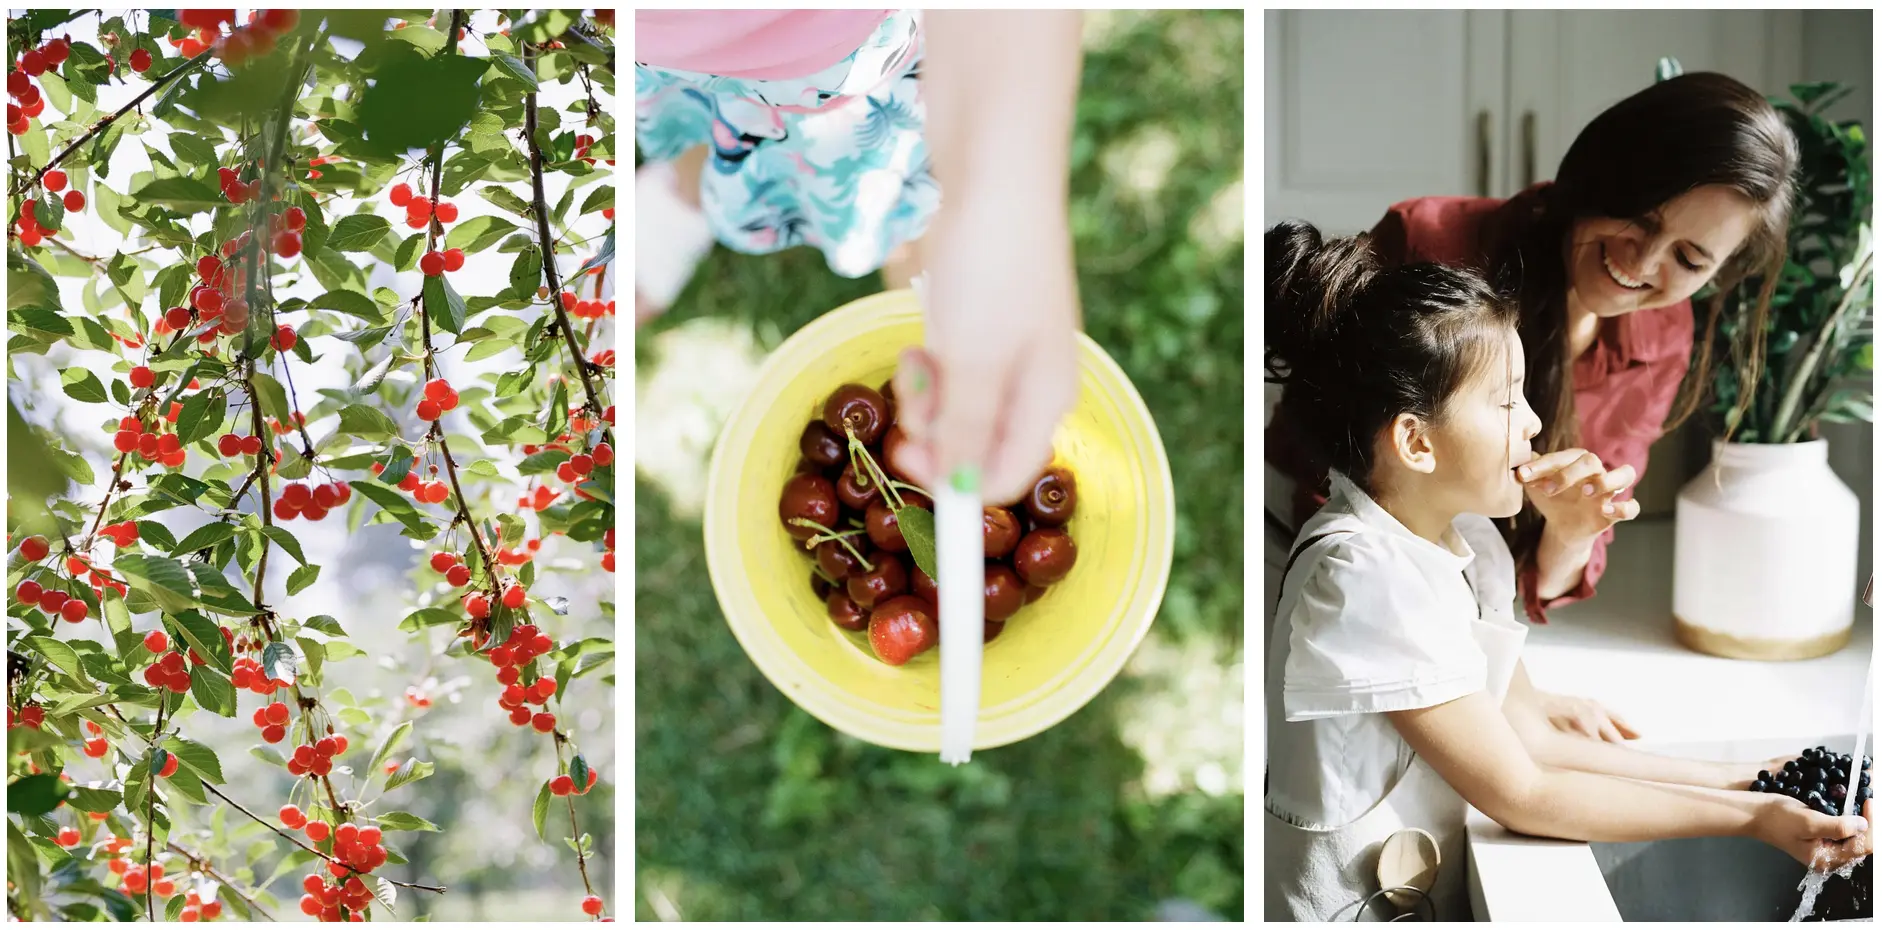
Cherry Farm in Montana Example
During a family trip, I photographed a cherry farm because the place felt magical. I sent the images to the owner; he used them on his website. Later, other farms reached out.
Following your curiosity often opens doors you didn’t know were there, truly the best tip I can give anyone beginning their photography journey.
Core Lesson: Photograph what moves you, and the right clients will recognize your passion instantly.
Your “Why” in Food Photography
Behind every image is a reason you picked up the camera in the first place. This section explores how personal experiences shape your creative voice.
Years ago, I lost three family members in a short window of time. Photographing one of the funerals made me realize how photos can fall painfully short of showing who someone truly was. That moment shifted my entire relationship with photography. I stopped chasing polished trends and started caring more about honesty, capturing the feeling of a moment rather than the perfection of it.
How This “Why” Shapes the Work
Now, even in food photography, I look for honesty, warmth, texture, and a touch of humanity. A slightly messy campfire s’more or a lopsided birthday cupcake often carries more emotion than a perfectly styled tart.
I rarely share my family’s faces publicly, but the images I keep for myself remind me why I photograph at all. They’re quiet anchors that keep me connected to my purpose.
Final Encouragement and Next Steps
You’ve now seen how light, angles, props, and intention can transform a meal into a story. This final section encourages you to carry these ideas into your own process with confidence and curiosity. Let yourself make beautiful things without waiting for permission. Your perspective is incomparable, so use it boldly.
Using What You’ve Learned
Take the foundations such as light, angles, props, layers, context, and let them guide your next meal, your next experiment, your next story. Photograph what you love. The rest grows from there.
If you want to dive deeper into these ideas and really see them come alive, I’d love for you to join me in my full food photography class. I take you behind the scenes, go into more detail about what we talked about here, and help you build confidence one simple step at a time.